Mass Coding
The Mass coding functionality allows users to apply metadata updates in bulk to all or selected contacts.
To apply mass coding to all or selected contacts, follow the steps below.
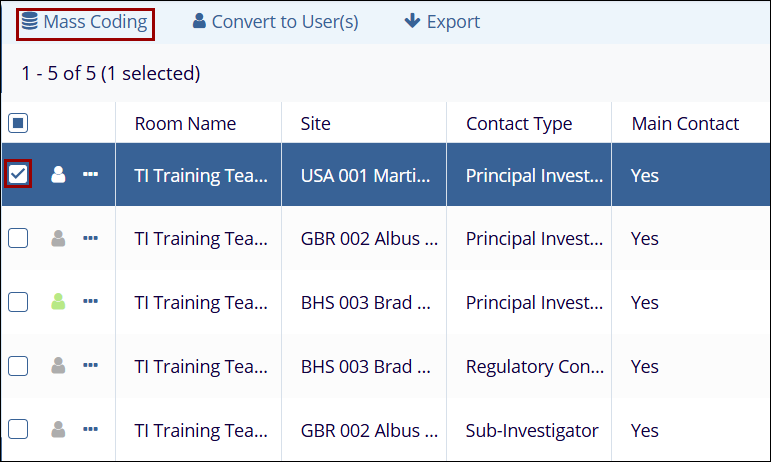
- Select a single or multiple contacts by clicking on their respective checkboxes.
- Click on the Mass Coding button from the top menu bar.

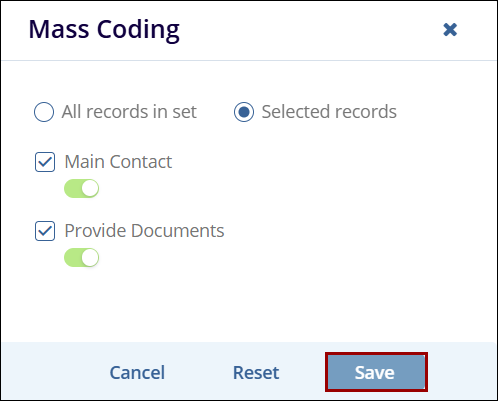
- On the Mass Coding window, select the following option by
clicking on its radio button
- All Records in set: The metadata updates will apply to all contact records
- Selected records: The metadata updates will apply to selected contacts.
- Check or Uncheck the Main Contact checkbox and enable or disable the toggle switch to designate the contact as the main contact.
- Check or Uncheck the Provide Documents checkbox and enable or disable the toggle switch.
- Click on the Save button.

- On the Confirm Mass Coding popup, click on the Yes button.

- On the success message popup, click on the Get Results button.

- Once the task is complete, the Contacts screen displays the updated metadata fields.
