
Creating an Audit Profile - General Information
Follow the steps below to enter the general information for Audit Profile:
- Navigate to Quality Review → Documents module.
- Navigate to the required folder to display the documents in the grid.
- Right-click on the required documents and select the Add to Cart options. The documents get added to the Documents Cart.
- From the Documents Cart, select the documents and click Actions → Create Audit Profile.
- The Create Audit Profile window opens. Refer to the screenshot below:
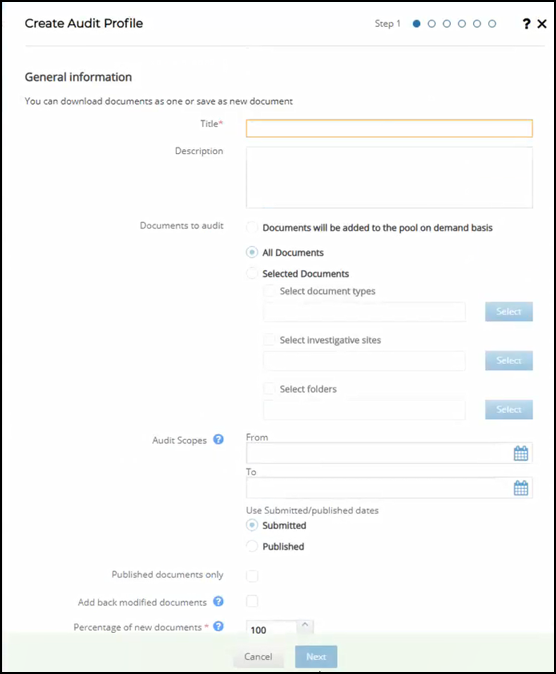
- Enter the Title of the Audit in the title field.
- Select the Documents to audit from the various radio button options available in this section. Each of the options in the Documents to Audit is discussed in detail in the topic Documents to Audit.
- Enter Audit Scopes. Documents submitted/published within the selected date
range will be published to the audit pool. The Audit scope will be disabled if the
documents are added to the pool on demand basis, or from selected audits.
- From Date: The day from which the audit is to start. It is not possible to select future dates as ‘From Date’.
- To Date: The day till which the audit is to be completed.
- Select Submitted/ published dates. Audit will be applied only to submitted or published documents as per selection. Submitted documents are documents just added to the room, whereas published documents are documents added to the room as final.
- Select Published documents only: If selected, documents added to the room as Final documents will be added to the audit pool. The user can choose to select Submitted from step c and check the published documents only checkbox. In this case, the audit pool will receive only documents that are just published to the room as final.
- Select Add reworked documents back to the audit pool: Changing document metadata, or replacing the document attachment will add the document back to the audit profile with open status, irrespective of the fact that the document was passed/approved during the audit in the same audit profile. Currently supported metadata changes are Index, Category, Document Type, Investigative Site, and Document Date.
- Select % of new documents: This defines the percentage of documents to be
included in the audit pool as per the frequency, or audit scope. The percentage of
documents is calculated from each intersection of selected investigative sites,
document types, and folders. Refer to the screenshots below:

- Select Frequency: When set, the system will move the documents to the audit pool based on the period set in the interval. This will be disabled if the audit scope date range is selected.
- SelectAuditors’ access level: This defines the security that the auditor receives on a document. The access level can be Full or Read-only.
- Select Contains PHI: The client may allow auditors to delete documents containing PHI, under which case the administrator will need to enable the Contains PHI functionality by ticking the checkbox next to it. To activate this checkbox, the Auditor’s access level has to be set to Full.
- Select Send audit notification: When checked, the auditor will receive an email notifying that new documents are added to the audit pool.
- Once you have made the selections, click Next at the bottom of the window. You are taken to the next step of the Audit Profile to add Auditors.