Room Settings
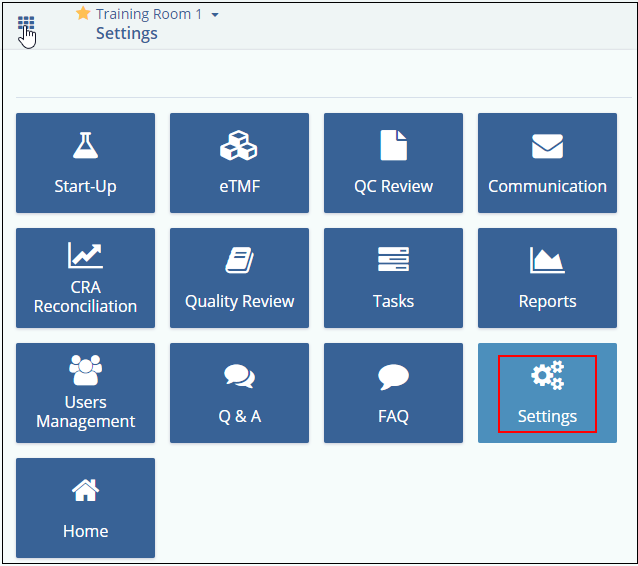
Access the Room Settings from the Main Navigation by clicking the Settings application.

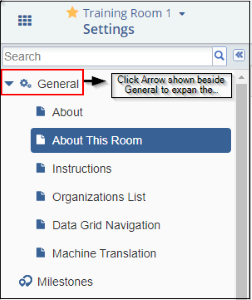
- The Administrator can access the modules from the left pane of the Room Settings page.
- By default, when Administrator users click on Settings, it only displays the first item of the General Settings, which is the About page of the study room.
- The modules of the Room Settings are displayed in the left pane.
- Every room setting module that displays on the left column is divided into sub-sections, allowing specific modifications for each defined category.
- To view and modify a specific module of the room settings, click the
Expand
 button which is located next to each module
name. This reveals the sub-sections in the respective module.
 - When each sub-section of the room setting tab is clicked, it appears as a separate tab on the right side of the screen. If users click multiple sub-sections, it will not override the previous tab; instead, separate tabs will be created for each item clicked.
- To close the tab, right click on the tab and select Close Tab.
- Right-clicking a tab will also provide an option to Close All Tabs and Close Other Tabs. A Search box is also available in the Settings.
- If users wish to search for specific settings, simply type in the word without looking through the entire settings menu. The features mentioned will further be discussed in the following sections.
- Administrator users can view and change most of the room settings in Trial Interactive. The client is given orientation on making the initial settings and on changing the settings in the client walkthrough.
- Typically, the room’s settings will be decided upon during the client walkthrough, and the settings will remain unchanged, for the most part, for the duration of the study.
Refer to the screenshot below:

