
Adding Each Site and its Contacts Individually
Sites can be created afresh, or added from a list of previously created sites in other rooms related to the same sponsor in a domain. This is especially helpful if the sites are located in multiple locations.
So you might want to create sites with the same name but different metadata like contacts, address, IRB/EC, and other details. It can also happen that a site is conducting different types of clinical trials, hence you might want to keep the same name but the rest of the data can differ. Metadata such as the country, and IRB/EC will be added to the new site only if the room has them configured and available.
To create sites, follow the procedure below:
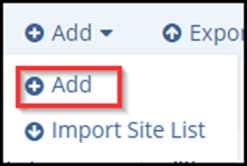
- Click the Add button from the menu bar. The Create Site window opens with six
steps to complete.
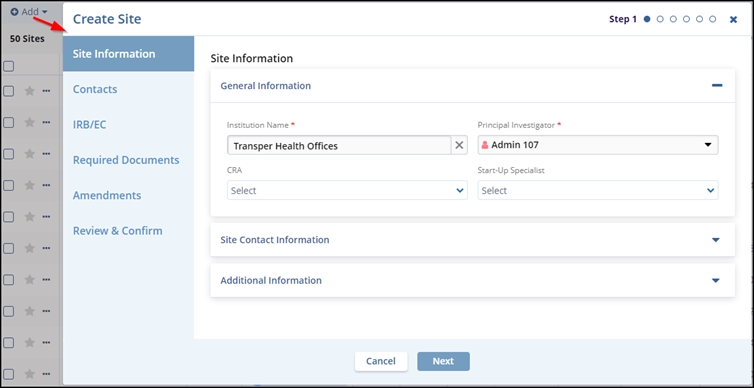
- In the Site Information tab, either type the Institution Name in the available field or type keywords in the field to view the list of available sites. Investigative site information is stored in Trial Interactive’s database. If a client has used an investigative site in a previous study, the site’s information will be stored and easily accessed through this window.
- Select the Principal Investigator, CRA, or Start-Up Specialist from the respective field’s dropdown menu.
- (Optional) Add required details in the Site Contact Information and Additional Information tabs. Click the Next button.
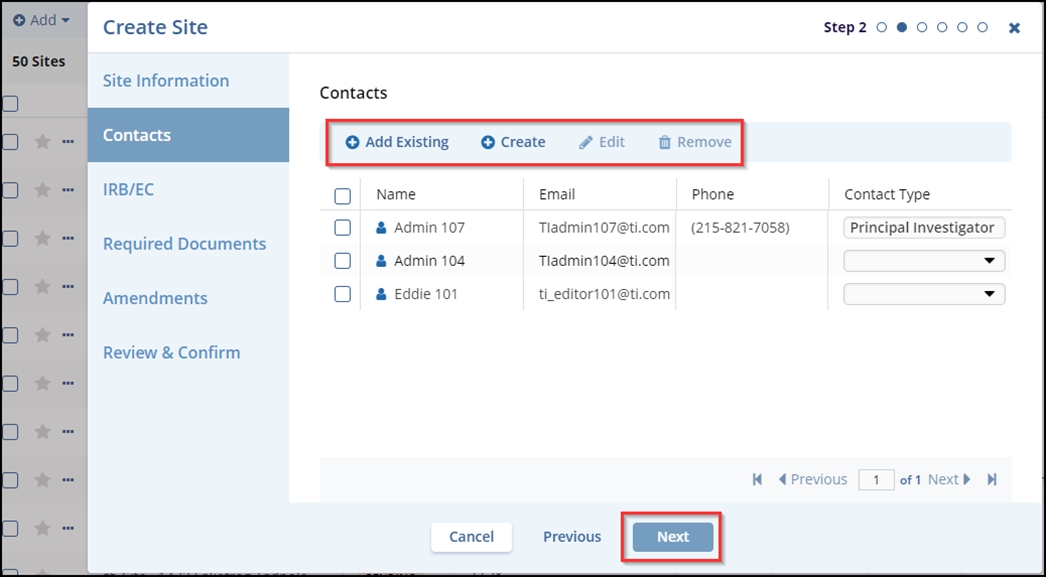
- The Contacts tab – In step 2, the user can Create new contacts or Add
Existing contacts to the site being created. In this step, the user can also Edit
and Remove the contacts that are not required. Click the Next button.
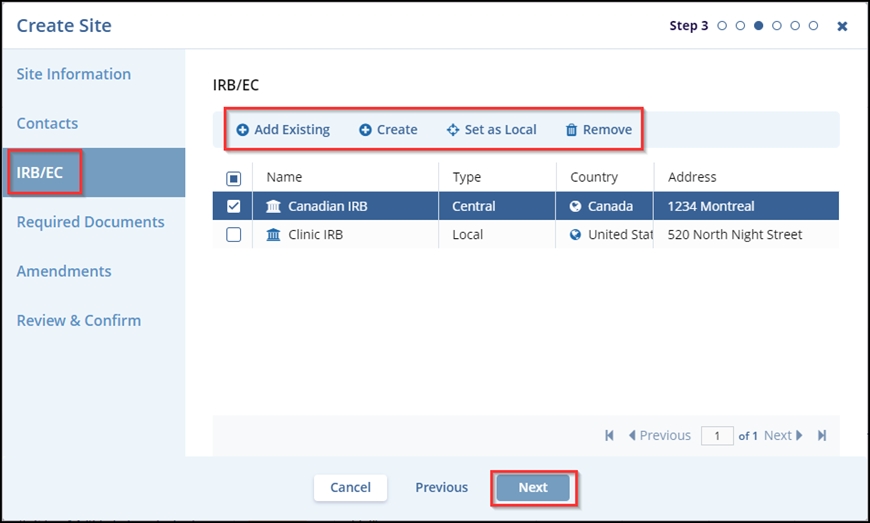
- In the IRB/EC tab – Step 3, the user can Create a new contact or Add Existing
IRB/ECs to the site being created. In this step, the user can also select an IRB,
Set it as Local or Central, and Remove the IRB/EC that is not required. Click the
Next button. Note: The IRB/EC can be ‘Set as Central/Local’ by
selecting only one checkbox at a time. Also, after setting the IRB/EC as Central,
the other IRB/EC in the list’s Type is changed.
- The Required Documents tab – Step 4, click the Add button to open an Add
Required Document Types popup window. Refer to the screenshot below.
- The Add Required Document Types window displays two sections- ‘Search’ on the Left side and ‘Required For’ on the right side.
- In the left panel, select the appropriate site and expand the arrows to select the required checkbox.
- In the right-side panel, select the required checkbox(s) to enable the Save button at the bottom of the window.
- Select the appropriate options for the ‘To be submitted by’ and Languages
fields
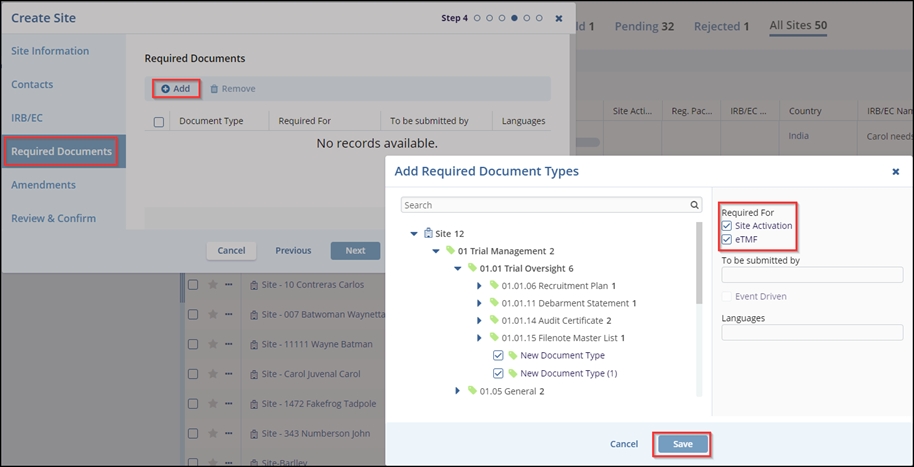
- Click the Save button in the Add Required Document Types window.
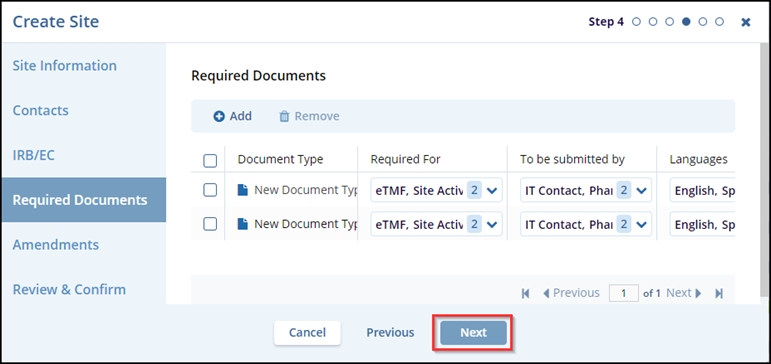
- The selected document types are displayed in the Required Documents tab. Click the
Next button.
- In the Amendments tab – Step 5, click on the required checkbox(s) to either set the
amendments as applicable or not applicable. After selecting the required amendment,
click on the Set Applicable button. The APPLICABLE is displayed below the
selected amendment. Click the Next button.
Note: The ‘Show only Applicable’ toggle button is enabled only when an amendment is set as applicable.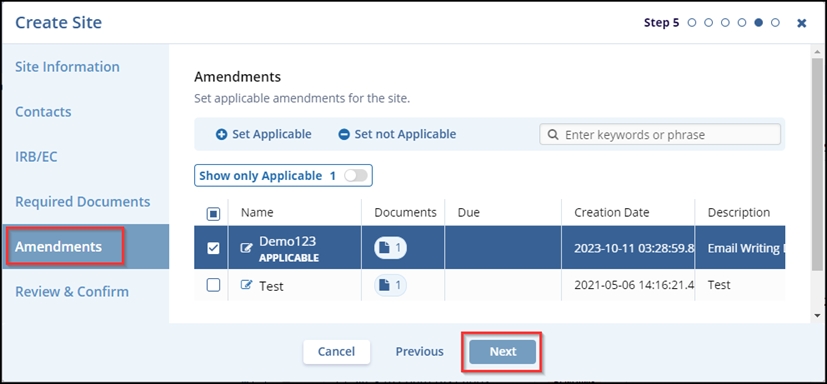
- The Review and Confirm tab – Step 6, confirm the details filled in the earlier tabs and click the Create button.
Note: The user can click the Previous button to edit the information filled in steps 1 to 5.
