Exporting Sites
Here, the users can export
- Selected Records
- All Sites in the current grid
- All Sites in the data room
- To Export a single site or a specific set of selected sites, select the site(s) by clicking the checkbox(s) at the left side of the grid.
- Click the Export Metadata button in the menu ribbon above the site grid. The Export Sites window opens.
- Choose the Source from the radio buttons.
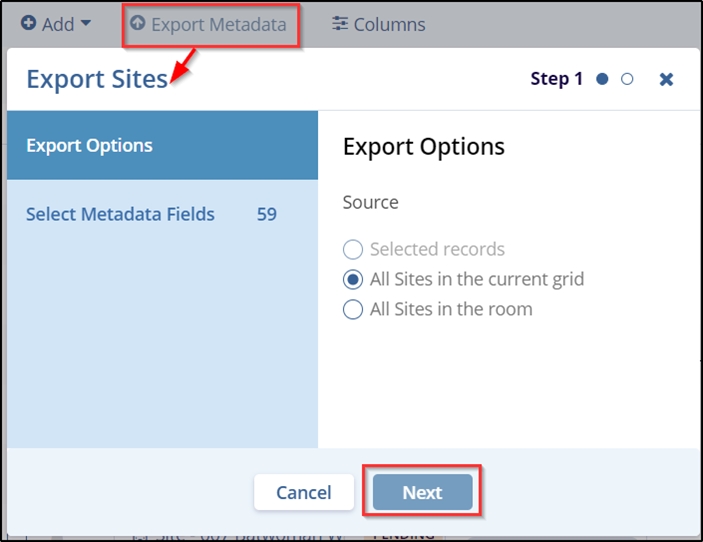
- Click the Next button at the bottom of the popup window. This opens the Select Metadata Fields – step 2 of the popup window. Activate the Metadata dropdown menu to the right of the metadata field.
- By default, two metadata fields (Investigative Site Name and Site Number) are pre-selected for the user. Select the other required metadata fields to include in the export from the below section.
- Expand the arrows to view the metadata fields. Select the checkbox(s) of the
required metadata fields to include in the export. Refer to the screenshot below.
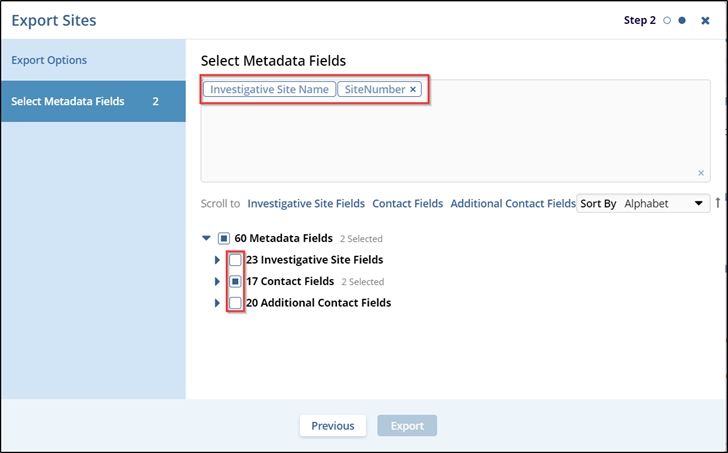
- After selecting the required metadata fields, the Export button is enabled in the
popup window. Click the Export button displayed at the bottom of the popup
window.

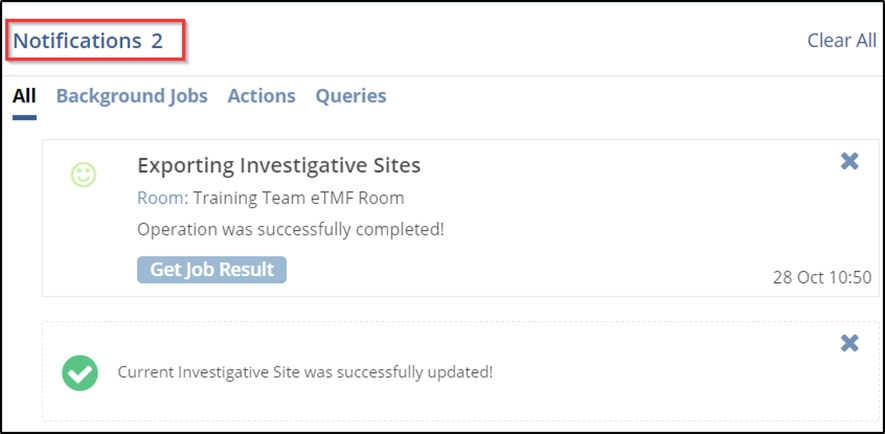
- Once the export is complete, the user is notified about the Get Job Result in a popup on the top right side of the screen.
- To view the exported file, click the Bell icon (Notifications) displayed in
the top right corner of the screen.