
PDF Watermark Options Settings
Watermarks can be added to documents downloaded or printed from a study room’s file index.
- Watermarks are only displayed when a document is not in the final workflow status.
- Therefore, once the document becomes final, the watermark will no longer be available on the document; this is an automatic process.
- In this panel, Administrators can select which metadata fields will comprise the
watermark, and they can select the appearance and position of the watermark.
Refer to the screenshot below:
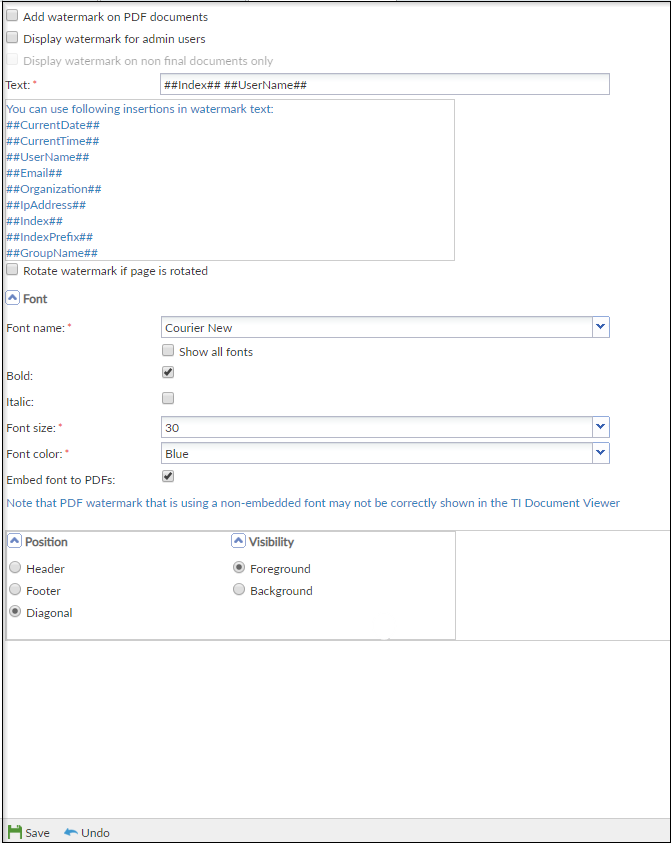
- Activate or inactivate the Add Watermark on documents option by clicking
the checkbox.
- Activation of this option also activates the option of allowing non-PDF documents to be printed or downloaded without watermarks.
- Tick the checkbox to Display watermark for Administrator users.
- Type in the Text of the message to be displayed as the watermark using the text strings from the list provided.
- Tick the checkbox to Rotate watermark if page is rotated.
- Select the Font name from the dropdown.
- The dropdown list can be extended to include all fonts by clicking the Show all fonts checkbox.
- Select whether the watermark text will be rendered as Bold and/or Italic text.
- Select or confirm the Font Size from the dropdown menu.
- Select the Font color from the dropdown menu.
- Select whether or not to Embed the font to the PDF.
- Select the Position of the watermark.
- Select whether the watermark will appear in the Foreground or the Background of the document text.
- Click Save.