
Adding Each Site and its Contacts Individually
Sites can be created afresh, or added from a list of previously created sites in other rooms related to the same sponsor in a domain. This is especially helpful if the sites are located in multiple locations.
So you might want to create sites with the same name but different metadata like contacts, address, IRB/EC, and other details. It can also happen that a site is conducting different types of clinical trials, hence you might want to keep the same name but the rest of the data can differ. Metadata such as the country, and IRB/EC will be added to the new site only if the room has them configured and available.
To create sites follow the procedure below:
- Click the Add button from the menu bar. The New investigative site window
opens.
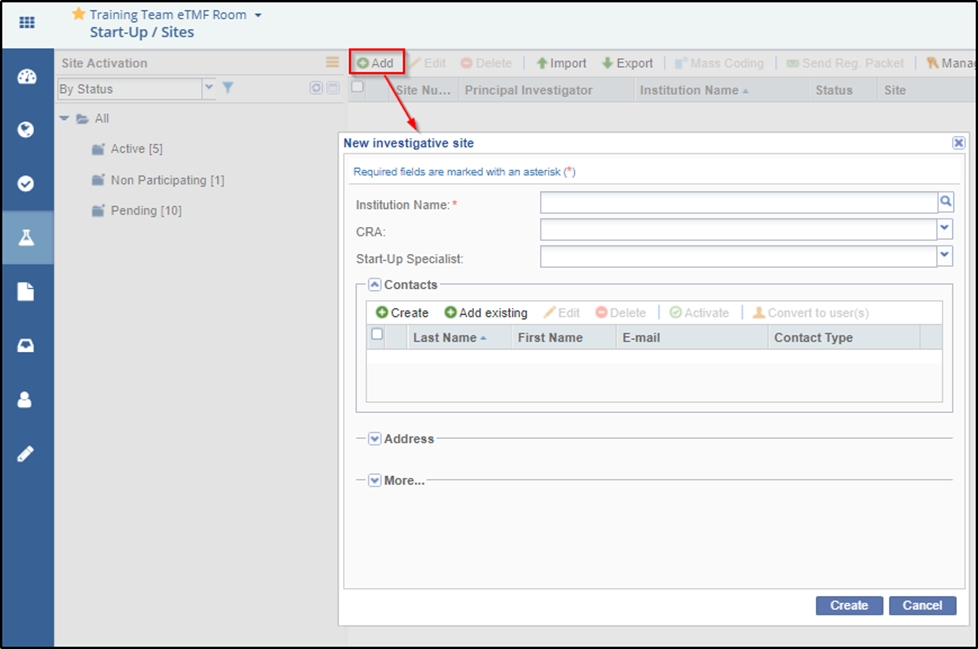
- Either type the Institution Name in the available field or activate the ‘Available
Investigative sites’ window by clicking the magnifying lens
 at the right end of the field. Investigative site
information is stored in Trial Interactive’s database.
at the right end of the field. Investigative site
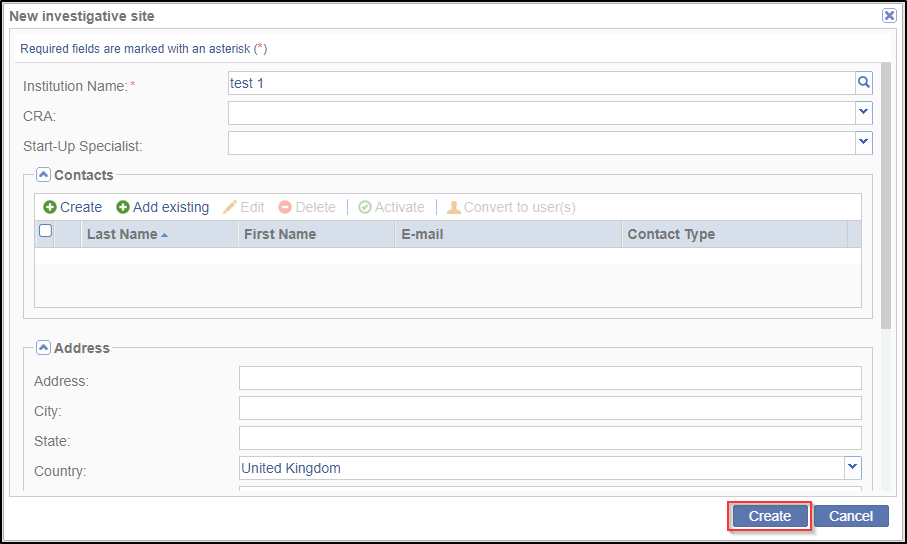
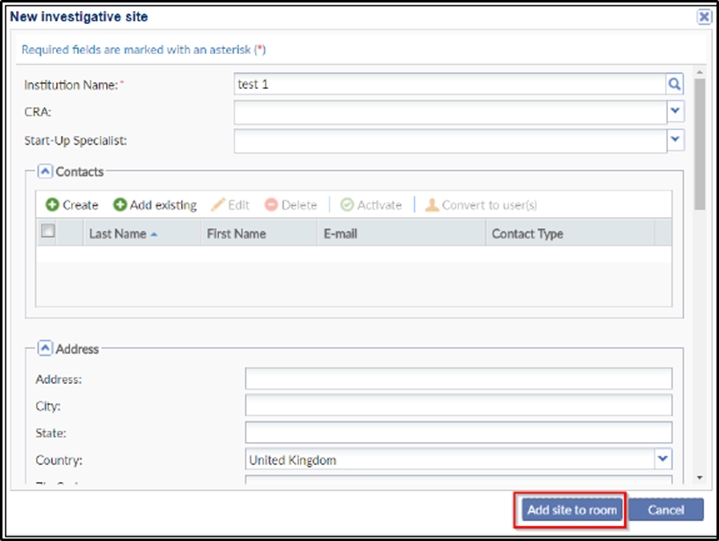
information is stored in Trial Interactive’s database. If a client has used an investigative site in a previous study, the site’s information will be stored and easily accessed through this window. If you choose from an existing list of sites, the ‘Create’ button in the ‘New investigative site’ window is replaced by the ‘Add site to room’ button. Refer to the screenshots below:
- Select the CRA from the field’s dropdown menu.
- Select the Start-Up Specialist from the field’s dropdown menu.
- From the Contact panel of the Site Profile window, the administrator can either
create, or add existing contacts, edit/delete contacts, activate/deactivate them, or
convert them to room users:
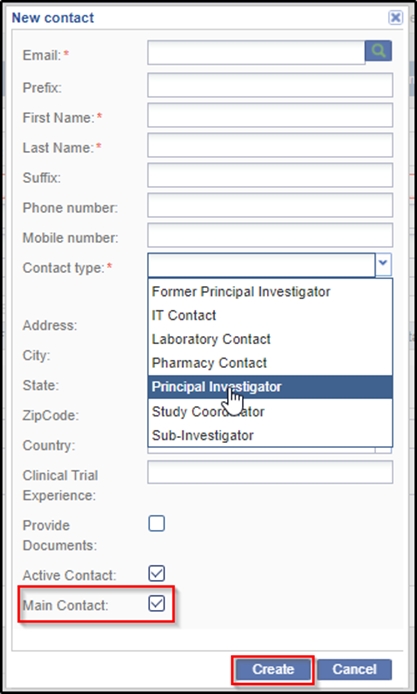
- Click Create in the Contacts panel to add a new contact to the site.
This information, too, is supplied by the client. At minimum, a site must
have a contact designated as the Principal Investigator and one of the
contacts must be designated as the Main Contact by selecting the Main
contact checkbox for the site. If a contact would be responsible to add
documents to the site then tick the Provide Documents checkbox. Refer
to the screenshot below:
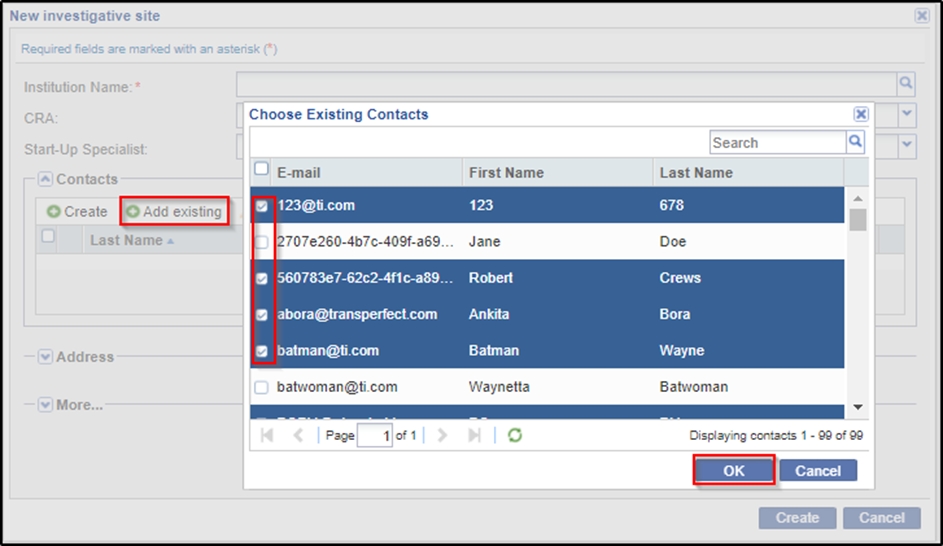
- Click the Add existing button to add contacts from a list of existing
contacts. Tick the checkboxes next to the contact names to add them to the
site. Refer to the screenshot below:
- You might want to deactivate a contact, if a contact is unavailable for a
considerable period of time and assign the role to another user, or would be
of use at a later time. You can activate or deactivate a user by clicking
the Activate / Deactivate
 icon in the Contacts panel after selecting the
user. Note: This icon toggles from Activate to deactivate state and vice versa depending upon its state.
icon in the Contacts panel after selecting the
user. Note: This icon toggles from Activate to deactivate state and vice versa depending upon its state. - You can edit the profile of a contact by clicking the Edit
 icon on the Contacts panel.
 - Similarly, you can also delete a contact by clicking the Delete
 icon on the Contacts panel. A reason of
deleting a contact could be that the user is no longer attached to the
organization.
icon on the Contacts panel. A reason of
deleting a contact could be that the user is no longer attached to the
organization. If a contact who has added documents, is later deleted, the contact name will be appended with ‘(undefined)’ in the metadata of the documents added by the contact.
-
Contacts can also be converted to Editors or Readers by clicking the Convert to user(s) icon on the Contacts panel. This functionality is available from the Communication/The Contacts Grid Pane section and is discussed in detail there.
- Click Create in the Contacts panel to add a new contact to the site.
This information, too, is supplied by the client. At minimum, a site must
have a contact designated as the Principal Investigator and one of the
contacts must be designated as the Main Contact by selecting the Main
contact checkbox for the site. If a contact would be responsible to add
documents to the site then tick the Provide Documents checkbox. Refer
to the screenshot below:
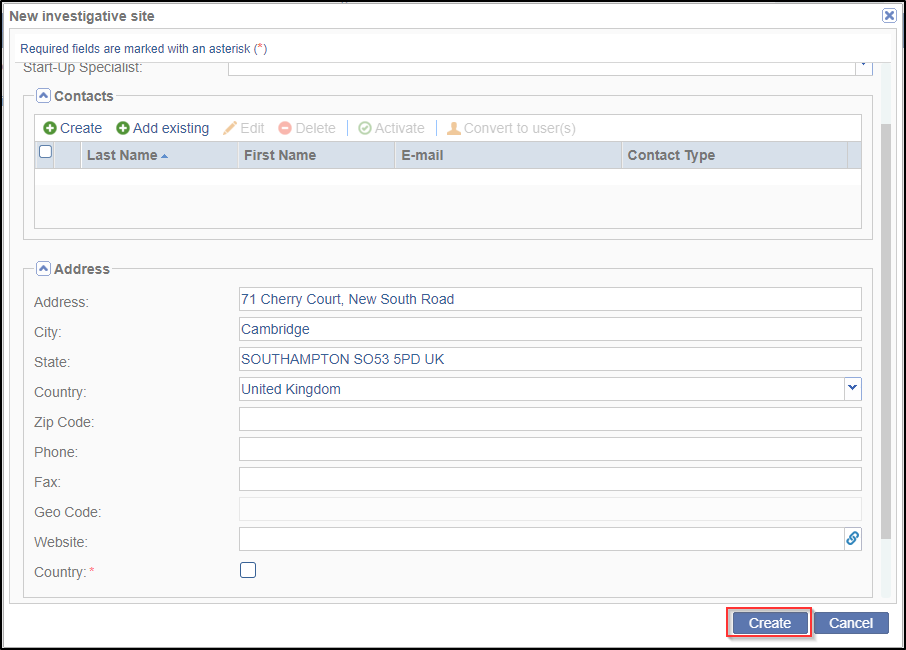
- Click the Address dropdown arrow to open the array of data fields for
entering the address where the site is located. Here, you can specify the Country
which is important when filtering for a site. Note that fields marked with red
asterisk * are required. Refer to the screenshot below.
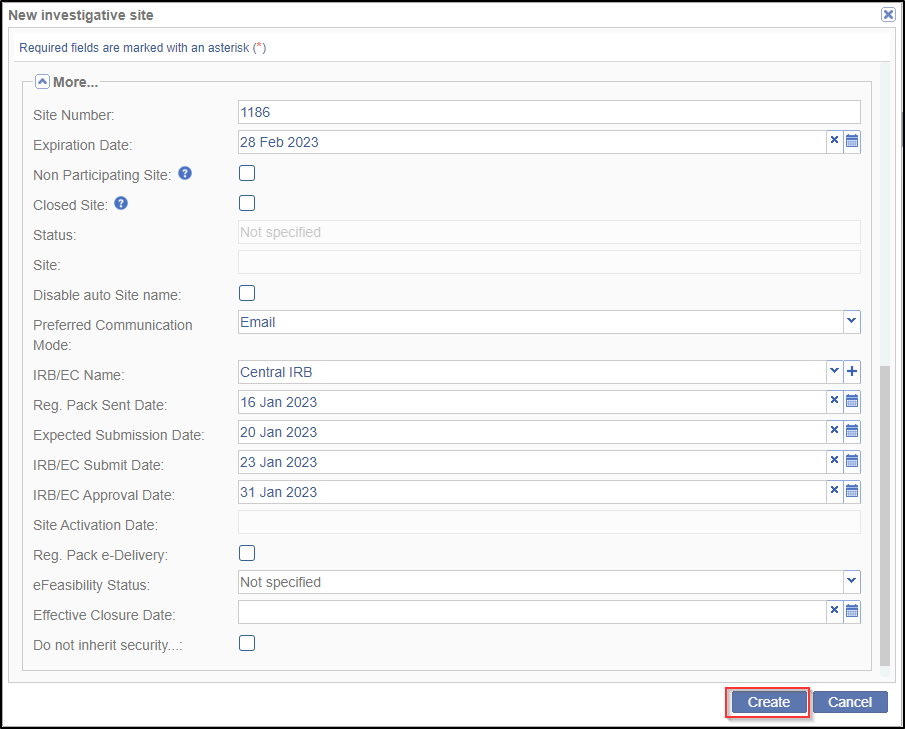
- Click the More dropdown arrow to open another array of data fields. Here you
enter important site information like the site number, site expiration date, status
of the site, its email domains, preferred communication mode, the eFeasibility
Status and so on.
- Besides the above, you also specify the IRB/EC details here. Select the IRB/EC Name from the dropdown. This dropdown will list the IRB/ECs that have been added to the room, or domain.
- You may enter the Expected Submission Date, and IRB/EC Submit and Approval
Date for the submission and approval of essential/required documents of the
IRB/EC. Refer to the screenshot below.
- Click Create or Add site to room at the bottom of the window as per the process.
- Repeat until all investigative sites have been created for the room.