Import
The Import functionality within the Study Settings allows users to import subject records through a pre-defined template.
To import the subject records, follow the steps below.
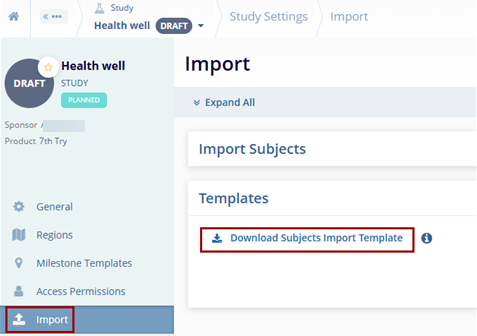
- Navigate to the Study Settings by following the steps detailed in the Study Settings section.
- Click on the Import link from the left-hand navigation pane.
- Expand the Templates section and click on the Download Subjects Import
Template button to download the template.
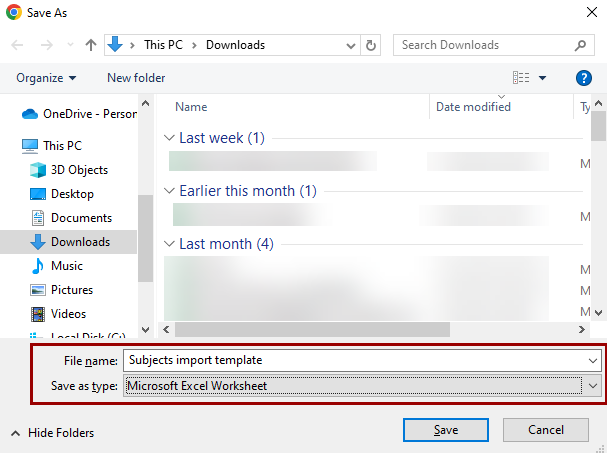
- Save the template as a Microsoft Excel Worksheet.
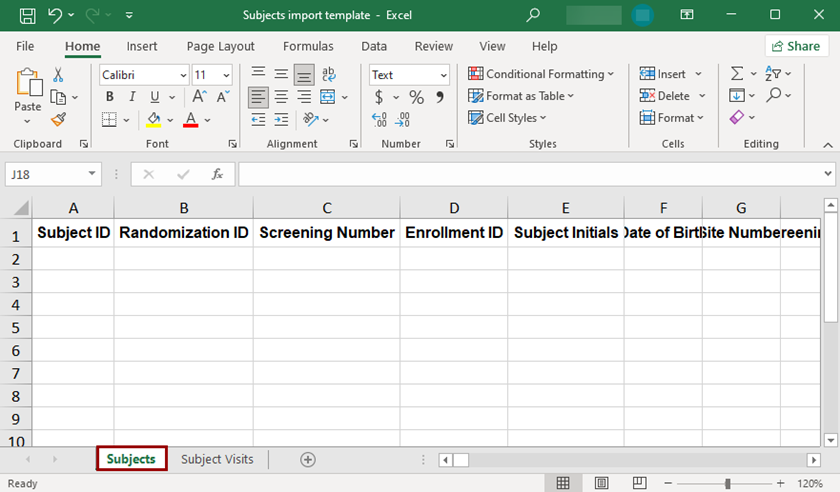
- In the downloaded template, fill in the following information within the
Subjects tab.
- Subject ID
- Randomization ID
- Screening Number
- Enrollment ID
- Subject Initials
- Date of Birth
- Site Number
- Screening Failure Reasons
- Early Termination Reasons
- Subject Outcome
- Notes
- Current Status
- Screened Status Date
- Screen Failed Status Date
- Run-in Status Date
- Randomized Status Date
- Enrolled Status Date
- Treated Status Date
- Early Terminated Status Date
- Lost to Follow-up Status Date
- Completed Status Date
-
Withdrawn Status Date
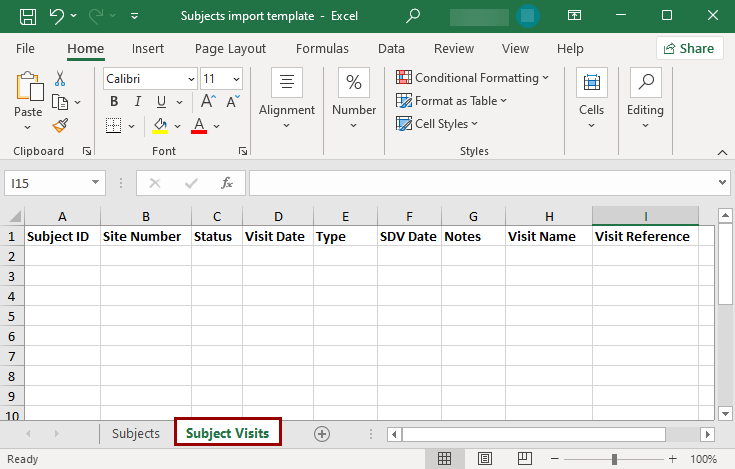
- Fill in the following details in the Subject Visits tab.
- Subject ID
- Site number
- Status
- Visit Date
- Type
- SDV Date
- Notes
- Visit Name
- Visit Reference
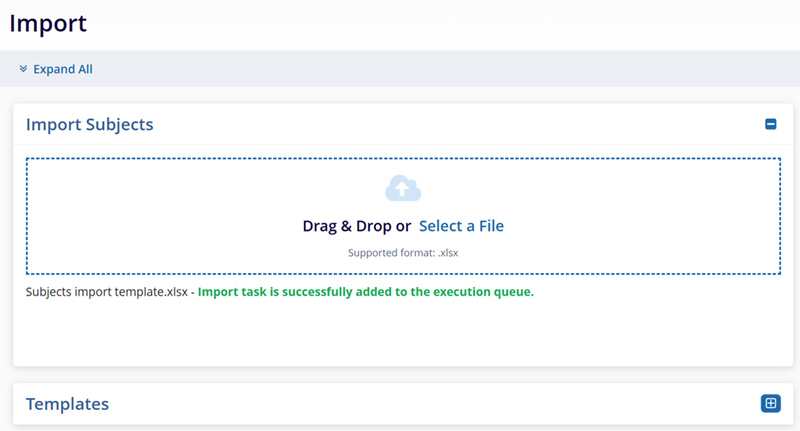
- Within the Study Settings > Import screen, expand the Import
Subjects section and upload the file by using the Drag & Drop
or manual upload functionality.
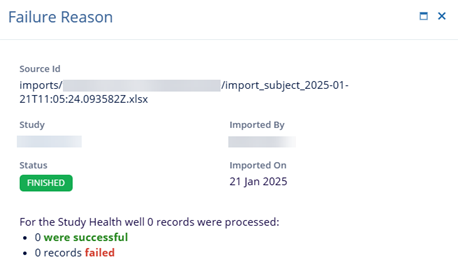
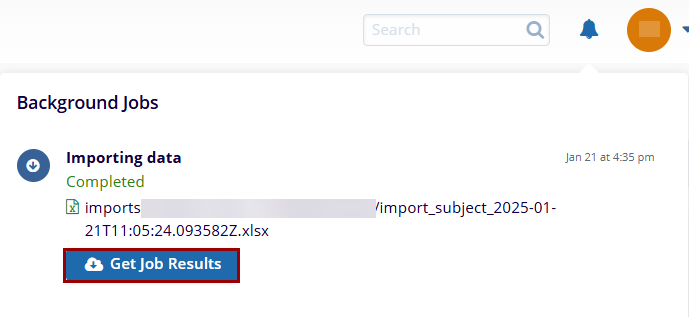
- Click on the notifications (bell) icon and select the
‘Get Job Results’ button.
- On the ‘Failure Reason’ screen, view the number of successful and failed records.