Study Organization

  1. Click on the "Studies" link in the navigation menu on the left side of the screen. This opens the "Studies" window.

  2. Locate the study to which you want to associate an organization and click on it. This opens the dashboard for that study.

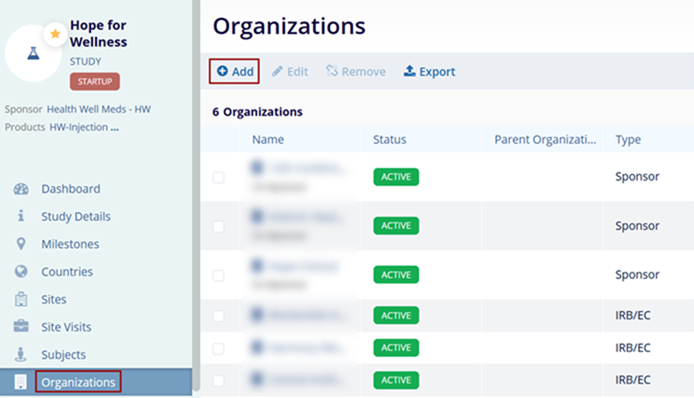
  3. Click on the "s" link in the navigation menu on the left side of the screen.

  4. This opens the "Organization" window, displaying organizations associated with the study.

  5. Click the "Add" button at the top-left of the screen.

  6. It will open the Create organization window. To learn How to create organization click here.
  7. If the organization has already been created, use the search area to locate and select the organization.

  8. Click "Create" or "Create and Add Another" depending on whether the user needs to associate another organization with this study.
  1. To edit an organization, select the organization and click the “Edit” button from the top menu. A quick view panel is displayed on the right side of the screen. Make any necessary changes in the quick view panel. Click "Save" at the bottom of the quick view panel. Refer to the screenshot below.

  1. To remove the organization that is associated with the study, Select the organization. Click the ‘Remove’ button from the top main menu.

  2. The user will receive the confirmation pop-up, To proceed further click on the ‘Remove’ button or click on ‘Cancel’ to discard it.

  3. To learn how to export the organization, click here.