Add Studies
To add a new study, follow the steps below.
- Click on the Add button from the top menu bar.

- Enter data in the following fields in the Create
Study window.
- Sponsor*: Select a sponsor from the dropdown list
- Protocol Number*: Add a protocol number to the study.
- Study Name: Provide a name to the study. The study name is automatically generated when left blank.
- Protocol Title*: Enter the protocol title.
- Types: Select multiple records from the available dropdown options.
- Owner: This field is not editable and displays the name of the user creating a study.
- Status*: Select a status from the dropdown menu. The dropdown menu displays the statuses configured in the Settings section for Studies.
-
Status Date*: Add the status date.

- Primary Program: Select a program from the available dropdown options. The Primary Program dropdown displays all programs created at the domain level.
- Primary Product*: Select a product from the available dropdown options. The Primary Product dropdown displays all products created at the domain level.
- Phase*: Select the phase from the available dropdown options.
- Design*: Select designs from the available dropdown options.
-
eTMF Location*: Select eTMF location from the
available dropdown options.

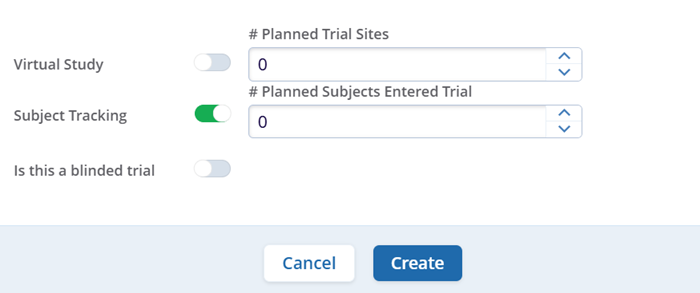
- Click the Toggle buttons for Virtual Study, Subject Tracking, and Is this a blinded trial. These fields are optional.
- To create a study, click the Create button.

- After clicking the Create button the user will receive a confirmation message
regarding the ETMF location. Users need to confirm the location and click on the Yes,
Confirm button to proceed further.

- A success message will pop up on the top left side of the screen, and the newly created study will be available in the grid view.
Important
- Indicate whether this is a blinded trial on the Study Details page. Although users can update this information after the study has been created, this is the first opportunity to specify that the study will include a blinded component.
- If any mandatory fields are missing, an error message appears when the user clicks the ‘Create’ button, listing the fields that require mandatory updates.
