
General Settings
This is a very active panel that houses a lot of options. The choices made here are
dictated by client preferences. Refer to the screenshot below:
Note: The entire
General Settings panel has only one Save button. Be sure that you click
Save after making any additions, selections, or changes in this
panel.
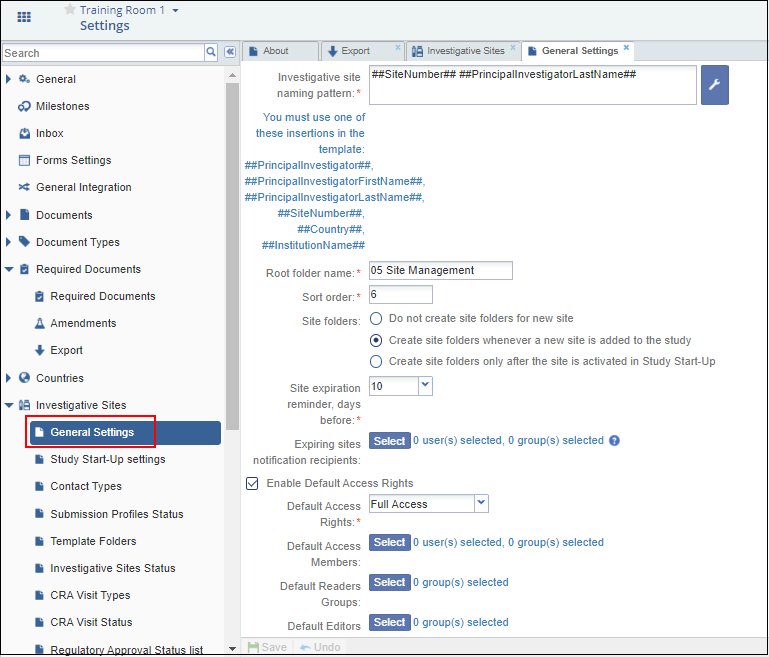
- Click the wrench icon to the right of the Investigative Site Naming Pattern
box.
- An Auto Name Rules window opens. The naming pattern is built and
displayed in the Rule Editor box. The information that populates in
the box is selected from the list of Available Templates. You can
also hard-type text into the Rule Editor. In the example below, ‘Site’ and
‘[Site Management]’ has been typed into the naming pattern. Refer to the
screenshot below:
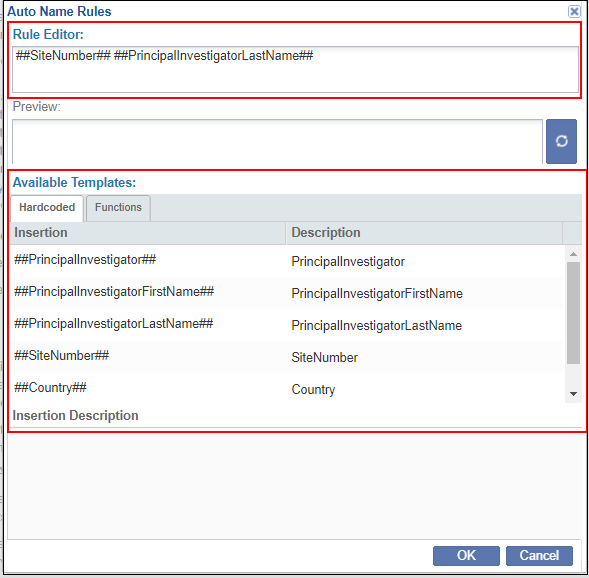
- Click in the Rule Editor box.
- Double-click the insertions in the Available Templates box in the order in which you want them to appear in the naming pattern.
- Once you have made the selections, click the blue box to the right of the
Preview box to see how the folder names will appear in the room’s
index.
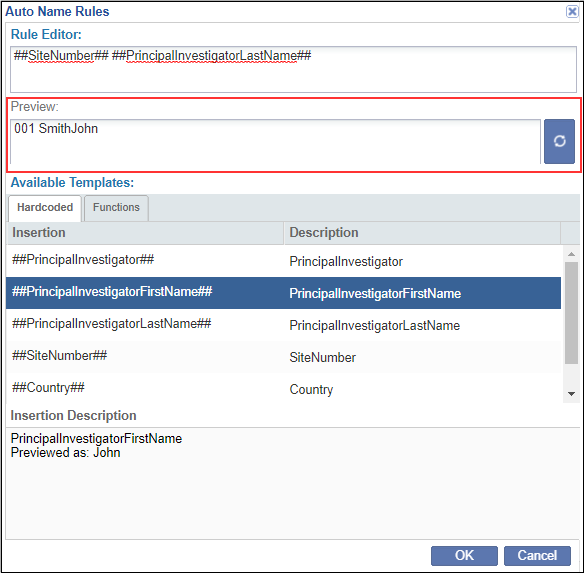
- Once the naming pattern is set up correctly, click OK at the bottom
of the window.
You return to the General settings panel.
- An Auto Name Rules window opens. The naming pattern is built and
displayed in the Rule Editor box. The information that populates in
the box is selected from the list of Available Templates. You can
also hard-type text into the Rule Editor. In the example below, ‘Site’ and
‘[Site Management]’ has been typed into the naming pattern. Refer to the
screenshot below:
- In the next available field, set the Root folder name in compliance with the
client’s preference. This is the title that is given to the main folder in the
room’s index that will hold the subfolders for each investigative site involved in
the study.
- Click in the field.

- Type the root folder.
- Hit the Enter key on the keyboard.
- Click in the field.
- Selection of the Sort Order for the Site Management folder is made in the
next field. This dictates where the folder appears in the room’s folder index.
- Click in the field.
- Type the number of the client’s preference.
- Hit Enter on the keyboard.
- The next box contains three radio buttons for Site folder creation in the eTMF.
Click the option that fits your needs.

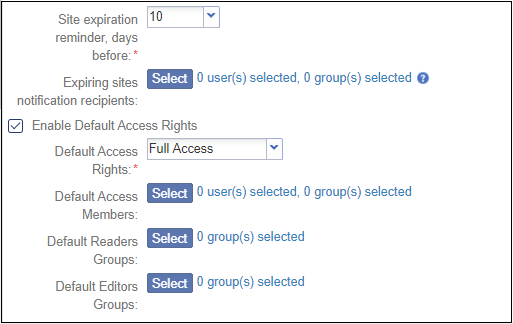
- Like the previously described settings, the rest of the settings in this panel are dictated by client preferences. Closely follow all instructions from the client in controlling these settings.
- Hover the mouse over the question marks in blue circles for more information about
specific options on the screen.
- Click Save after making any additions, selections, or changes in the General Settings panel.