
Documents Module
Auto Purge Settings
Clients might ask that documents that have, for some reason, been uploaded or sent to
the room and then deleted, be purged completely from the room.
- Navigate to Main Navigation -> Settings -> Documents Module -> Auto Purge.
- Click the checkbox next to Enable auto purge. Refer to the screenshot
below:
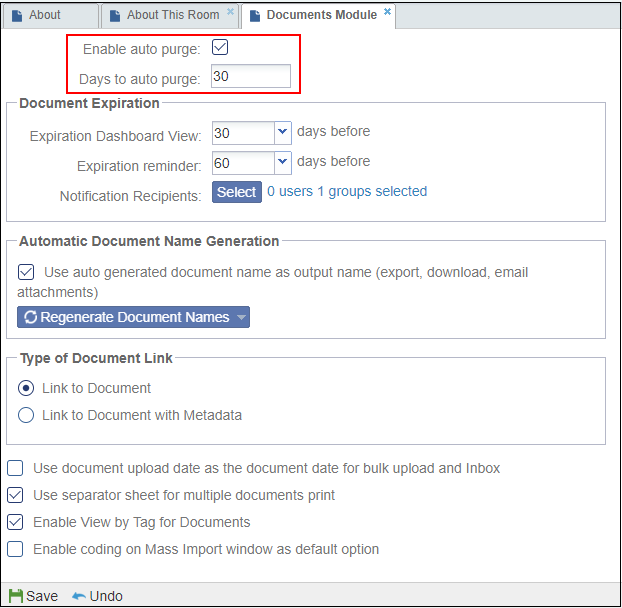
- Adjust Days to auto purge by clicking the box and typing the number requested by the client.
- If that is the only requested change to the settings in this module, click Save.
Document Expiration Settings
As an Administrator, you might want to specify the time by which a document will
expire and require a new version.
- Navigate to Main Navigation -> Settings -> Documents Module -> Document
Expiration. Refer to the screenshot below:
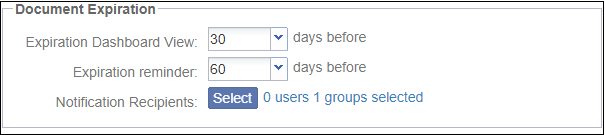
- The Expiration dashboard view field controls how long before a document expires that it will appear in the Expiring Documents list in users’ Dashboard view.
- Insert the number of days requested by the client.
- The Expiration reminder field controls how many days before expiration, a reminder email will be sent to users and groups selected in the option below to receive this reminder. Insert the number of days requested by the client. By default, the value of both fields is 10 days before.
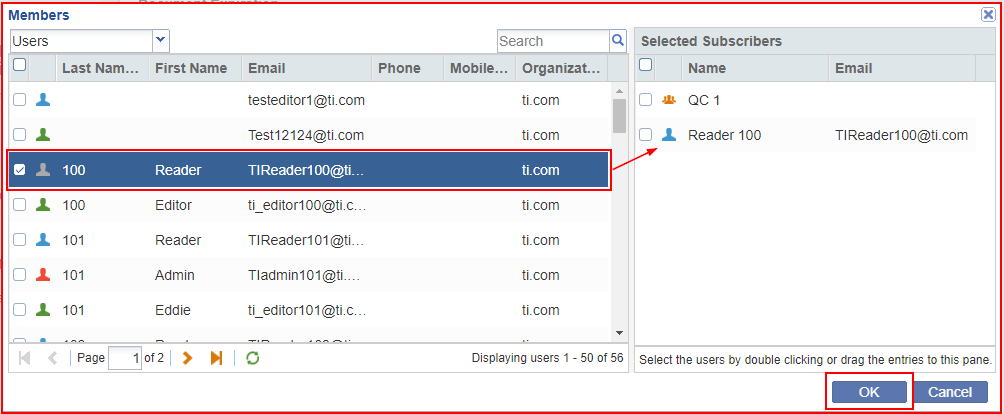
- Click Select from the Notification Recipients field to select users/groups to receive a notification email.
Automatic Document Name Generation
Clients can choose to set the auto naming pattern for a document type and generate the document name automatically as per the pattern.

- Tick the checkbox to enable Use auto-generated document name as output name option.
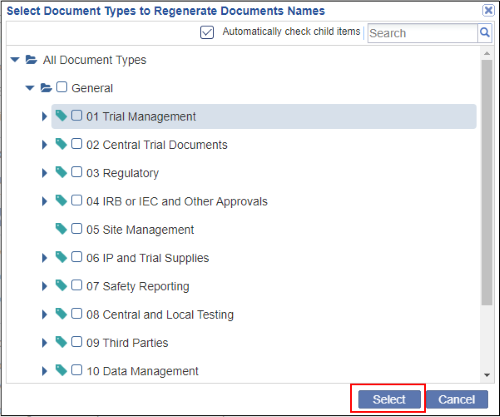
- Click Regenerate Document Names button to regenerate document names of selected document types.
- The Select Document Types to Regenerate Documents Names window.
Select the document types and their categories for which you
want to regenerate document names. Refer to the screenshot below:
- You can also choose to Regenerate all the document names in the dataroom by clicking the dropdown option Regenerate all document names in the dataroom. Confirm the popup by clicking Yes to proceed further.
- For either of the options mentioned above, a background job starts which then exports the document names in a .xlsx file. On receiving a notification about completion of the job, click Job Result to retrieve the file.
Document Upload Date as Document Date
Note: Even though it is not advised to do so, an Administrator can change the
naming and dating conventions used for documents that are bulk uploaded or
delivered to the room through the Inbox.
- Enable the Use document upload date as the document date for bulk upload and Inbox option by ticking the checkbox.
- Now, the upload date will automatically be assigned as the document
date in the document profile. Refer to the screenshot below:
