
Configuring the Document Grid
Through this option, you can decide which columns to display or hide from the Document, Workflow, or Audits Grid. Thus, you can decide exactly what information you want to see and configure the grids accordingly to suit your view.
- Navigate to the eTMF/Documents module.
- Click the Update Columns icon from the top right corner of the documents
grid. Refer to the screenshot below:

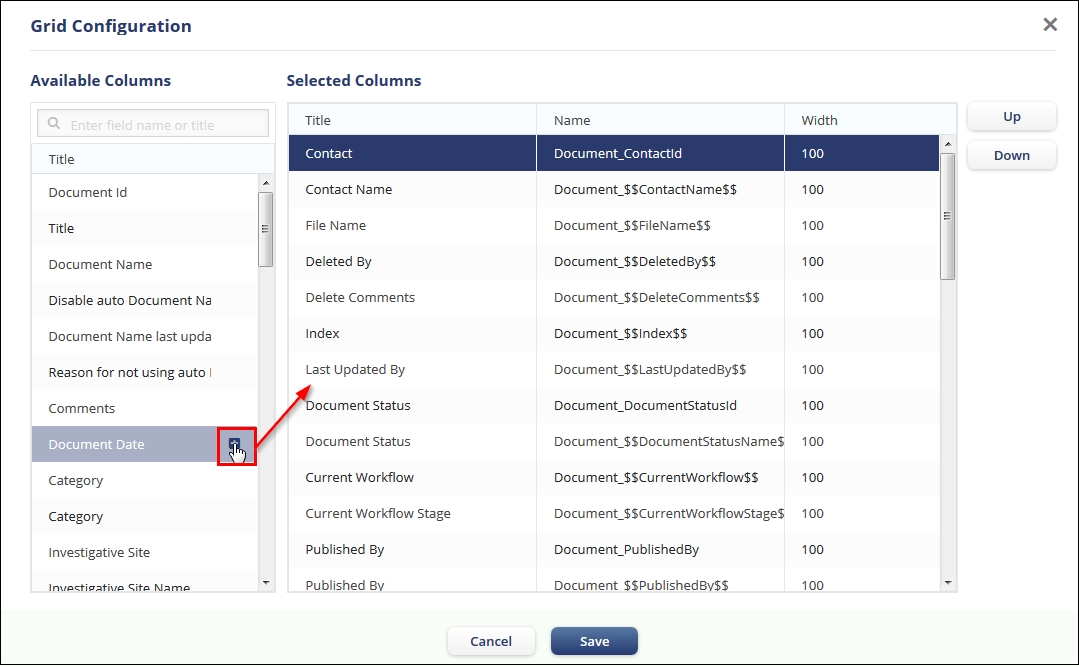
- The Grid Configuration window opens which displays the following panels:
- Available Columns Panel: This panel display the list of all available columns in a room.
- Selected Columns Panel: This panel displays the list of all columns that are selected and added from the Available Columns.
- To add a column to the Selected Columns pane from the Available Columns pane, hover the mouse over the column name in the Available Columns. The + sign appears next to the column name.
- Click the + sign to add the column to the Selected Columns. The
column gets added to the list of Selected Columns. Refer to the screenshot
below:
- Alternatively, you can also double-click the columns in the Available Columns to add to the Selected Columns.
- After adding the columns to the Selected list, they are greyed out in the
Available Columns list and a small green tick appears to the next of the
column name as shown in the screenshot below:
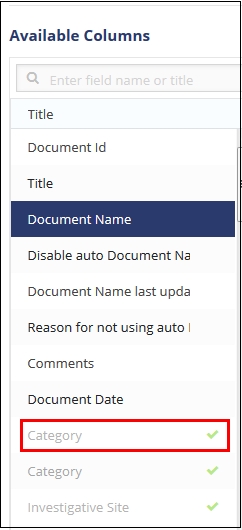
- Similarly, you can remove the columns from the Selected Columns list by clicking the - icon that appears next to the column name on hovering the mouse over the column OR double-click the column to remove it from the list.
- Besides adding and deleting columns, you can also change the sequence of the
columns by clicking the Up or Down
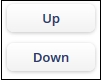 buttons located at the extreme right of the window.
 - Click Save to save to changes.