
Regions
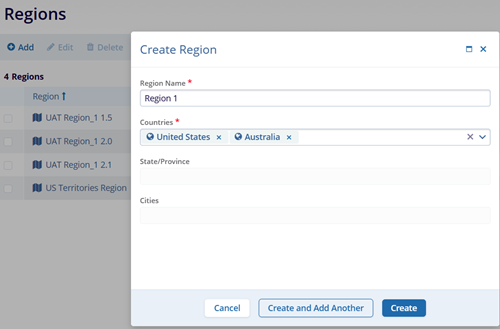
To create a new region, follow the steps below.
- Navigate to the Settings area and select the Regions menu.
- On the Regions screen, click on the +Add button.
- On the Create Region screen, mandatorily enter the Region Name and Countries
- Click on the Create button.
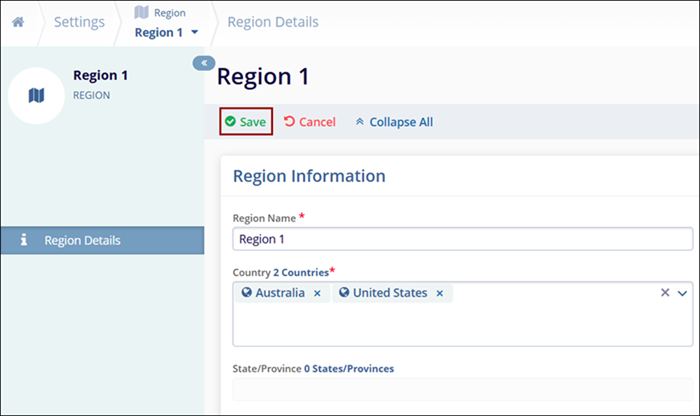
Edit Region
To edit a region, follow the steps below:
- Select the region and click on the Edit button from the top menu bar.
- On the Region Details screen, make the required edits and click on the Save button.
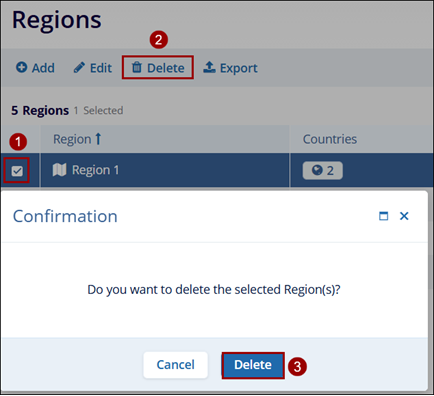
Delete Region
To delete a region, follow the steps below:
- Select the region by clicking on the checkbox
- Click on the Delete button from the top menu bar.
- Click on the Delete button on the Confirmation popup.
- Click on the Export button to retrieve the region's data in XLSX or CSV file formats.