
Fields
Add New Custom Field
To create a custom field, follow the steps below:
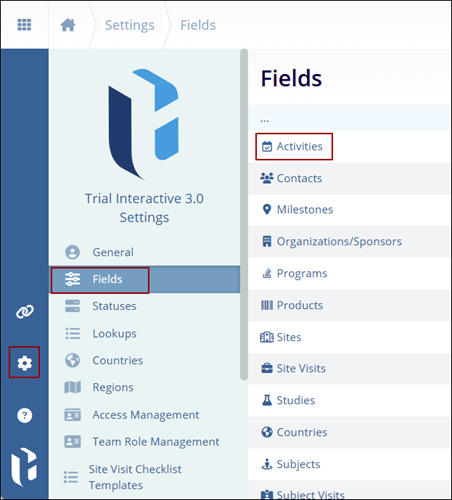
- Navigate to the Settings area and select the Fields menu.
- Select the sub-type. For example, Activities.
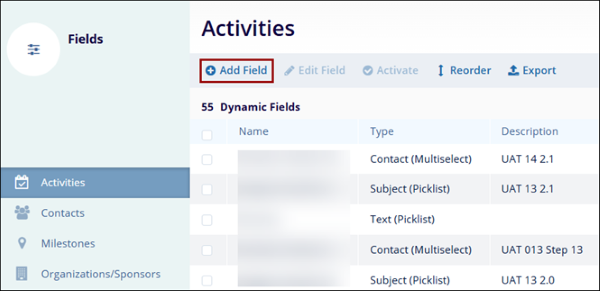
- On the Activities screen, click on the +Add
Field button.
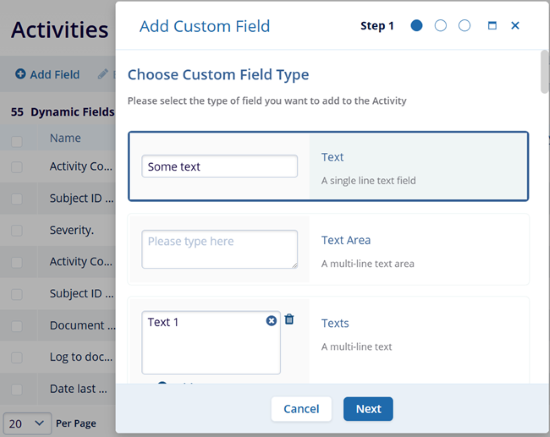
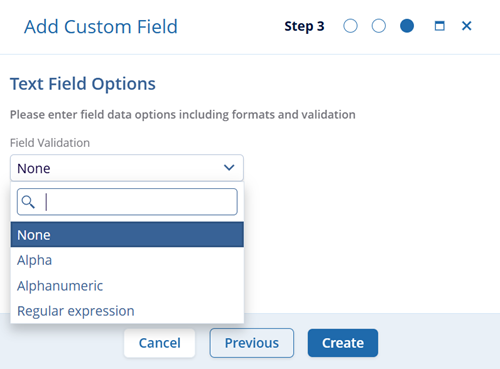
- In step 1 of Add Custom Field form, select the custom field type from the
available options and click on the Next button.
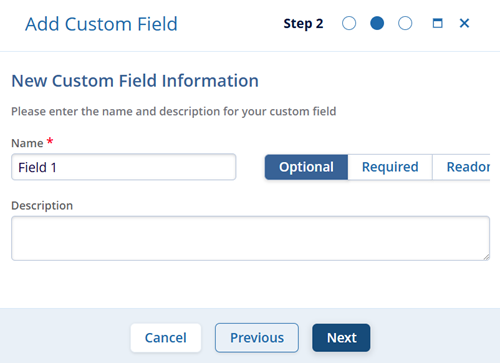
- In Step 2, mandatorily add a name for the field. Optionally add
description and select whether the field in Optional, Required, or
Read-only. Click on the Next button.
- In Step 3, add the field validation value by accessing the dropdown options and click on the Create button.
Note
- Follow the similar steps for other sub-types. i.e., Organizations, Milestones, and others etc.
- The steps below may vary slightly depending on the type of field chosen.
- A tooltip is displayed explaining the meaning of the 'Regular Expression' option selected as a Field Validation type which improves clarity by helping users understand the purpose of 'Regular Expression' when configuring custom text fields within a domain.
Edit Custom Field
To edit a custom field, follow the steps below:
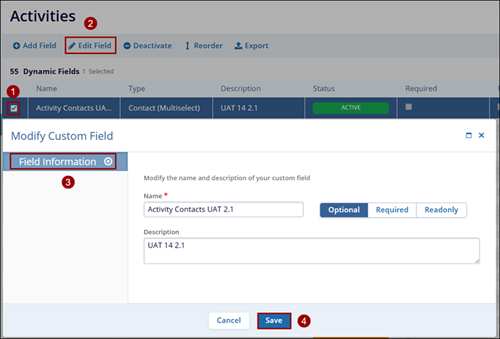
- Select a custom field by clicking on the checkbox.
- Click on the Edit Field button from the top menu bar.
- On the Modify Custom Field window, make the necessary edits within the Field Information section.
- Click on the Save button.
Activate Custom Field
To activate a custom field, follow the steps below:
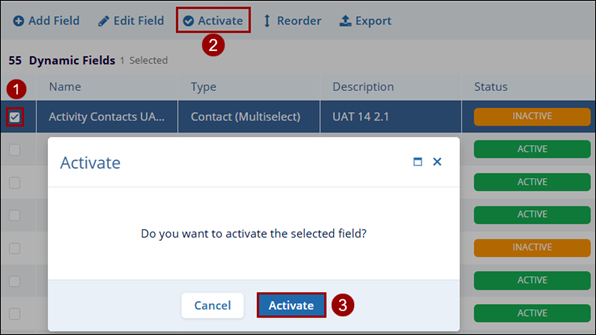
- Select a custom field by clicking on the checkbox.
- Click on the Activate button from the top menu bar.
- On the Deactivate confirmation popup, click on the Deactivate button.
Deactivate Custom Field
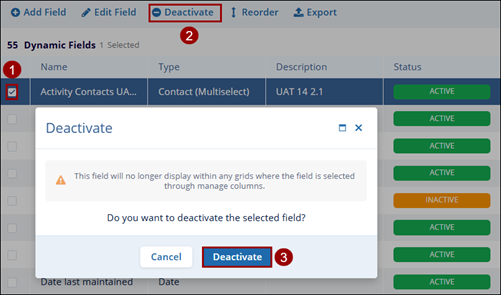
- Select an active custom field by clicking on the checkbox.
- Click on the Deactivate button from the top menu bar.
- On the Deactivate confirmation popup, click on the Deactivate button.
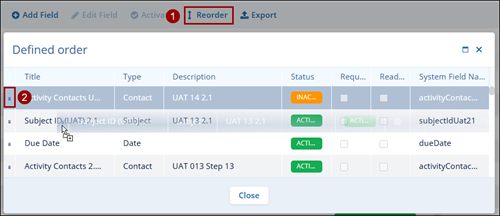
Reorder
To reorder the custom field list, follow the steps below.
- Click on the Reorder button from the top menu bar.
- Place the fields in the desired position using the drag & drop functionality.
Export
To export the custom fields list, click on the Export button and follow the standard steps detailed in the Exporting Contacts section.