
Adding Documents from the Documents Action or Context Menu
- From the Documents Module, click the Document
dropdown.
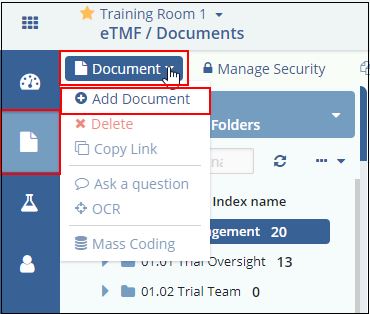
- Select Add Document and the New Document window opens. Enter the details as required to create a new Document profile. Refer to the screenshot below:
- Select the appropriate Category from the dropdown list; General, Country, or Investigative Site.
- Depending upon the category selected, the document’s Submitted Name field would appear or disappear. Enter the Submitted Name as required.
- Select the Document Type, and Document Date. Type in the date if that is configured for you.
- Add pertinent Comments, if necessary. The Index position will populate automatically, based on the folder you selected from the index.
- Click the Browse button next to the Attachment field to attach a document.
- Complete other fields as necessary and click Next to take you to the Document Security popup. Here you can add group(s) and/or users(s) who would access the documents into the security grid and set the desired levels of access. A detailed description of each security access is given in Manage Security.
- Click Finish for the new document to take its place in the default index folder or the Upload folder as set in the room settings.
Note: You can also add/import documents by dragging and dropping them from the
Windows Explorer to their relevant index folders. Upon dragging and dropping the
document, the Document Profile window opens for you to code the document. The
Title, Document type, and Category fields are automatically coded for you. The
dragged document can be found in the Attachment/URL field of the Document
Profile.