
Importing Documents
Follow the steps below to import
documents metadata to a room:
- Navigate to the eTMF Documents module and select Documents from Import dropdown.
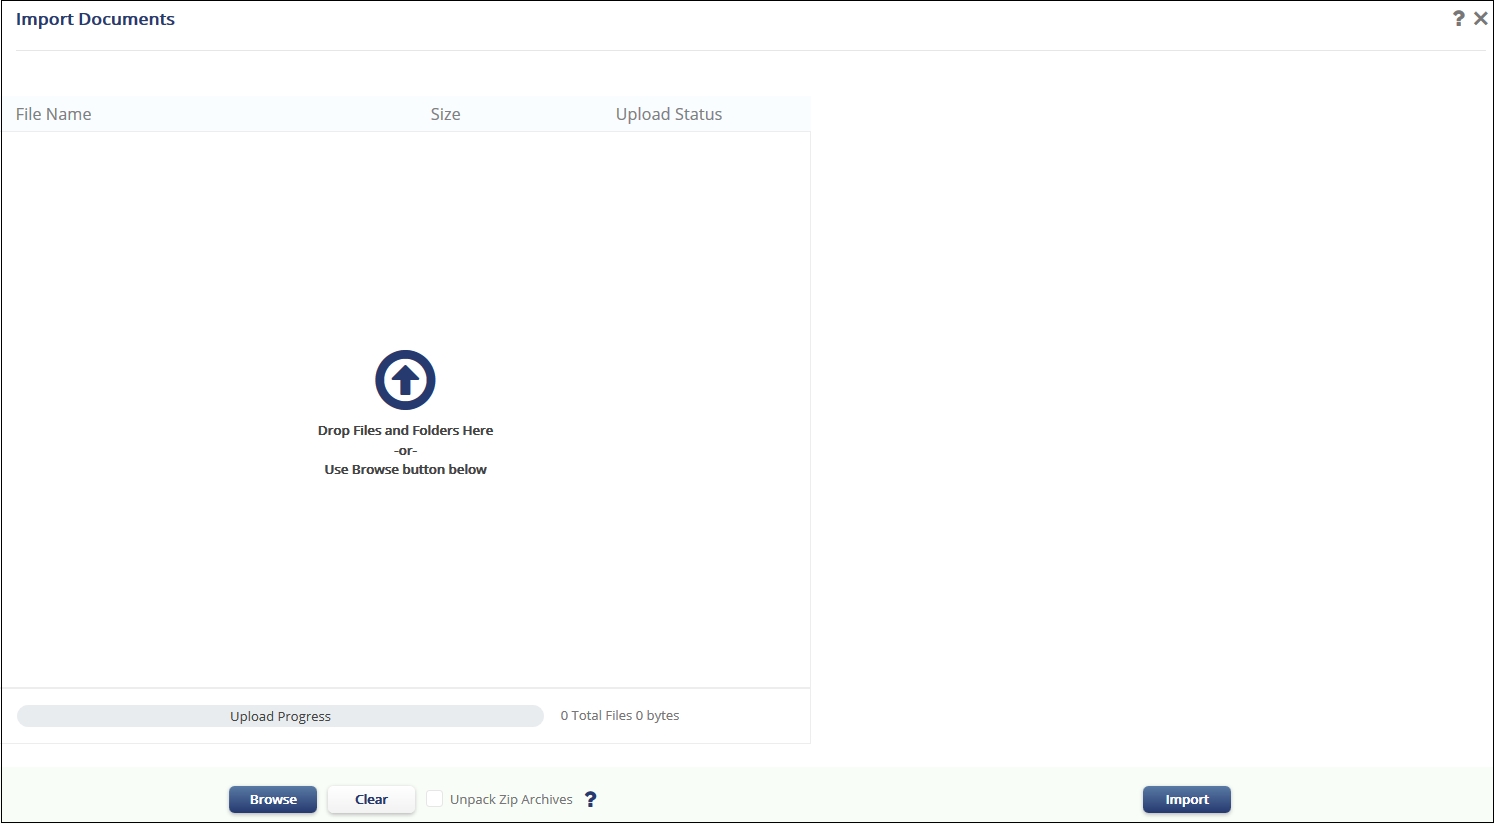
- The Import Documents window opens. Refer to the screenshot below:
- Following the on-screen instructions, either drag-and-drop files from your own computer into the upload panel or use the Browse button on the window to select documents to upload.
- After selecting documents to be uploaded, you can select the Documents Metadata checkbox on the right pane of the window to quickly code select metadata for these documents while the system is carrying out bulk-uploading. Therefore, if you are importing documents that are from the same investigative sites, are related to a particular contact person, or belong to the same document type, you can assign those at one go. This is also Mass Coding while importing documents.
- While the documents are uploading, the user can monitor the Upload Status column in the display panel and view the progress of the upload in the progress bar at the bottom of the window. When the upload is complete, each document will display an Upload Status and the progress bar at the bottom of the window will read Done.
- If you have specified the Documents metadata then click Import and
Apply coding, and Close button placed
on the bottom right corner. A confirm Mass Coding message will pop-up. Click Yes to confirm. - If you have not specified anything on Documents Metadata, then after the upload is finished, simply click the Import for the process to begin.
- The Import functionality will not allow the import of erroneous files. During the import of several files, the files that were uploaded successfully will be removed from the list of files in the Import Document dialog box, but some documents will remain in the grid due to some errors while uploading. The user can try to import the left out documents again. This will not re-import the already uploaded documents but will try to import the documents remaining in the grid only.
- Once importing documents is over, click the Close button in the bottom right corner of the Import Documents window. The uploaded documents can then be found in the user’s Upload folder in the folder index or the default index folder as specified in your room settings.