
Saving your View
If you used the ‘Set’ button to test out a view of the Grid and you wind up wanting to keep it, you can go back into the Manage Columns window and choose to save your view.
From the Manage Columns window:
- Press ‘Save’
-
- This opens the Save View window (see the screenshot below)
 Figure 17: Save View
-
- If the view is new, give it a unique name.
-
- If you are updating an existing view, you can leave the name as it is.
-
- Choose whether or not this view should be your default view.
- (Admins Only) – Select whether this view should be the
default view for all users in the room.
-
- Users will be able to change their default view after this is selected but all users will initially have this view presented to them.
-
- Choose whether or not you would like to save this view as a new
view.
-
- If you are editing an existing view, you would not choose to save your selections as a new view.
-
- Press ‘Save’
- Once you have saved your view, it will be available in the list of all views. This list is accessible from the Default dropdown menu at the top-right of the Grid.
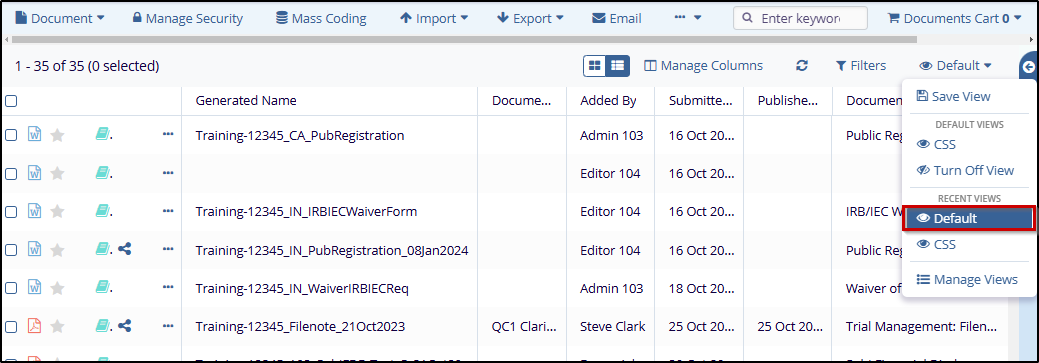 Figure 18: Default