
Managing Folder Security
Administrator users can manage folder security. This section discusses the major interface for doing so but the user can also right-click on index folders to view and edit that specific folder’s security. As the same can be done via this interface, the folder-specific method will not be discussed in depth here. Some rooms, such as eISF rooms have separate security controls for site folders. Those are controlled from the Settings menu. Please see Site Template Folder Security for more information.
To assign Folder Level Security:
- Click Manage Security from the top ribbon bar. The Manage
Security window opens.
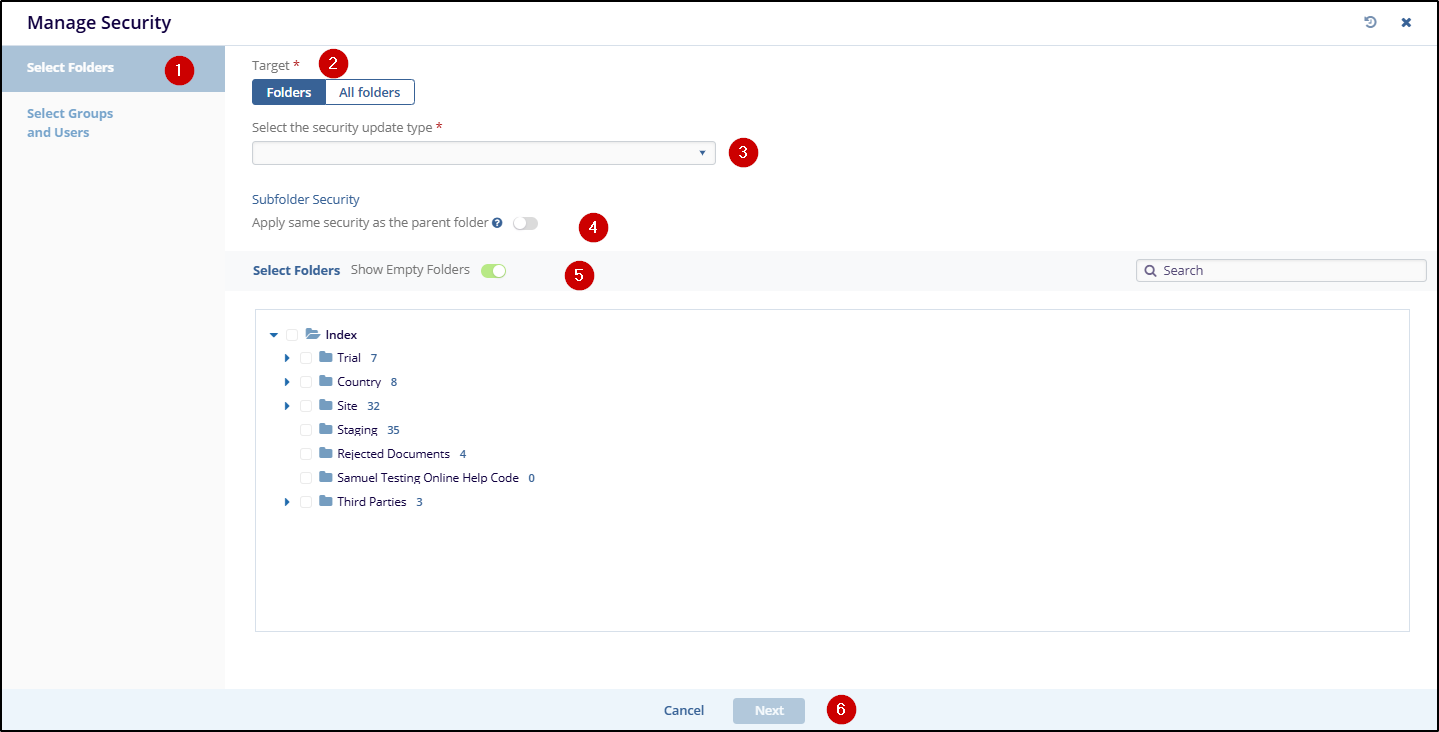 Figure 66: Manage Security Page
- Select the Folders button from the ‘Select the
Target’ section. The panel that displays the Index structure
becomes active allowing you to select exactly to which folders you
would like to apply security. You must select at least one folder
from this list.
-
- If you select the ‘All Folders’ option, the changes will automatically be applied to all folders whose security can be managed from this interface.
-
- Select whether or not the changes should apply to all subfolders or only to the folders specifically chosen.
- Click the toggle button next to the folders whose security should be changed or, if you chose to include all subfolders then choose only the relevant parent folders.
- Choose the type of security update
- Update existing security: This option leaves all current security definitions in place and adds on any new definitions set in step two of the manage security process.
- Overwrite existing security: This option erases all current security definitions and replaces them entirely with the definitions set in step two of the manage security process.
- Remove from existing security: This option leaves intact any security definitions already assigned but removes access for any group(s) or user(s) specified in step two of the manage security process.
- Restrict access to administrators only: This option erases all current security definitions in place and makes the target files/folders only viewable to administrators.
- Click ‘Next’
- Using the Groups and Users tabs on the left side of the control window, select the Groups and/ or Users to update security rights.
- Enter the username to add the group or users to the Security
Grid and select the checkbox. Refer to the screenshot below:
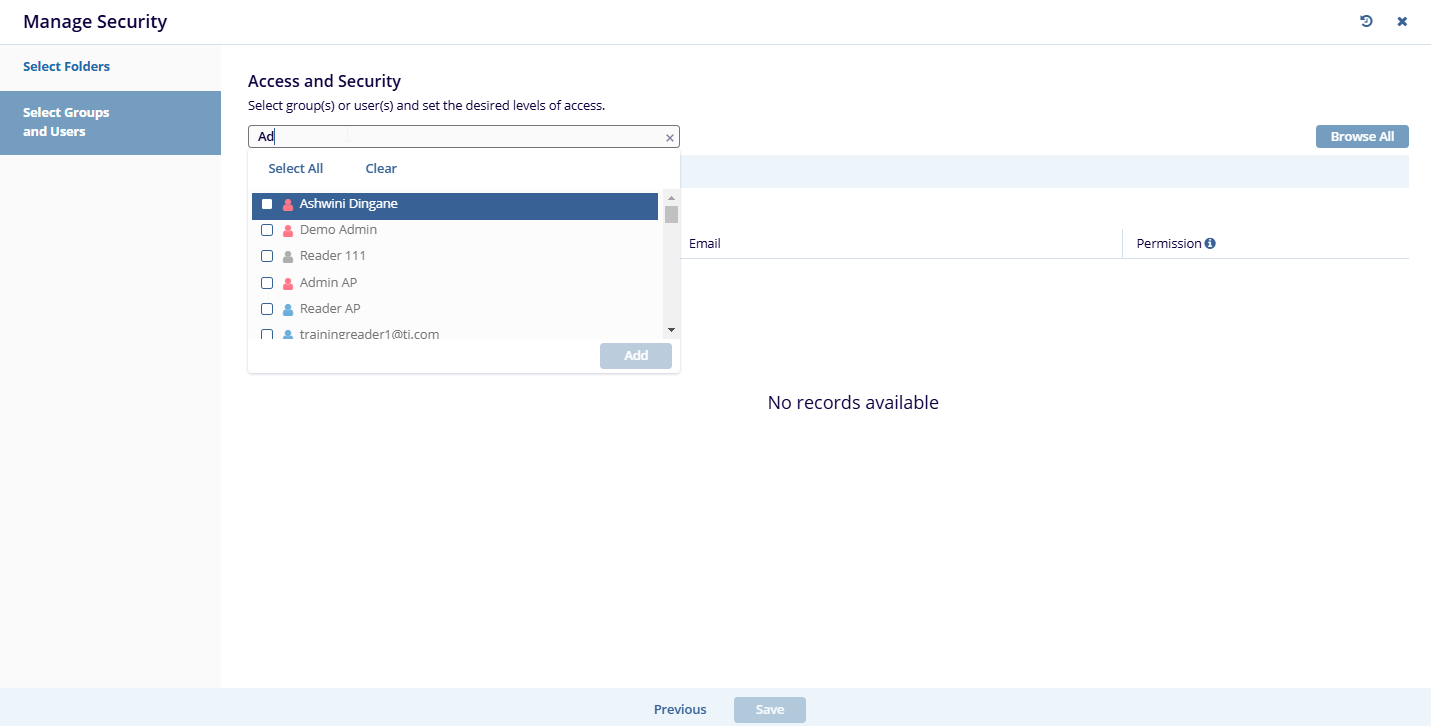 Figure 67: Access and Security
Once the users or groups are
selected. you will need to define their security access
rights.
Figure 67: Access and Security
Once the users or groups are
selected. you will need to define their security access
rights.
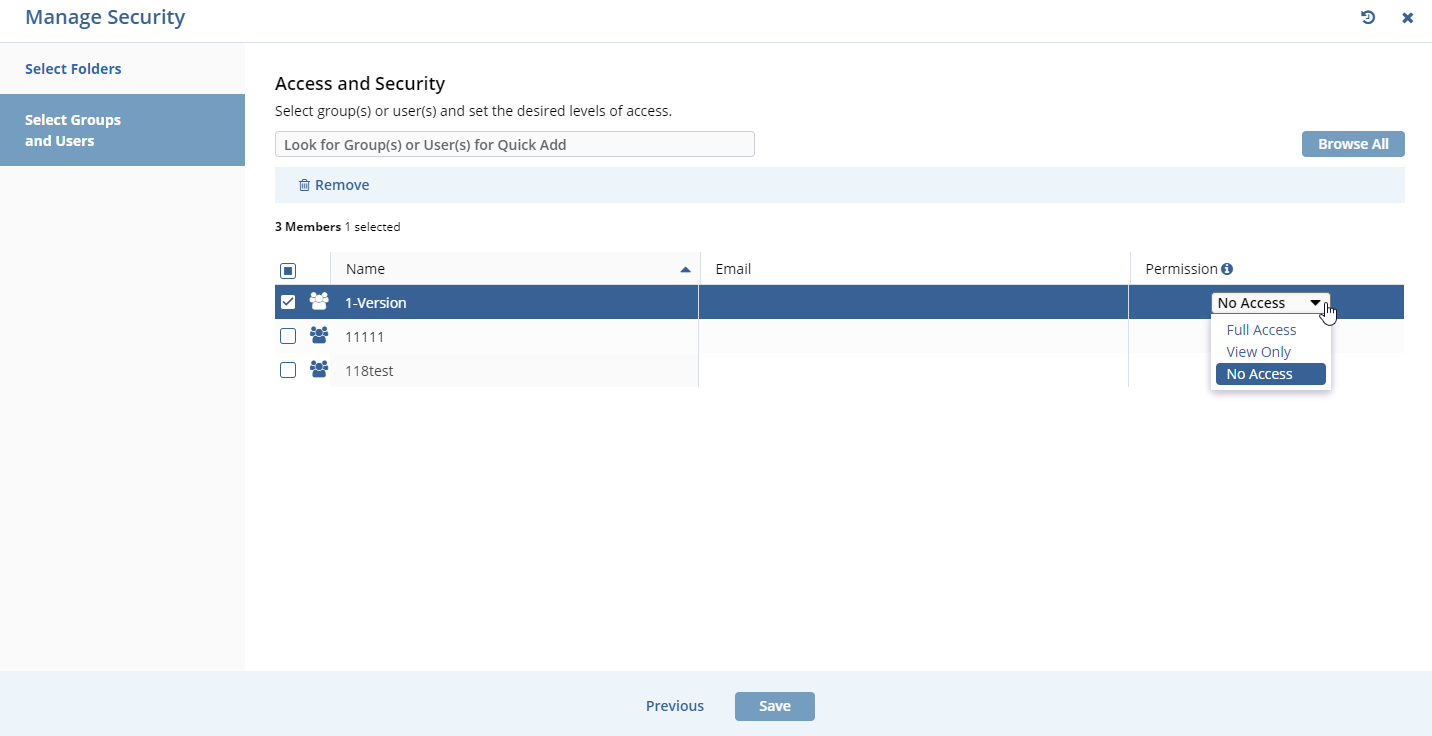 Figure 68: Access Permissions
-
- Full Access – Users have unhindered access-level-appropriate access to the documents.
- Read-Only Access – Users can only view the documents.
- No Access – These users will not even see this folder on their room index and cannot access any associated files.
- No Watermark – This option will only appear for rooms in which the watermark option is enabled. It allows the selected user to view the documents in the chosen folders without the watermark.
- (Collaborate rooms only) Proxy Document Owner – This allows the specified user to act as a document owner for any documents contained in the selected folders.
-
- Click Save