
Index Outline
The administrator can decide on several functions and appearances related to the Trial Interactive room's index. As with any change to room settings, please communicate any alterations to your Trial Interactive representative so that the configuration manual may be maintained correctly.
Navigate to Navigation Grid->Settings->Documents->Index Outline
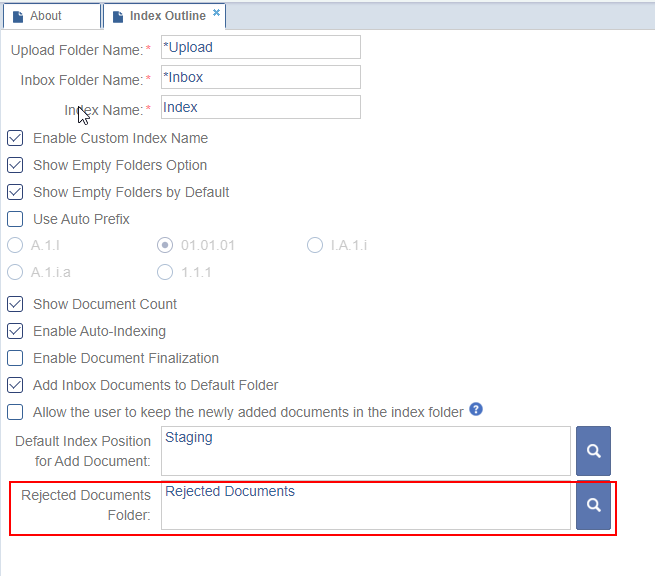 Figure 21: Index Outline
- All documents imported are populated in the Upload folder unless they have been assigned metadata during upload.
- The folders in a room index are numbered, and the subfolders follow a standard numbering system.
- These folder numbers are called as Folder Prefixes, whose settings can be decided from the Auto Prefix option.
- Activate or inactivate Auto Prefixing of folders in the room’s index by ticking the Use auto prefix checkbox. Refer to the screenshot above.
- If not selected, folder titles will appear in the index just as they were typed in during the creation of the room’s index.
- Auto prefixing inserts the desired prefix of numbers or letters to identify the levels of the folders in the index.
- Numbers after the folder names indicate how many documents are available to you in each folder. Check the ‘Show Documents Count” option to enable these numbers on the room’s documents module.
- Enable Auto Indexing to determine whether or not documents can be routed automatically to the correct index location as indicated in the related document-type profile.
- The default location for documents that have been uploaded with metadata assigned is indicated in the ‘Default index position for Add document” field.
- A new feature, the Rejected Documents Folder with Search icon, has been added in this version.
- To add a Rejected documents folder click on the search
Icon.
 Figure 22: Rejected Documents
- Select the folder that you want to add to in rejected documents
folder. Click the OK button.
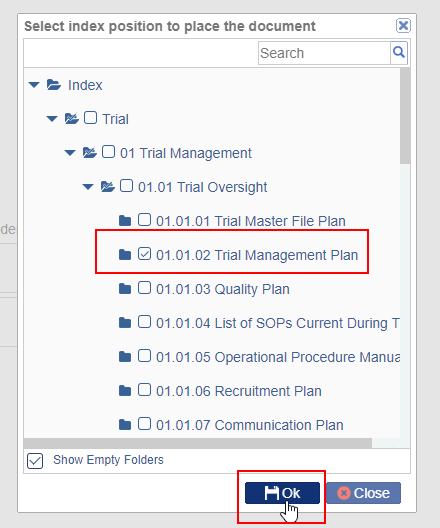 Figure 23: Index position
- The file will be added to the Reject folder box.
 Figure 23: Rejected Folder
- Documents that are emailed into the room’s inbox are typically stored in each user’s Inbox folder, but this can be altered by choosing to enable the ‘Add inbox documents to default folder’ option which would then route all documents emailed to the room inbox directly to the default folder (Staging, in the screenshot above).
- Users can click and drag documents directly to any folder of their choosing depending upon access rights. Whether or not those documents stay in the index folder is determined by the final setting: ‘Allow the user to keep the newly added documents in the index folder”