
Adding New Group
New Groups can be defined and added by clicking the Add Group  button from
the left of the Groups panel.
button from
the left of the Groups panel.
- To add a new group, click the Add Group button from the left pane.
- The Create new group window opens. Refer to the screenshot below:
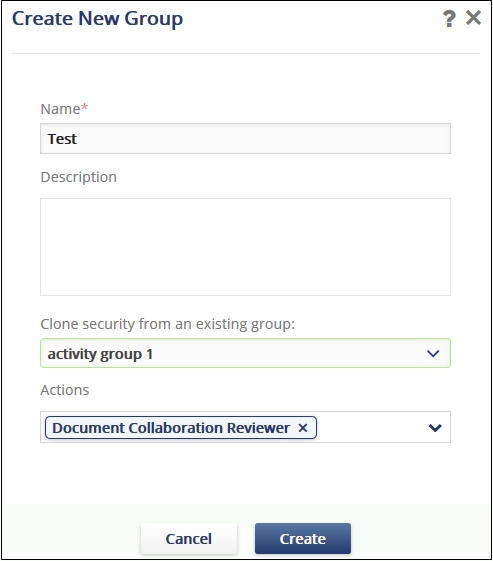
- Enter the new group's name.
- Add the description of the new group. Note: You have the option here to clone security settings from an existing group. If you know that the settings for this new group are identical to another group already established in the room, select that group from the dropdown menu and continue.
- Assign Actions or tasks that the group of users can perform under the specific role by ticking the checkbox next to the Action name in the dropdown.
- The Administrator can also view the actions available in a room along with their purpose from the Main Navigation -> Settings -> General -> Actions. This is discussed in Section Actions.
- Click Create. The new security group appears in the Groups list with no users assigned to it.