Export Required Documents
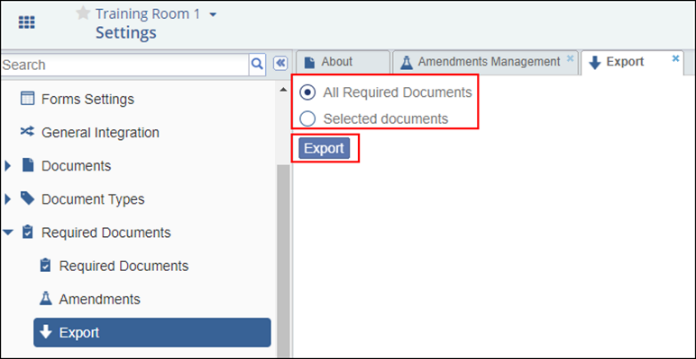
In this menu, Administrator users can export either All Required Documents or Selected documents. Refer to the screenshot below:
 Figure 52: Export Documents
Required Documents can be exported in two ways:
- Select the ‘All Required Documents’ option to export documents from all document source categories.
- Select the ‘Selected documents’ option to indicate
which documents should be exported.
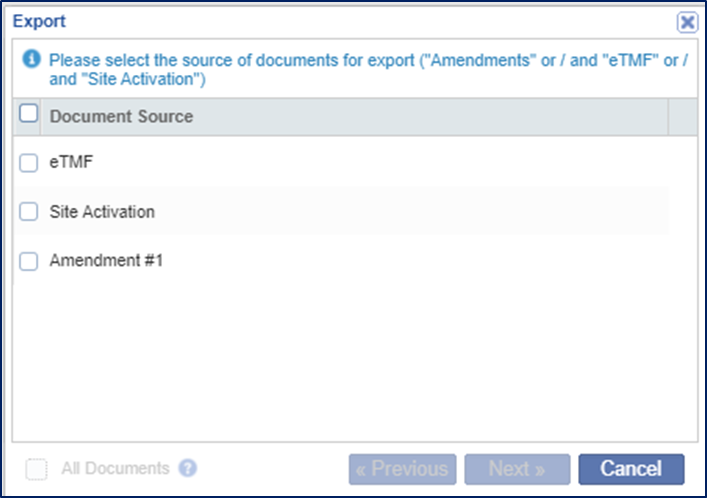
- The Export window opens for you to choose from Amendments, Site
Activation Requirements, or eTMF documents. Refer to the screenshot
below:
 Figure 53: Source Document list
- Select the required Document Source/s and click Next.
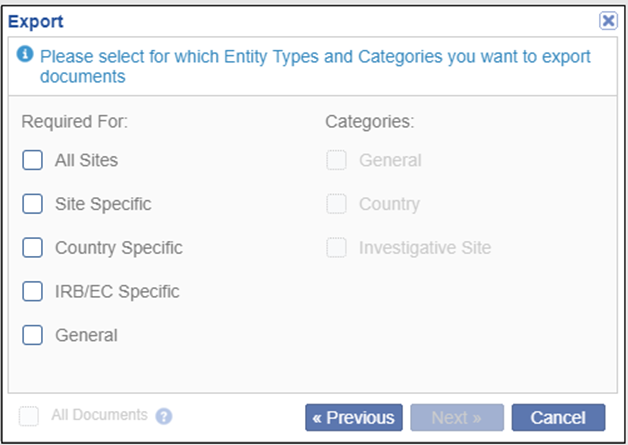
- A new Export window opens for you to select required Entity
Types and Categories. Refer to the screenshot below:
 Figure 57: Entity Type and Categories
- The Export window opens for you to choose from Amendments, Site
Activation Requirements, or eTMF documents. Refer to the screenshot
below:
- Click Next.
- The final Export window will open for you to review the chosen criteria.
- Click ‘Previous’ to make changes in the selections or click ‘Next’ to continue.
- Press the ‘Export’ button to export the list of documents selected.
- A notification will display indicating that the job was completed successfully.
- An excel file is generated with a list of required documents and you can save the file for your records.
Refer to the screenshot below:
 Figure 59: Exported Data
