Edit an Audit
Existing audits can be edited by any room administrator or any user who is indicated as one of the Audit Managers for the audit in question. For example, an Editor or Manager level user who is designated as an Audit Manager for one of several quality review audits in the room will be able to navigate to the Quality Review Settings menu. The difference between their view and the Administrator view will be that the Administrator will see all audits whereas the Editor or Manager user will only see the audit in which they are indicated as the Audit Manager.
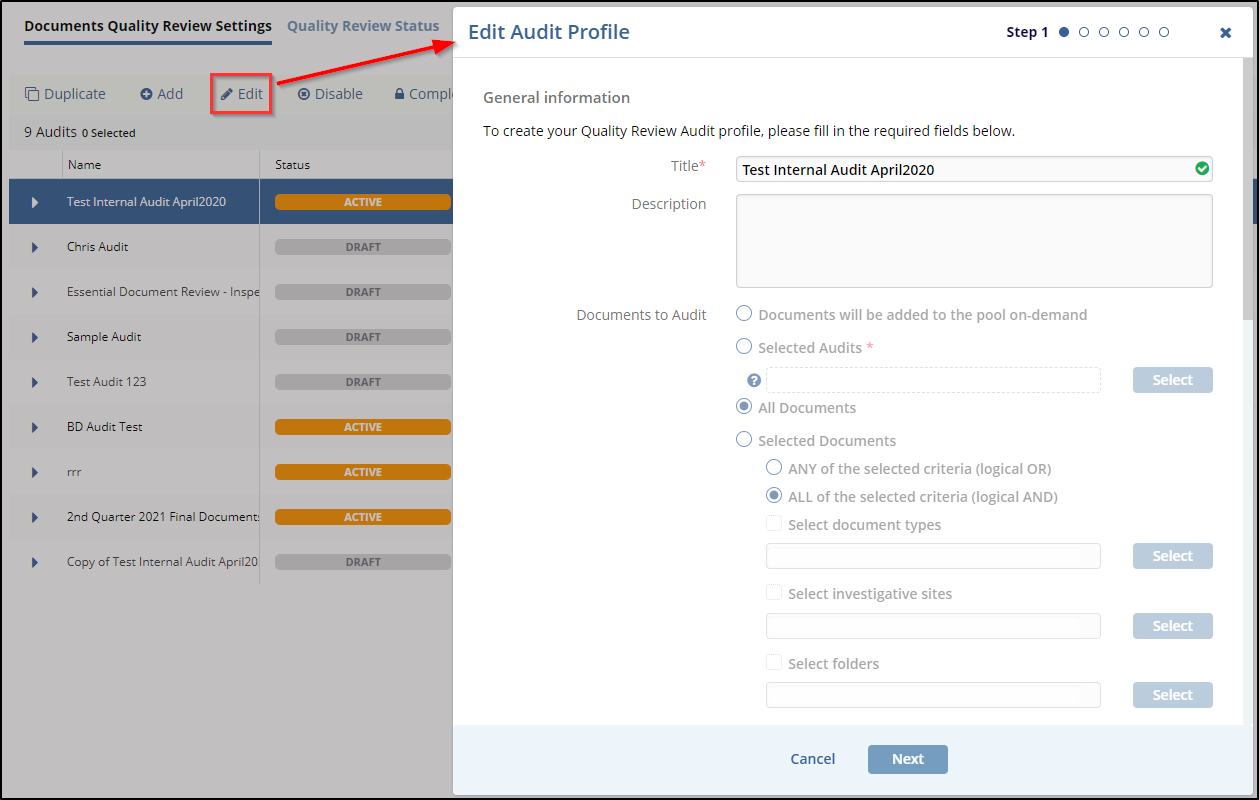
Follow the steps below to edit an existing audit:
- Select the audit from the list.
- Click the Edit button from the top menu bar.
- The Edit Audit Profile window opens.
- Follow on to the steps and make any required changes to the audit profile.

Deactivating an Auditor
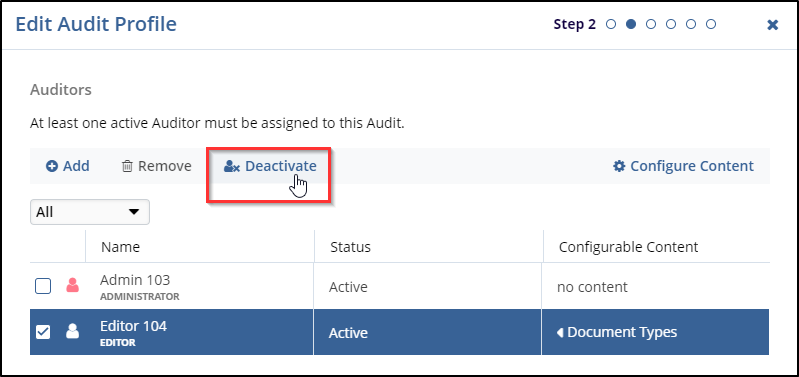
While you are editing an audit, you will have the option to remove an auditor from the audit. In order to do that, please follow the steps below:
- Open the audit profile for editing and to the auditors page.
- Select the auditor who needs to be removed from the audit.
- Click the ‘Deactivate’ button.

- This will open the ‘Documents Reassignments’ window.
- Choose what to do with the user’s remaining documents.
- Leaving the ‘Automatically reassign all documents randomly between existing auditors’ box checked will do just that. The auditor’s remaining documents will be reassigned randomly.
- If the box is unchecked, you will be able to choose an auditor to reassign the documents to. Move the selected recipient from the left side of the window to the right side.
- Press ‘Add’
- Proceed through the remainder of the Edit Audit wizard and press ‘Finish’ to save your changes.
