
Building the Document Type Profile
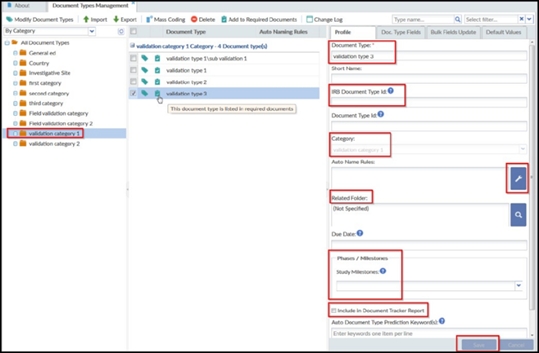
- Select the new document type by clicking the checkbox next to the icon and the document type name. The panel on the far right becomes active.
- In the Profile tab, type in the Short Name for the document type. This can be the same as the Document Type name that you created in the previous steps, or it can be abbreviated if the original name is long.
- The IRB Document Type ID is one of the fields besides the Site ID and IRB Number that is required by the system for IRB Integration. This field will be available only if IRB Integration is enabled in the room. This field can accept multiple values separated by semi-colon and should be unique within the document type category.
- The Category has already been assigned by your first steps of creating the new document type.
- Click the wrench icon next to the Auto Name Rules field. When the metadata gets filled out for documents of this type, the auto-naming rules you set up here will be applied to these documents. The configuration manual determines all initial document types and auto-naming rules. An Auto Name Rules window opens. Refer to the screenshot below:
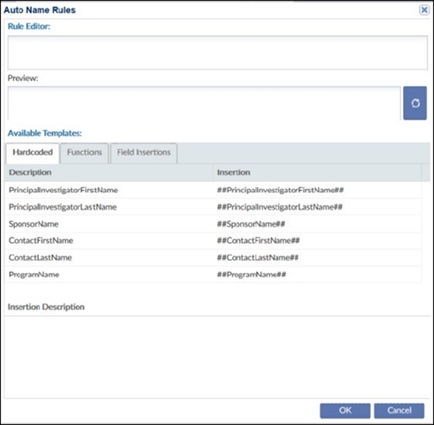
The following set of instructions describes the insertion of a standard set of fields for the auto-naming of documents of a particular type. For this example, the proposed naming rules include the study Principal Investigator’s first and last name and the Sponsor's Name.
- Under the Hardcoded tab, double-click a description to be inserted as an auto-naming rule. The insertion appears in the Rule Editor.
- If you want to include fields present under the Field Insertion tab, double-click
the description and click the green arrow in the Select Fields Document Profile.
This gets appended in the Rule Editor. The order in which you select these naming
elements is the order in which they will be displayed.
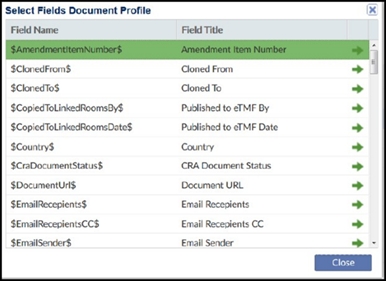
- Click Close when you have included all of the necessary fields. Note: The fields stored under the Hardcoded tab are fields typically used in building auto-naming patterns. To include these, insert your cursor in the spot in the Rule Editor where you want this field to appear, then double-click the Description of the field, and it will be inserted into the naming pattern.
-
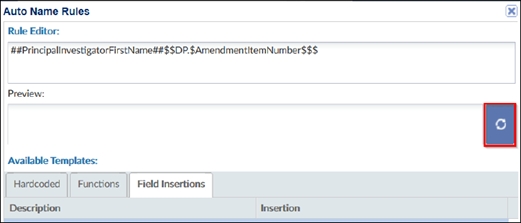
Back in the Auto Name Rules window, click the white arrows icon to the right of the Preview box. The box populates with a generic preview of the selected Auto Naming pattern. Refer to the screenshot below.
-
Click OK at the bottom of the window to be returned to the main Document Types view.
-
Click ‘Save’ at the bottom right of the Profile tab window.