
Adding Documents to a List of Documents
- Click the relevant tab from the left panel of the Required
Documents menu.
- For Country and IRB/EC documents, pick the relevant country or IRB/EC.
- Click ‘Add’ from the top ribbon bar of the Document Types window on the
right. Here, Refer to the screenshot below:
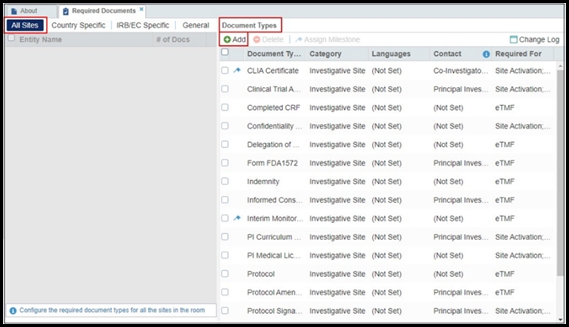
- The Required Documents window opens for you to add Required Documents for
your sites under specific categories.
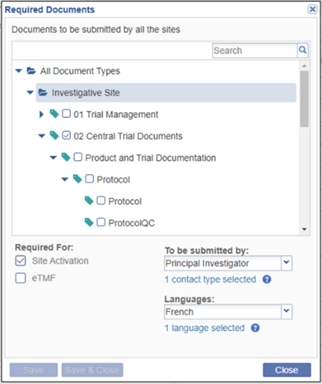
- Click the folder from which you need to select the Required Documents that you want to add to the list for all sites. The list of the available document types in that folder appears.
- Click the checkbox next to one or all of the documents to be required.
- Select whether the document(s) will be required for Site Activation or eTMF by clicking the checkbox.
- From the dropdown menus to the right, if necessary, select:
- To be submitted by This is the Study Contact who is responsible for providing the selected required documents
- Languages- Select the language from the list to be applicable to the Required Documents.
-
Click ‘Save & Close’ if you have documents from only one category folder to add, or click ‘Save’ if you need to add more required documents.
Note: If documents are to be provided by one study contact and another document or documents are to be provided by a different contact, click Save; go back to the documents list; select the next set of documents, and again select whether the documents are required for Site Activation or eTMF; select the contact type from the dropdown, and click Save. Continue this process until you have finished adding the required document types for all contacts, and then finally click Save & Close.