
Add Agency Submission
Follow the below steps to add the agency:
- Click the Agency Submission option on the Country Details page. This opens the Agency submission Page.
- Click the drop-down arrow next to the
Add button. The Create New
and Create from Existing options are displayed.
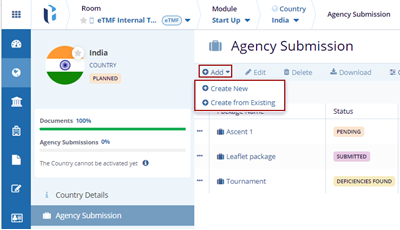
- Click the Create New option. The Create Package pop-up window is displayed.
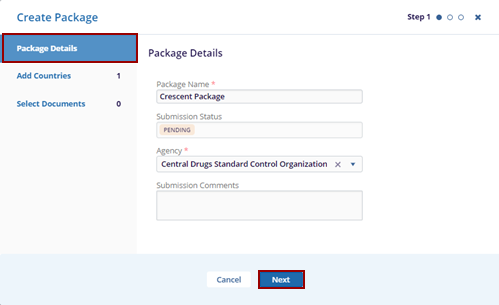
- In the Package Details tab, fill in the required fields - Package Name, and Agency.
- Click the Next button at the bottom
of the popup window.
- This opens the Add Countries tab, click on the +Add button to add a country.
- The Add Countries pop-up window is displayed.
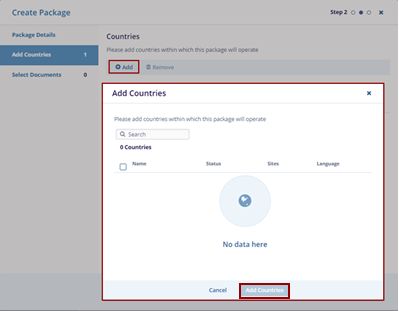
- Click Add Countries, and the added country is displayed within the Add Countries tab.
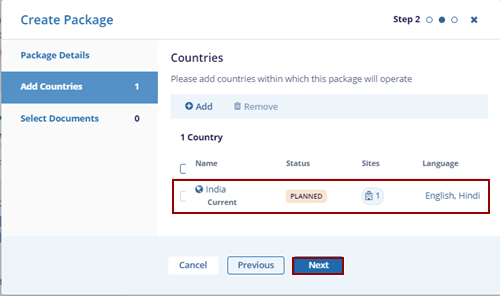
- Click on the Next button once the required
countries within the package have been added.
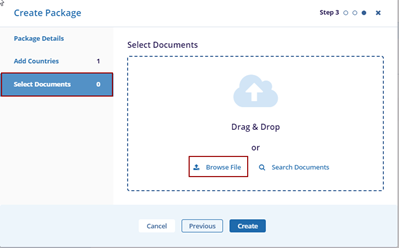
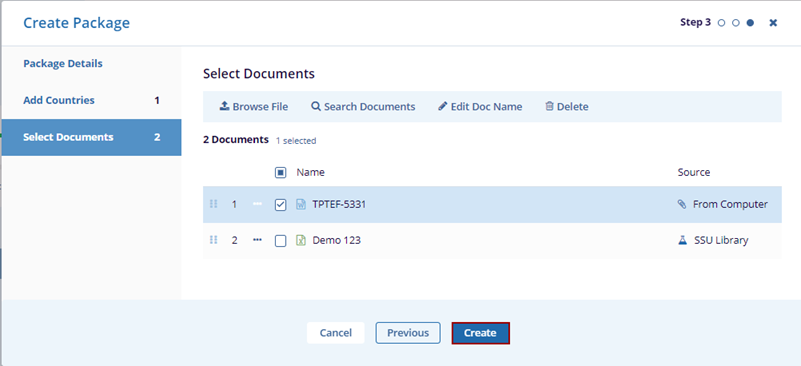
- This opens the Select Documents tab. Select an appropriate option – Browse Files OR Search Documents.
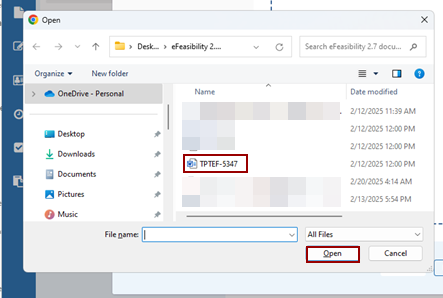
- Click on the Browse Files option, select a
document from the system, and click on Open.
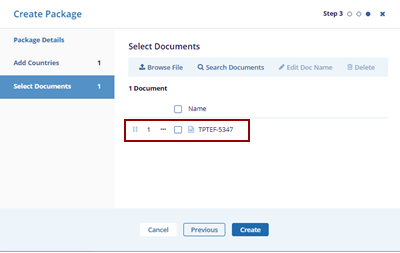
- The selected document is added to the Select
Documents tab.
-
The notification message is displayed on the top right side of the screen.
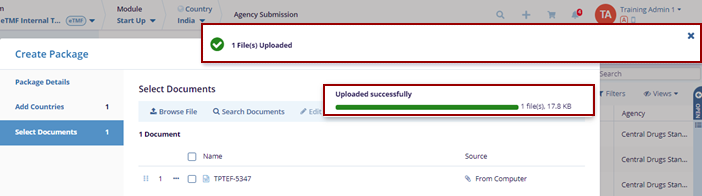
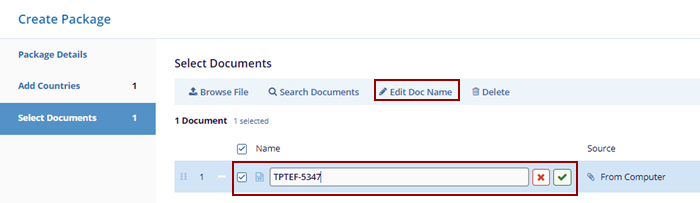
- Once the document is uploaded, select the document click on the
Edit Doc Name, make the required changes, and
click the Tick mark beside the document.
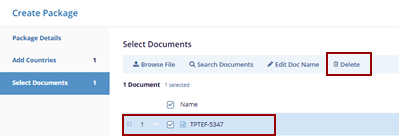
- Select the document and click Delete the
button to discard the action.
- Click the Search Documents tab the
Search pop-up window is displayed.
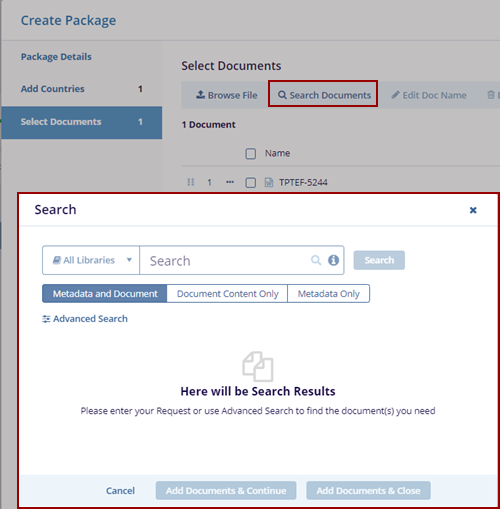
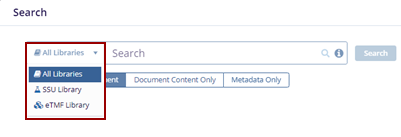
-
Expand the All-Libraries arrow to search from SSU Library or eTMF Library.
.png)
- Clicking the Advanced Search button in the
search pop-up window redirects the user to the Advanced
Search page.
.png)
- Users can add unlimited fields as needed with the + Add
More Fields button. The Advanced Search –
Add Fields pop-up window is displayed.
.png)
- Select the fields and click the Save button.
.png)
- Click the Remove All option to remove the added fields.
- Click Reset All resets the page with the
existing information.
.png)
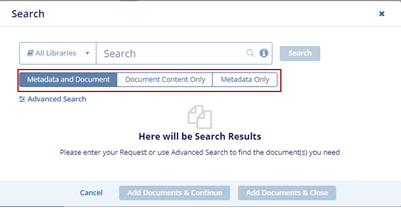
- The Search pop-up window displays the below three tabs by
default.
- Metadata and Document
- Document Content Only
- Metadata Only
Note: The Metadata and Document tab is pre-selected by default. Choose Document Content Only or Metadata Only if you want to filter the results accordingly.
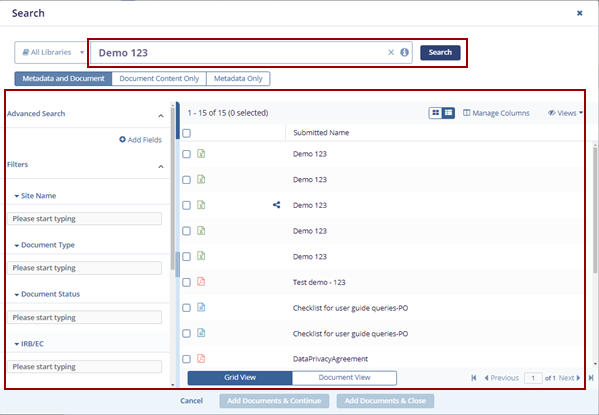
- Enter the document name in the Search field and click
Search. The searched document is displayed with
the Metadata on the left side.
-
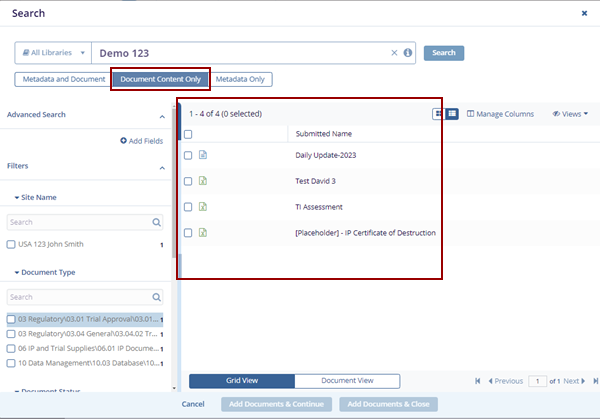
Click the Document Content Only tab it will display the document based on the content only.
-
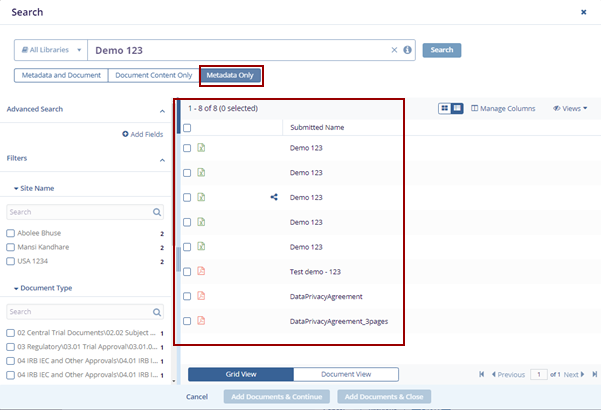
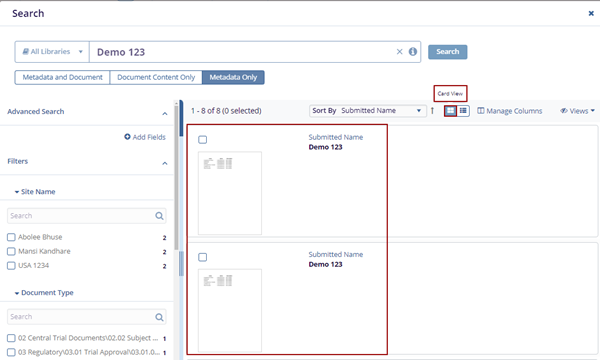
Click the Metadata Only tab it will display the document having metadata.
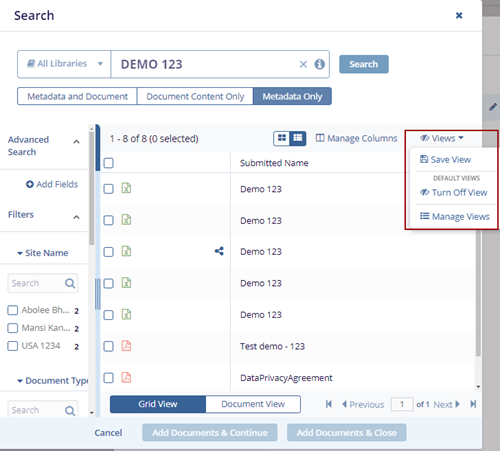
- The users can view the views in two ways:
-
Grid View
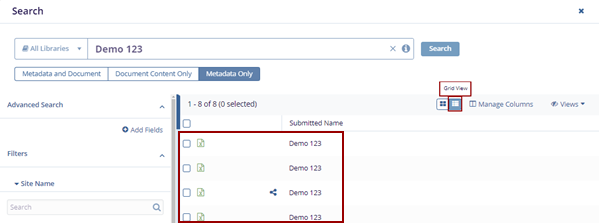
-
Card View
-
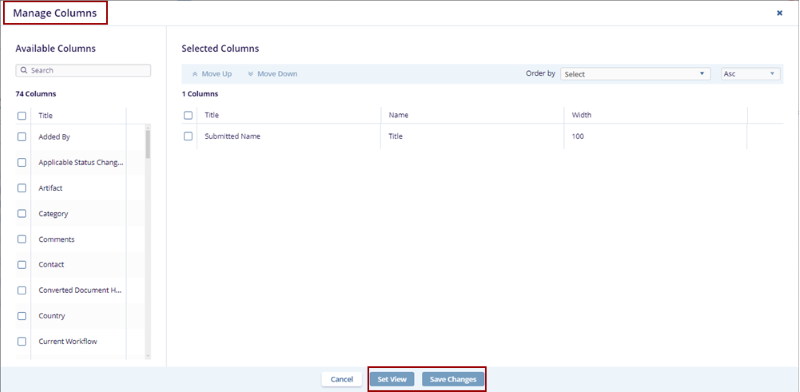
- Click the Manage Columns to customize the information displayed. The user can add or remove columns that need to focus on specific details relevant to the review on the Manage Columns pop-up window.
- Save View to save the current selection as a new view, or click Save Changes
to apply the modifications to the existing view.
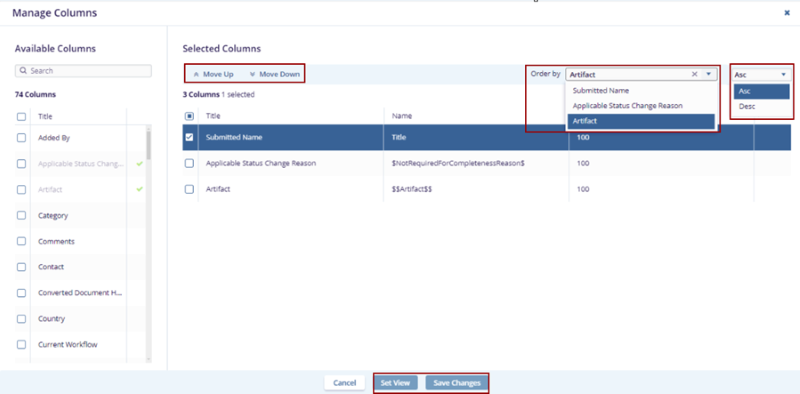
- Use the Move Up and Move Down arrows to adjust the position of the columns.
- Use the Order By option to sort the selected columns in Ascending or Descending order.
- Save View to save the current selection as a new view, or click Save Changes
to apply the modifications to the existing view.
- Click Views to manage the search views. Select
Manage Views to customize views based on options
like Created by Me, Shared by Me, Shared with Me, and Default
Views.
.png)
- Click Add Documents & Continue will
display the notification message at the top right of the screen and
will continue on the same page to add the documents.

- Click Add Documents & Close will close the Search pop-up window.
- Click Create on the Create package pop-up
screen.
- The Package Created notification message is displayed at the top right of the screen.
