Study Start-Up Settings
The Study Start-Up Settings allows you to set up rules that would be critical for a site activation process. These settings are global and are applicable to all sites in the room.
To set up the SSU Settings, the administrator needs to:
1. Navigate to Settings via the navigation grid
2. Click the arrow next to Investigative Sites in the left pane of the Settings window
3. From the collapsed dropdown, click Study Start-Up Settings
4. The Study Start-Up Settings window opens to the right
5. Select the options as required
6. Click Save at the bottom of the window to commit the changes
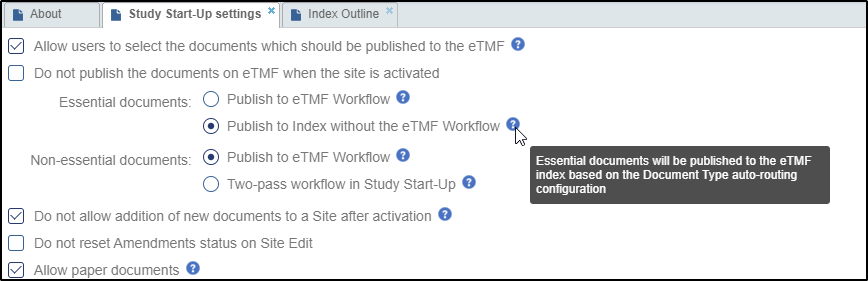
Referring to the screenshot above, the SSU settings window can be divided into two sections:
1. Settings regarding essential and non-essential documents on site activation
2. Other settings
Settings regarding essential and non-essential documents on site activation
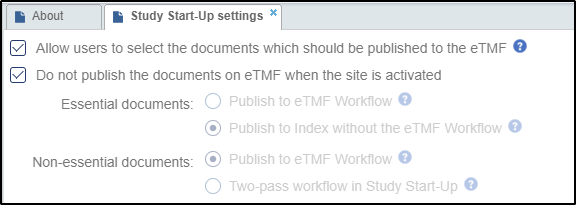
- If you do not wish to publish the documents on the eTMF when a site is
activated, select the checkbox next to the option. On selecting the checkbox,
the next two options regarding Essential and Non-essential documents appear
greyed out and disabled.
- If you wish to publish the essential and non-essential documents on the eTMF
Workflow, select the radio button next to the option. These documents will be
added to the workflow specified in your system on site activation and will be
taken up for QC Review as per the process. On publishing the documents will be
added to the default folder as specified in the Documents section under the room
settings.
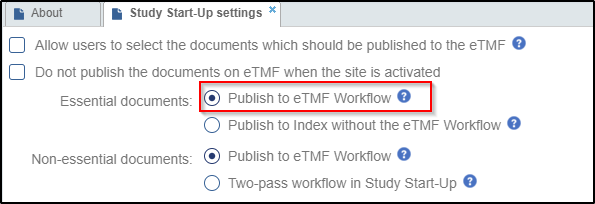 Note: To be added to the workflow, documents should match workflow conditions. If the document is not matched to workflow conditions, it will be just placed to the default index position.
 - If you wish to publish the essential documents directly to the Index without the
eTMF Workflow, select the radio button next to the option. These documents will
be automatically routed to the appropriate eTMF index based on the document type
auto routing configuration specified in the Related Folder panel of Document
Types section in the room settings. The screenshot below shows where a Tracking
Information document will be routed to in the eTMF on site activation.
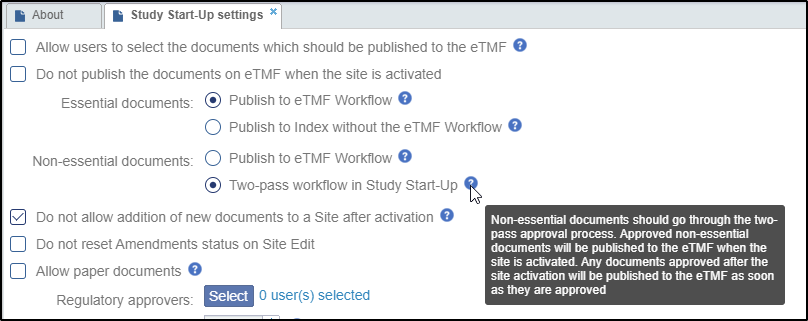
- If you wish the non-essential documents to pass through the two level approval
process in SSU, select the radio button next to the option. These documents will
need to be approved through QC Review, and Regulatory Review, and will be
published on the eTMF with Final status on site activation. If documents are
approved after site activation, they will be need to be published to the eTMF
manually. Position in the eTMF index for these documents will be provided by the
system as per the Auto-Indexing rules. You will need to enable auto indexing in
the Documents section in the room settings for this to happen.
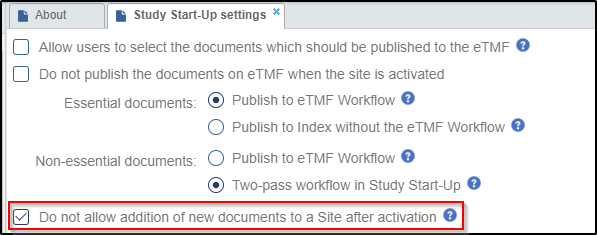
- If you wish to lock down the site for any new documents after the activation,
select the option as shown below:
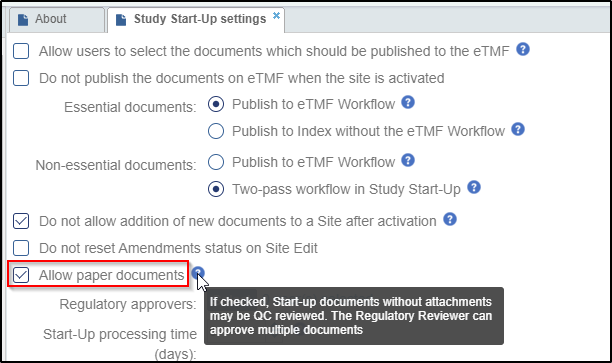
- If you need to submit paper documents instead of their soft copies, you may
choose ‘Allow paper documents’ option as shown below. Such documents can be
uploaded without attachments and can pass through QC Review, and Regulatory
Review.
Other Settings
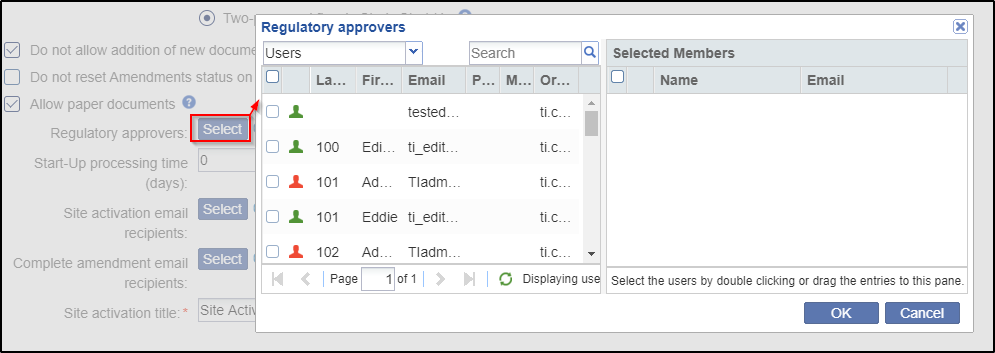
- From this section, you can add Regulatory Approvers globally for all sites in
the room. This is discussed in section Adding Regulatory Approvers.
- To specify buffer time in days for site activation after IRB/EC approval, enter
the number of days in the textbox next to the option.
.png)
- Besides the above, you can also specify the contacts types and users who will
receive emails on site activation, and on completion of amendment documents
(documents added to the site after its activation), and the title for site
activation.
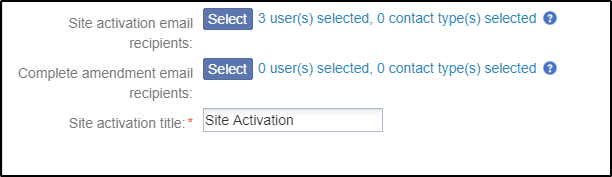
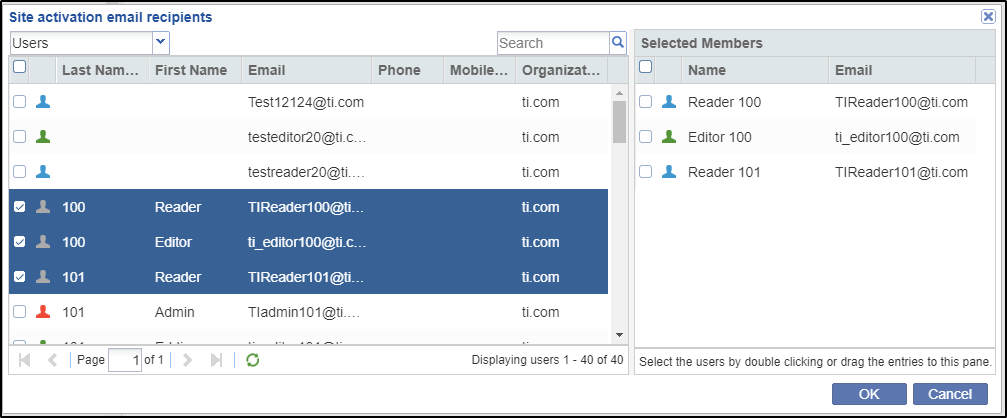
Click the Select button to select the users/contacts who should receive email notifications on site activation. This will open the Site activation email recipients/Complete amendment email recipients window as per your selection:
a. Select Users/Contact Types from the dropdown.
b. Select the user to transfer them to the right panel by either double-clicking them, or by dragging and dropping them in the right pane.
c. Once Users/Contact type is selected, they will appear greyed out in the left pane.