The General Settings allow you to set up rules that would be critical for a site creation
process. These settings are global and are applicable to all sites in the room. The
choices made here are dictated by client preferences.
To set up the General Settings, the administrator needs to:
1. Navigate to Settings
2. Click the arrow next to Investigative Sites in the left pane of the Settings
window
3. From the collapsed dropdown, click General Settings
4. The General Settings window opens to the right
5. Select the options as required
6. Click Save at the bottom of the window to commit the changes.
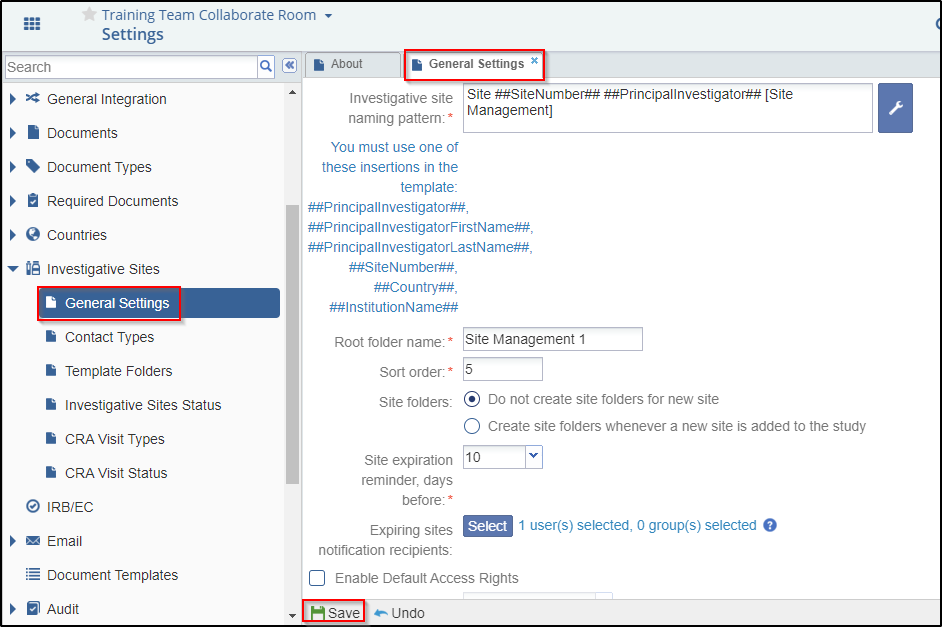
Referring to the screenshot above, the General settings window allows the following to be
defined:
1. Site naming pattern
2. The root folder name
3. The sort order
4. Creation of site folders
5. Site expiration reminder period
6. Site expiration notification recipients list
7. Site default access rights and members
8. Site default access editors and readers groups
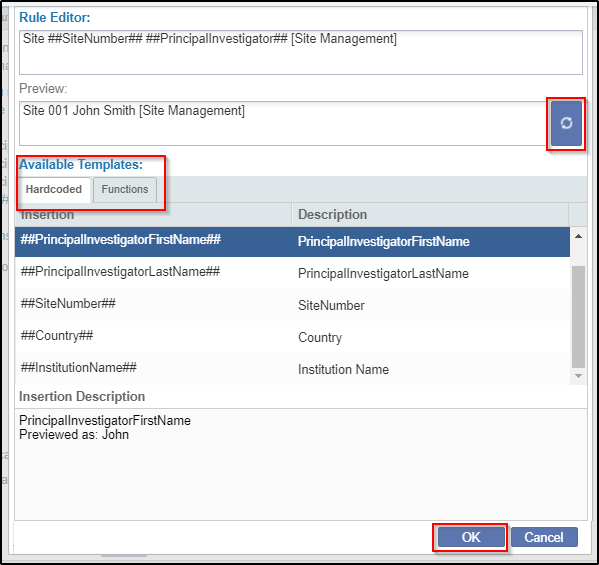
1. Site Naming Pattern
The investigative site naming pattern is set as per the prescribed pattern of the
organization. To set the naming pattern, click the wernch icon available at the end of
the Investigative Site Naming Pattern.
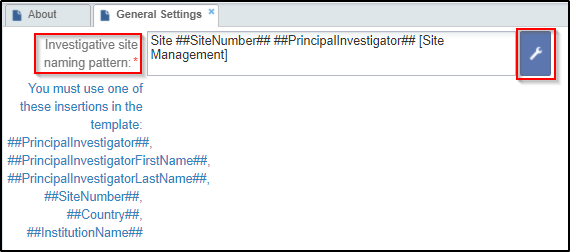
This
will open a new window pop up of the Rule Editor. Here you can define the rule for
naming the investigative sites. Once you set the naming pattern, you can review the same
by clicking the refresh icon available after the preview box. Fill the essential details
from the available templates ( choose Hardcoded/Functions by togglle screen) and click
OK button at the button to save and execute the naming pattern. Refer to the screenshot
below.
2. Root Folder Name
The Root folder name is set in compliance with the organization’s preference. This is the
title that is given to the main folder in the room’s index that will hold the subfolders
for each investigative site involved in the study.

a. Click in the field.
b. Type the root folder name.
c. Hit the Enter key on the keyboard.
3. The Sort Order
Selection of the Sort Order for the Site Management folder is made in the next field.
This dictates where the folder appears in the room’s folder index.

a. Click in the field.
b. Type the number of the client’s preference.
c. Hit Enter on the keyboard.
4. Creation of site folders
The options listed here decide when site folders are created for a new site. The box
contains three radio buttons for Site folder options. Click on the option that fits your
needs.

5. Site expiration reminder period
The options here allow you to set the number of days before a site's expiration and when
notifications will be sent out to the users who are selected as the ‘Expiring sites
notification recipients’.
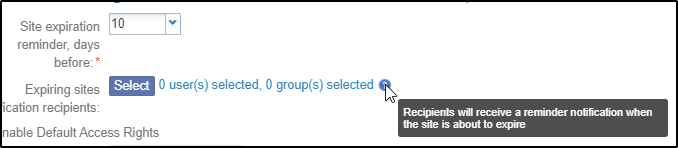
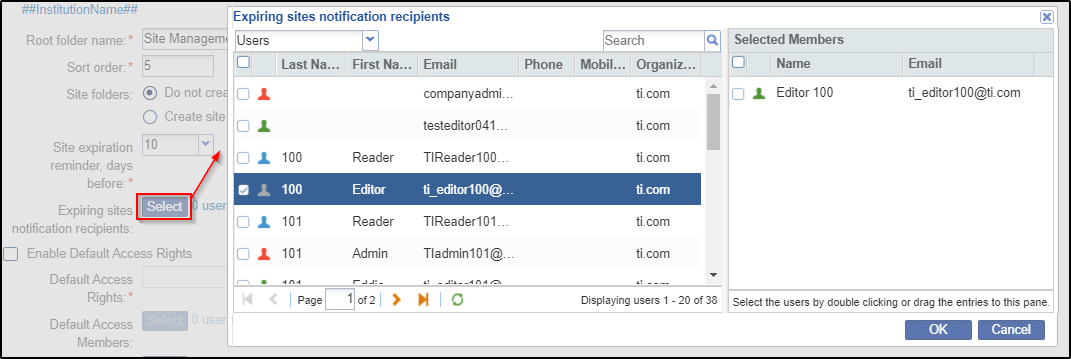
6. Site expiration notification recipients list
Click the Select button to select the users/groups who will receive the notification
reminder email. Either double-click the users, or drag and drop them to the right pane
to add them to the recipients’ list.
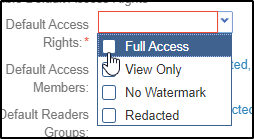
7. Site default access rights and members
This option alloaws you to enable default access rights and the members who possess them.
To enable the default access rights click the checkbox available before the Enable
Default Right Access option.

To define the default acess rights select any one from the dropdown available with the
Default Access Rights option.
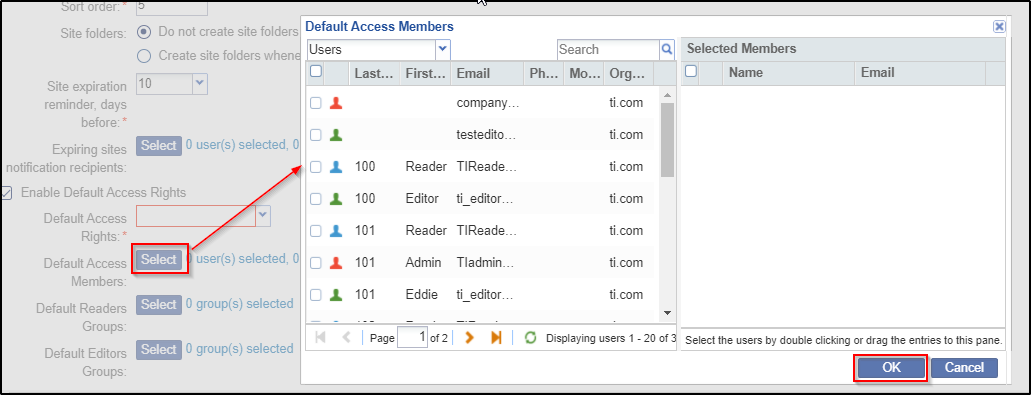
To add the members with default access, click the Select button that opens the Default
Access Members popup where you can select the members/groups from the available list and
drag them to the selected members list at the righ side of the popup. Once you select
all the members, click the Ok button at the bottom of the popup to save the
changes.
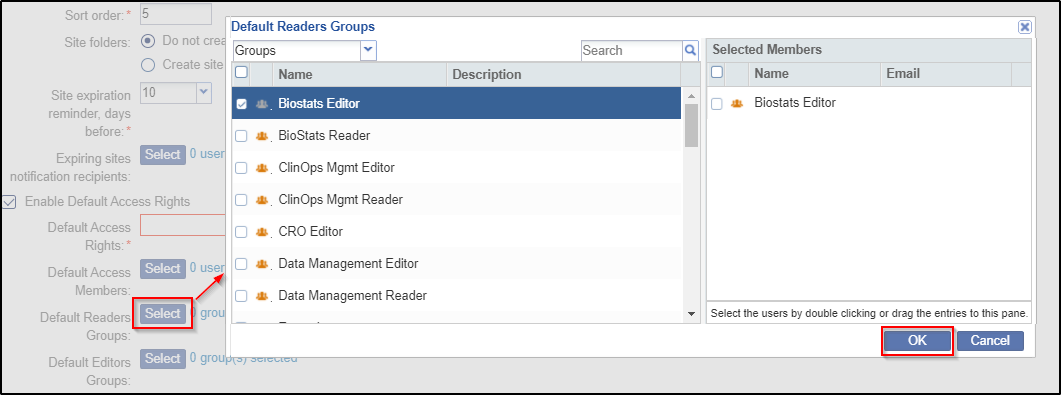
8. Site default access editors and readers groups
These options allow you to set the the default access to readers and editors group. To
add the default readers/editors group click the Select button available after the
options Default Redaers/Editors Groups. This will open a popup where you can select the
groups from the available list and drag them to the selected members list at the righ
side of the popup. Once you select all the members, click the Ok button at the bottom
of the popup to save the changes.