Signing the documents in Adobe Sign
If you are assigned to electronically sign a document, follow the steps mentioned here:
- When you are assigned a document for eSignature, you should receive an email containing the link to the room where the document is stored. Click the Review Document link to access the document. Alternatively, click the Dashboard tab and navigate to the Documents to be signed dashlet.
- Double click the document listed in the Documents to be signed dashlet. A
new window to review and act on the document will display.
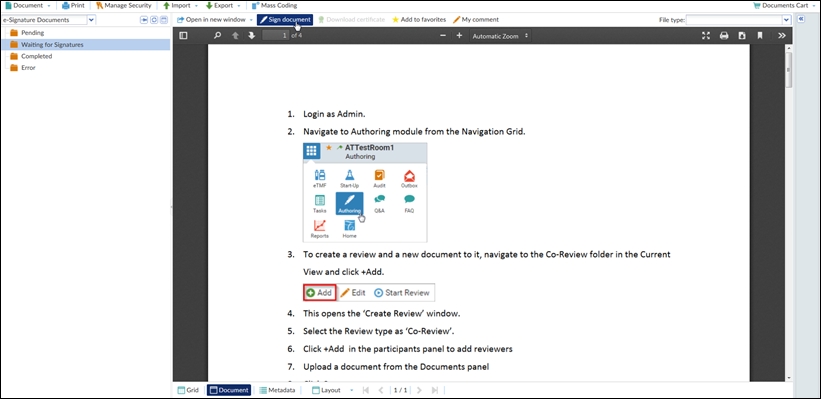
You can also proceed to the eTMF/Documents or SWS/Documents module (depending from where you need to e-sign documents) and select the required document from the Waiting for Signatures folder under e-Signatureview in the Index pane. Either way, click Sign Document to begin the review and signing process.
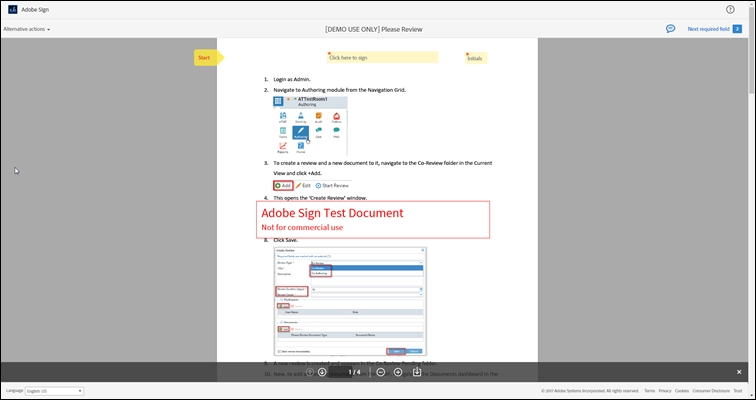
If you are assigned to sign using the Serial signature, a place where you are supposed to sign will be highlighted in the document. Refer to the screenshot below:
- You will be prompted with a signing validation dialog box. Enter the login and password that you used to log into Trial Interactive. The validation process will be skipped if you proceed to sign a document from within your email inbox.
- After validation, you will now be lead to the Adobe Sign interface called
embedded signing, for you to review and sign the document. Refer to the
screenshot below:

- Hit Click here to sign box. You will be prompted to choose your style for the signature (font, size, etc.)
- Enter your signature and other details as required. Click Apply.
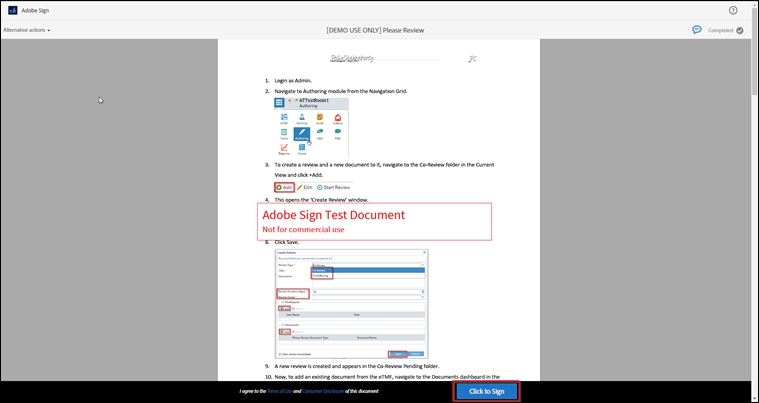
- This will insert your signature. Hit Click to Sign. Refer to the
screenshot below:

- The document will move to the Completed folder under e-Signature Documents.
