
Adding Groups with the eSignature Actions
Add Groups and activate the eSignature Action for the specified groups.
- Navigate to Settings -> Security -> Groups. The Groups Panel opens.
- From the Groups tab, click Add. The Create New Group window opens.
- Name the group by typing its title into the Name field.
- Add a Description.
The user making these additions or changes can choose to clone the security parameters already defined for another user group that has been established in the room. This cloning designation is not required.
- Click the Actions dropdown. Refer to the screenshot below:
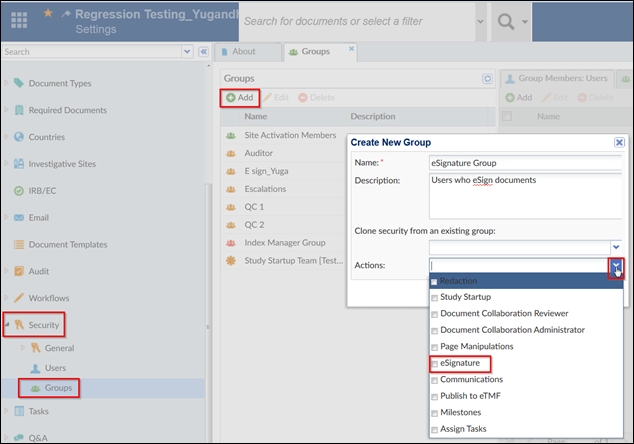
- Click the checkbox for eSignature and click Create.
The new user group displays in the list of Groups in the panel on the left.