
Modify Documents Types
- Click Modify Document Types option from the ribbon above the dashboard.
- A new Modify Document Types’ Tree window opens, displaying the folder
structure of Document Types in a tree view. Document Types can be added to
the category folders, edited in their current positions, and deleted through
this view. In the figure below, the Investigative Site folder is
open, displaying the document types that are added in that category.
Figure: Modify Document Types' Tree 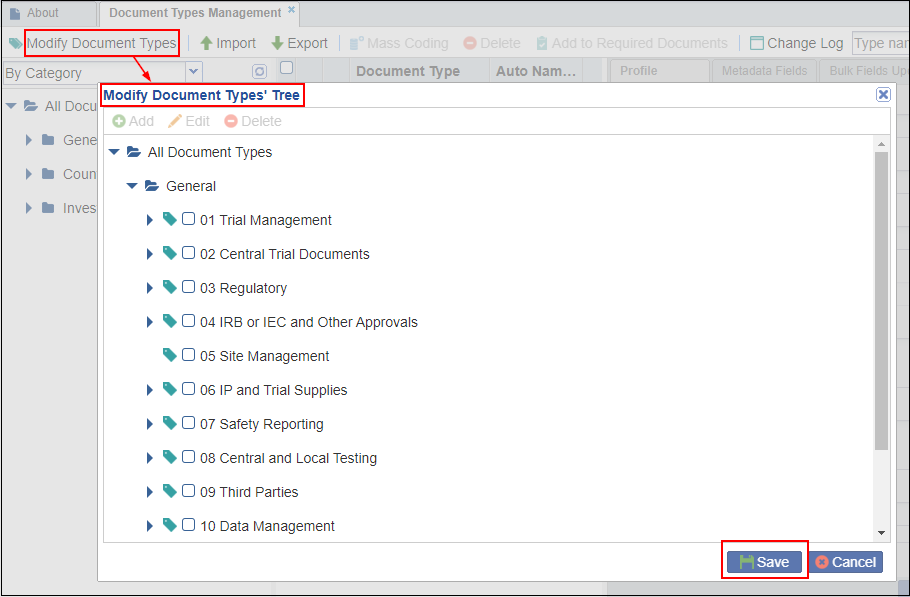
- To add a new document type, click the main category into which the new document type is to be assigned. If the folder already contains document types, click the + sign next to the category’s folder icon to see the document types already contained in the category. The categories are marked by the yellow folder icons and the actual document types by the blue document icon.
- Click the Add button near the top of the window, or
right-click the folder where you want to add the new document type,
or right-click the document type under which you want to add a
sub-type. A new line appears with an editable field that reads
New Document Type. Refer to the screenshot below:
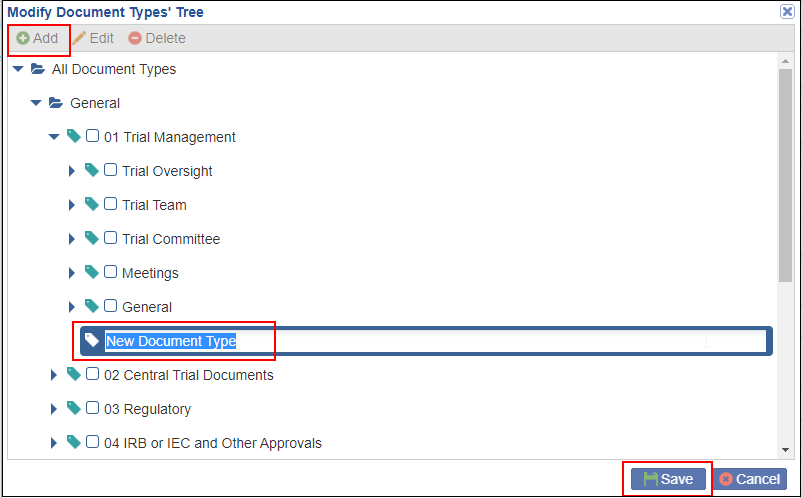
- Type the name of the new document type to be added to the category folder.
- Press the Enter key. If you have more document types to add to this or other categories, you can repeat this process.
- When you have added all of the necessary new document types, click
Save at the bottom of the window. That window closes, and
you return to the primary Document Types view. The document
types that you have just created has not been routed to a proper
index position. Refer to the screenshot below:
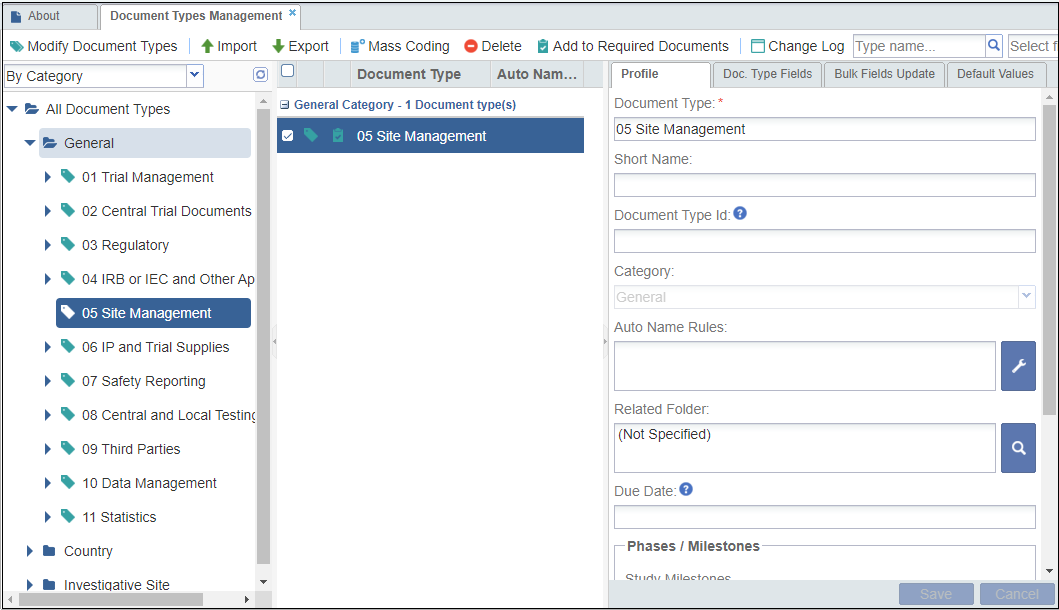
- Similarly, you can also edit or delete document types.