
Creating Amendments
To create amendments, the administrator needs to do the following:
1. Navigate to Settings.
2. Click the arrow next to Required Documents in the left panel.
3. Select the Amendments option from the dropdown.
4. The Amendments Management window opens in the right panel.
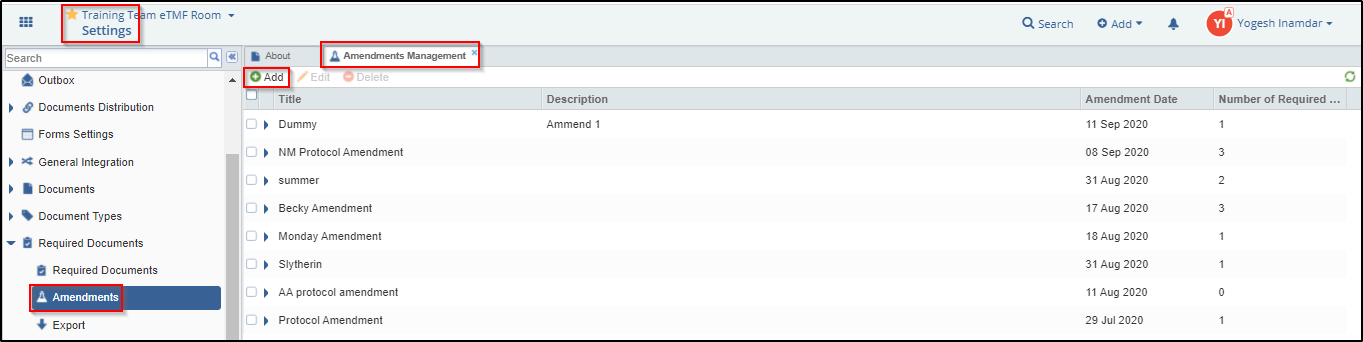
5. Click Add button displayed at the top menu bar to open the Create Amendment pop up window. Refer to the screenshot below.
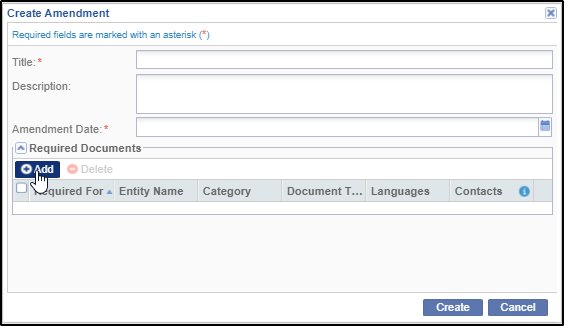
a) Fill in the details as required for the 'Title', 'Description' and 'Amendment Date' fields. Note that the fields marked with red asterisk * are mandatory to fill.
b) Click the Add button in the Required Documents panel in this window. Refer to the screenshot above.
c) The Required Documents window is displayed. Refer to the screenshot below.
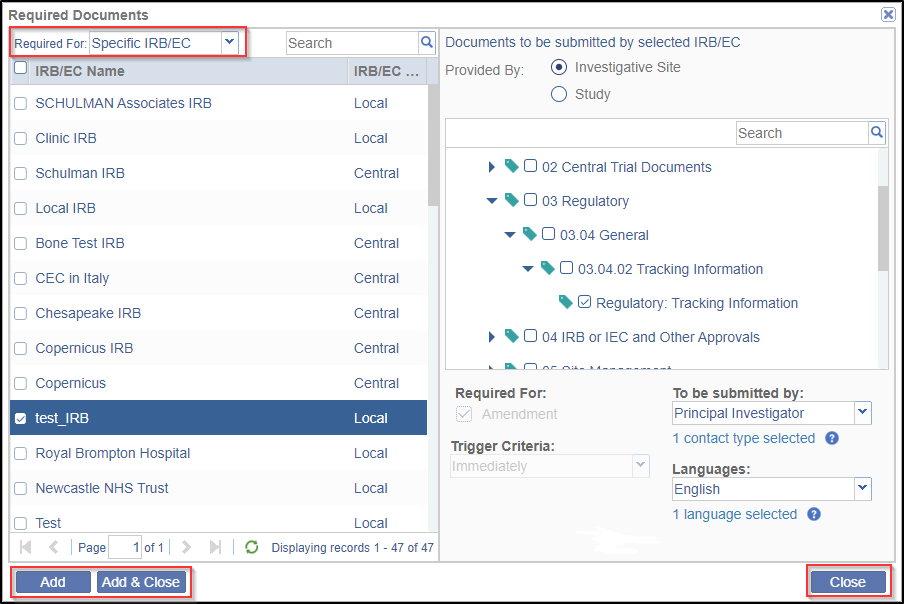
d) From the Required For dropdown in the left panel select an option as required (All Sites, Specific Site, Specific IRB/EC, or Specific Country).
e) From the right panel above, in the 'Provided By' section, select a radio button.
f) Below in the right panel select the essential/required documents that are needed after the site activation.
g) Select an appropriate option from the dropdown of the 'To be submitted by' and 'Languages' fields.
i) Click Add & Close button to reflect the changes in the 'Create Amendment' window.
j) The procedure to add the documents is same as described in earlier section Basic Configurations for SSU.
6. Click the Create button to create the amendment.