Adding Regulatory Approvers
A Regulatory Approver can be a Global Regulatory Approver, Country, or Site Regulatory Approver. As a Global Regulatory Approver, you are able to perform the functions at all sites within a study room. As a Country Regulatory Approver, you are able to perform the functions at all sites in a specific country (ies). Lastly, as a Site Regulatory Approver, you are able to only perform the functions at the site(s) a room Administrator assigns.
To add Global Regulatory Approver follow the steps as below:
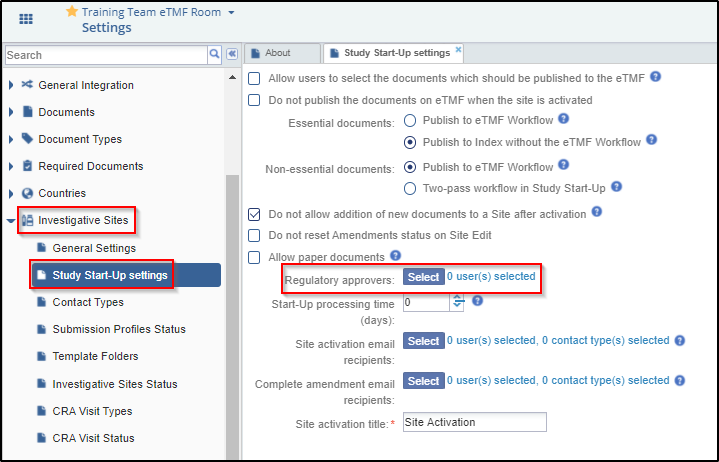
1. Navigate to Settings.
2. On the left-side panel, navigate to Investigative Sites Study Start-Up settings.
3. Next to Regulatory approvers, click on Select. Add user(s) by either double clicking on the user on the left-hand side to move to the Selected Members on the right-hand side, or by dragging and dropping the user from the left-hand side to the Selected Members on the right-hand side.

Users added as Regulatory Approvers added from here will be available as Regulatory Approvers to all the sites in the room.
To add a Country Regulatory Approver follow the steps as below:
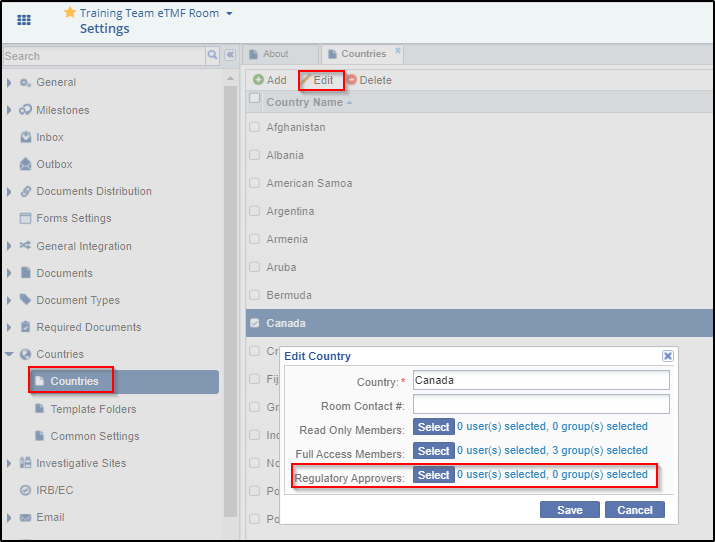
1. Navigate to Settings -> Countries -> Countries.
2. Check the box next to the country and then click Edit. (If the Country is not listed, click Add to create a new country).
3. Next to Regulatory Approvers, click Select. Add user(s) by either double clicking on the user on the left-hand side to move to the Selected Members on the right-hand side or dragging and dropping the user from the left-hand side to the Selected Members on the right-hand side.

5.Click Select to open the Regulatory Approvers windows and add the users. Click OK.
To add a Site Regulatory Approver follow the steps as below:
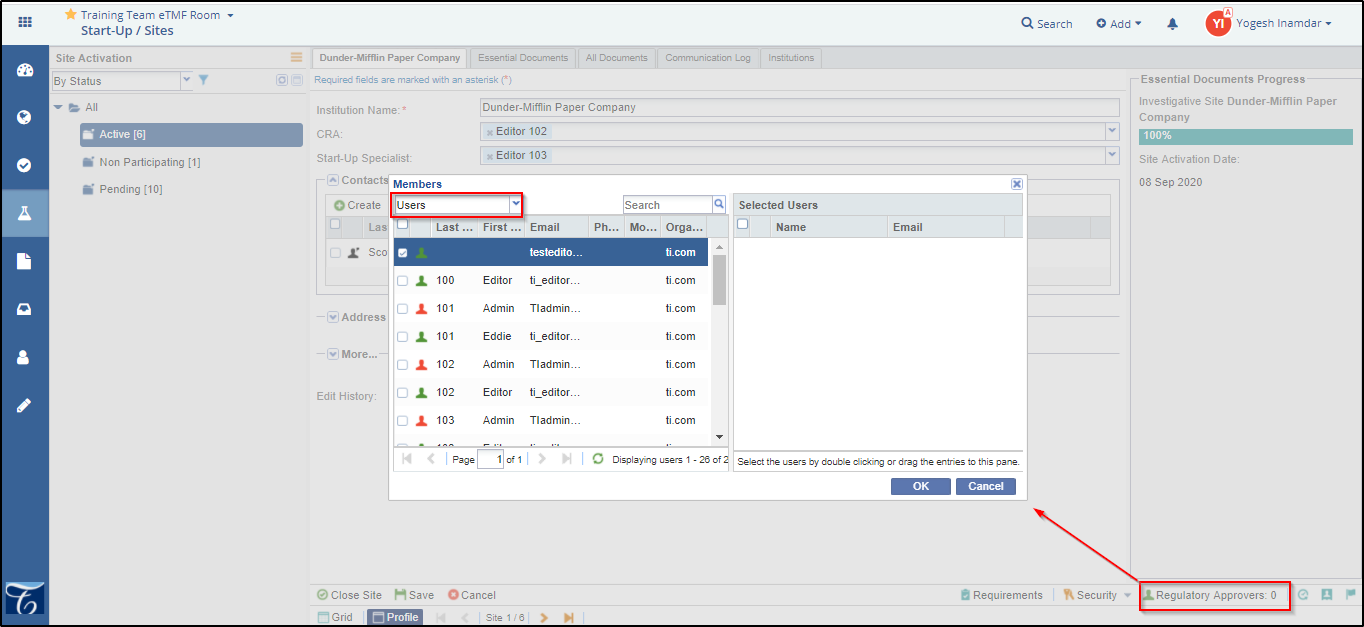
1. Navigate to the SSU module Sites.
2. Double click on the site you wish to add a Site Global Regulatory Approver.
3. At the bottom right-hand corner, click on Regulatory Approvers. Add user(s) by either double clicking on the user on the left-hand side to move to the Selected Members on the right-hand side or dragging and dropping the user from the left-hand side to the Selected Members on the right-hand side.

