
Creating Quality Control Workflow
To create a Quality Control workflow follow the procedure below:
- Click the Add button from the grid.
-
- The Workflow Editor window will open. Refer to the screenshot below:
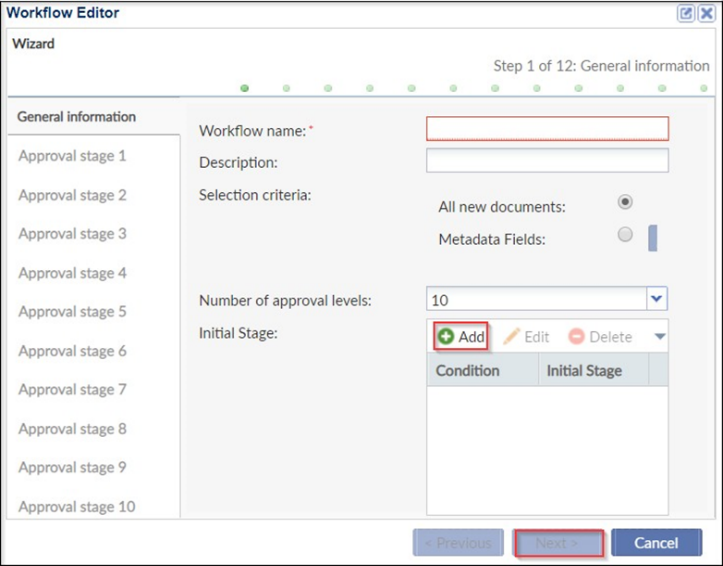 Figure 96: Workflow Editor
-
- Enter the Quality Control Workflow name and Description.
- The Selection Criteria could be All new documents or only those Metadata fields that need to be reviewed. Refer to the screenshot above.
- Select the workflow levels, i.e. QC1, QC2, and so on.
- You may apply a condition to select documents for review as per a particular condition. Click ‘Add’ to add a condition from the Initial Stage box. Refer to the screenshot above.
- The Initial Stage Condition window opens. Refer to the screenshot below:
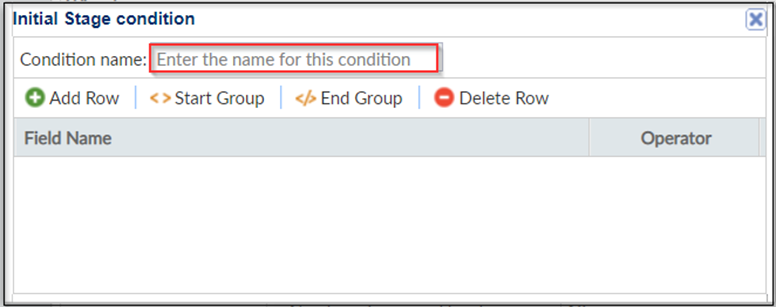 Figure 97: Initial Stage Condition
- You may add multiple conditions and decide their sequence to
filter documents with the green arrow keys. Use And / Or operators
if you want all / either of the conditions to execute. Refer to the
screenshot below:
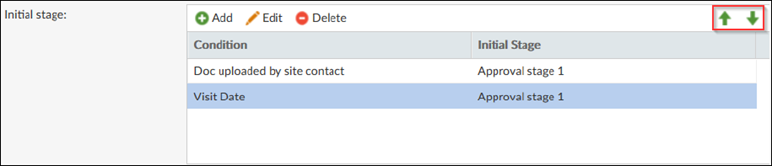 Figure 98: Initial Stage
- As per the screenshot above, documents uploaded by the site
contact on a particular site visit date would be added to the
workflow. The details of each condition are as below:
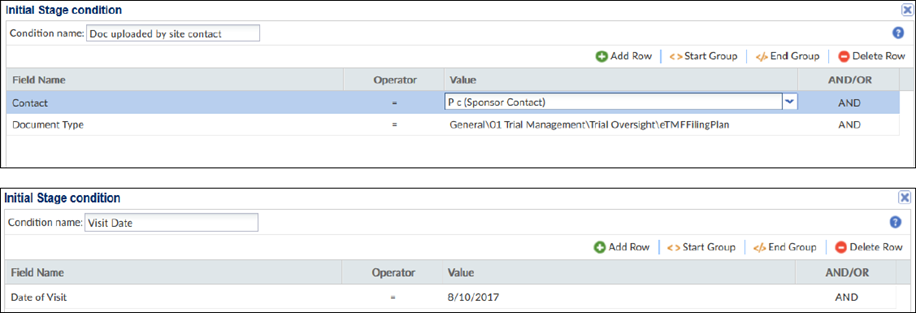 Figure 99: Initial Stage Condition
- Thus, as per the above conditions, documents of type ‘General\Trial Management\Trial Oversight\eTMFFilingPlan’ uploaded by the site sponsor on the site visit date of 10th of Aug. 2017 would be added to the workflow.
- Click Next. This leads you to the configuration wizard of the
first stage of the workflow. Refer to the screenshot below:
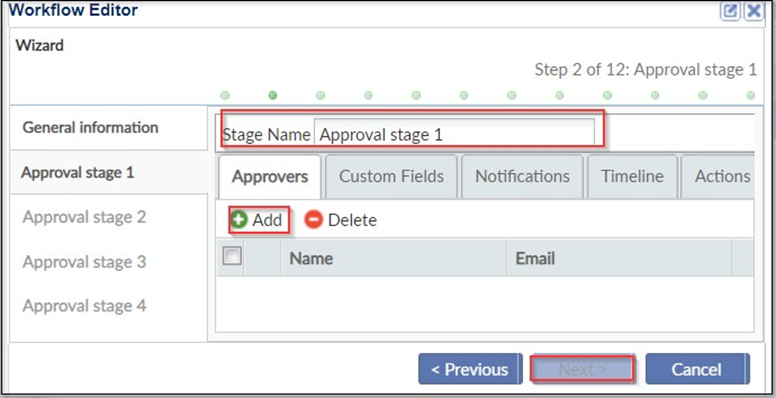 Figure 100: Workflow Editor
- Change the Stage Name, if desired. Click the Approvers tab. Refer to the screenshot above.
- This allows you to add users/groups as reviewers of the
documents for the particular stage in the workflow.
Note: It is recommended to add a Group to save configuration time.
- Click the Custom fields tab. This is a required tab and
Statuses, and Issues must be added. Refer to the screenshot
below:
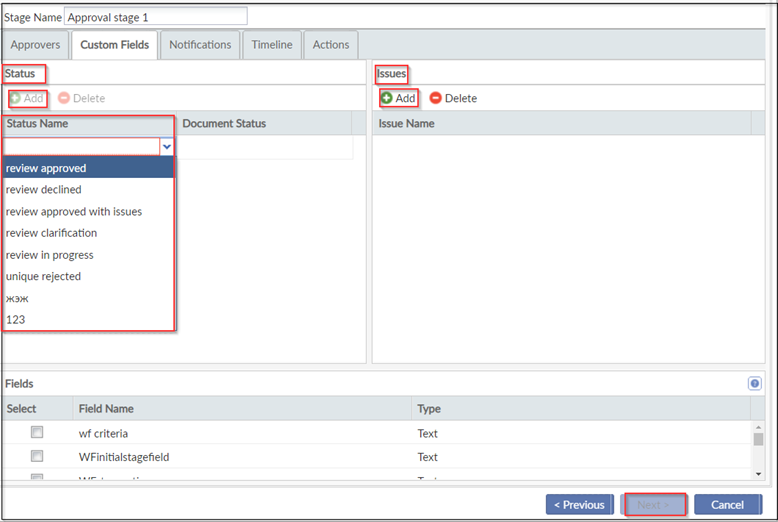 Figure 101: Approval Stage One
The statuses are the ones previously created. Click ‘Add’ to add the first status and select the document status from the dropdown. Refer to the screenshot above. Approved and Rejected are the minimum statuses that need to be added to a workflow. You can include more statuses, like Clarification and In Progress, for better functionality of the workflow.
- Click the Issues section to assign the reasons in case the reviewer rejects a document/asks for clarification. Some of the standard issues could be Missing Pages, Missing Signature, Blank Pages, Incorrect Study, Poor Scan, Duplicate, and Expired Documents.
- To make metadata fields, as required, available for a workflow
configuration, proceed to Forms Settings and select the Workflow
Fields, as required.
- These fields will appear in the Fields panel at the bottom of
the Customs tab. Tick the fields as required for the review. Refer
to the screenshot below:
 Figure 102: Fields
- These checked fields will appear in the Review panel of a document in the eTMF/ Documents module once a document is claimed for review.
- As shown in the screenshots, the Submission Date, Approval
Date, and Document Version fields checked in the workflow
configuration appear in the Review Panel of the document metadata
window.
 Figure 103: Document Data Test
- These fields will appear in the Fields panel at the bottom of
the Customs tab. Tick the fields as required for the review. Refer
to the screenshot below:
- Click the Notifications tab.
- Here, you can allow for email notifications to be enabled for the event names listed.
- For users who want to be notified only in case of Claim, Release, or Escalation, groups can be added accordingly.
- In case you have fed in values in Timeline Configuration, the values would be populated by default in the Timeline tab. You may choose to override the previously set configurations if desired.
- Actions is an optional tab allowing for complex workflow
building.
- It enables a workflow to have a jump. A specific document can jump to a certain stage.
- For example, a Form FDA 1572 after QC1 review, can jump to a stage 3 review, where Regulatory Affairs perform a 2nd review on the document.
- While efficient for complex workflows, it is not required for regular workflows creation.
- Click Next when all tabs have been reviewed.
- Repeat similar steps for each stage of approval.
- Settings may change per approval stage, like approvers, notifications, and timelines.
- When finished, click Next.
- The Workflow finish is the last step. Any errors in the workflow will appear here that need to be addressed. If there are no errors, click Finish when done.