
Signing the Document and Approval Workflow
To sign a document and initiate the approval workflow, follow the steps below.
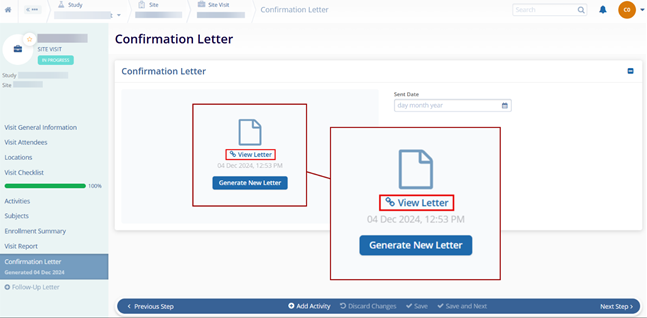
- Click the View Letter hyperlink.
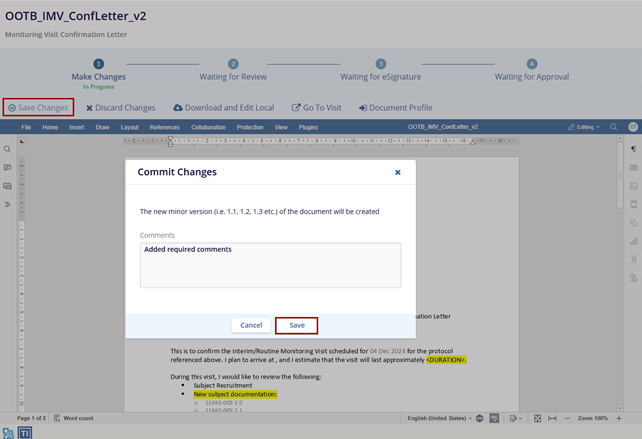
- On the TI viewer of the Trial Interactive Collaborative Room,
opened in a new tab of the browser, click the Edit
Document button displayed in the top left corner.

- Make the required changes in the document and click on the Save Changes button.
- On the Commit Changes popup window, enter the
comments and click on the Save button.
Note:
- The page is refreshed and all the values that are entered in the Visit Report Checklist are displayed in the document.
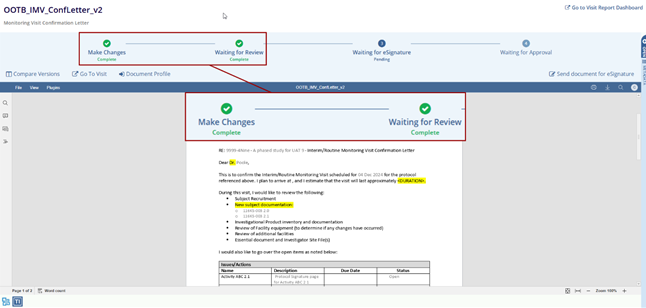
- Once the changes are saved, the Make Changes step shows ‘Pending Status’
- Click the Start Approval Workflow button.

- A notification is displayed in the top right corner – Add
document(s) to Monitoring Visit Workflow.
Note:
- The Make Changes stepper displayed in the top right corner shows a green tick mark with Complete status.
- If the one-step workflow is enabled, the Waiting for Review steeper also shows the Completed status.
- If a two-step workflow is enabled, the reviewer user (probably the CSM user) has to complete that step.
- When the Reviewer signs/approves the review, the Waiting for Review stepper displayed at the top shows a green tick mark with a Complete status with the email ID of the reviewer and the date of process.
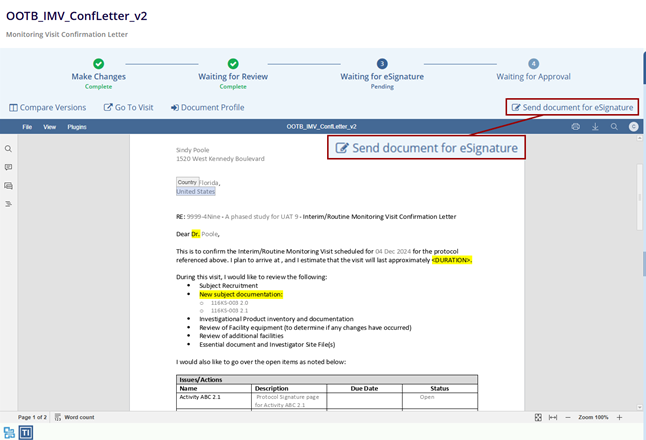
- Click the Send document for eSignature button
displayed in the top right corner.
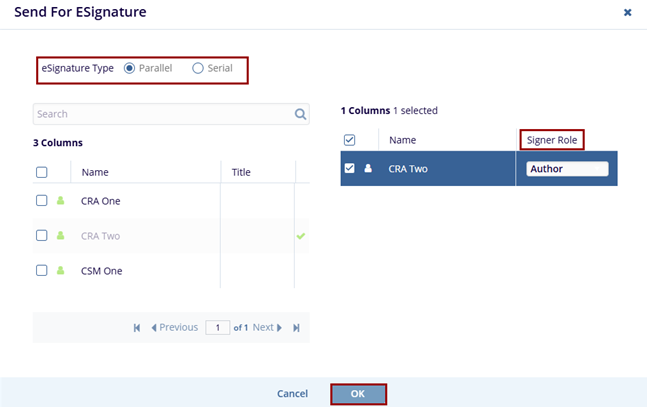
- On the eSignature screen, select a radio button for eSignature Type – Parallel or Serial.
- Select the checkbox(s) displayed in front of the email IDs and mention the ‘Signer Role’ by accessing the dropdown options.
- Click OK at the bottom of the screen. The
document needs to be signed by the number of users mentioned in the
‘Send for ESignature’ window.
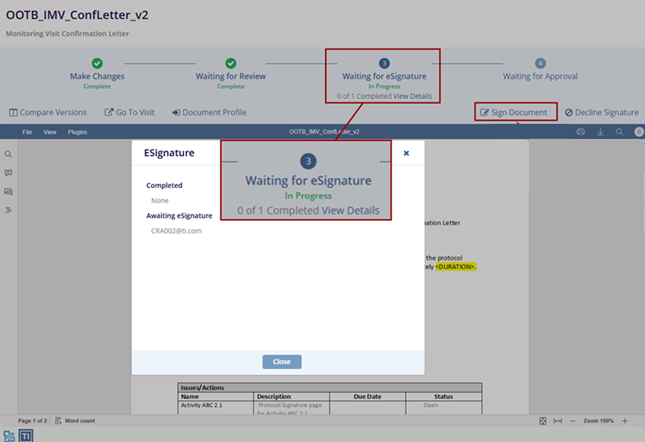
- The Waiting for eSignature stepper displays In Progress with the number of signers. It also displays the ‘Sign Document’ and ‘Decline Signature’ buttons in the top right corner.
- Click on the View Details to check the eSignature status for the letter.
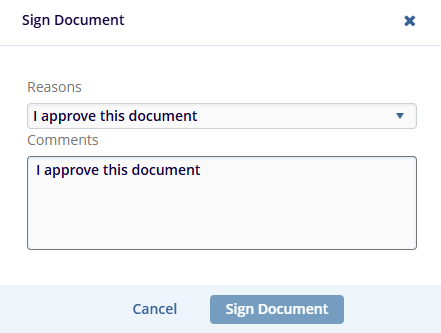
- Click on the Sign Document button.
- On the Sign Document screen, select a reason from the ‘Reasons’ dropdown menu, add the
required comments in the ‘Comments’ section, and click in the Sign Document
button.
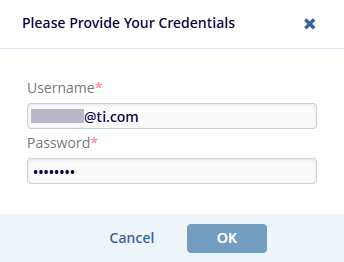
- On the Please Provide Your Credentials screen, enter the Username and Password
in the fields as indicated with an asterisk (*) and click OK.
- The document is signed and approved. The Waiting for Approval stepper displays a green tick mark with the email ID of the signed user and the date of signature below.
- Refresh the page and navigate to the last page of the document to view the signature.
