
General Security Settings
From here you can perform the following functions:
- Logout Timer Configuration
- Invite Participants Settings
- Redaction Settings
- Actions Settings
- PDF Watermark Options Settings
- Document Viewers Settings
- Document Encryption Options
- Confidentiality Agreement Settings
Logout Timer Configuration
Room administrators can set a Logout Timer from the room settings. Refer to the screenshot below:
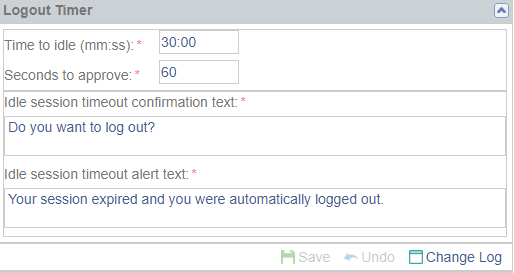 Figure 104: logout Timer Configuration
- Adjust the time a user can remain logged in without being active in the study room.
- You can also adjust the Seconds to approve field. This is the amount of time a user has to respond to the Idle session timeout confirmation message.
- Enter the message that the user sees on the screen when the user is automatically logged out due to an idle session in the Idle session timeout alert text.
- Click Save after any changes or Undo to revert back any changes made.
Invite Participant Settings
As an Administrator, you can add a layer of security to the user registration process. Refer to the screenshot below:
 Figure 105: Invite Participants Settings
To use this extra layer of security:
- Click the Use PIN checkbox.
- Enter a Registration PIN.
- Click Save from the bottom of the grid to save the changes made.
- Remember: You will also need to inform new users of the PIN that you have created. New users will have to enter this PIN before being allowed access to the room’s registration process.
Redaction Settings
- Administrators can choose to enable or disable the Redaction
option in the room. Refer to the screenshot below:
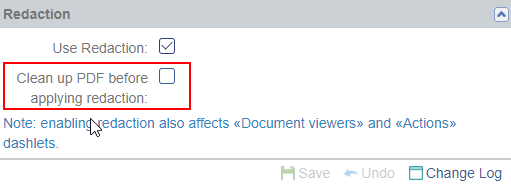 Figure 106: Redaction Settings
In this version , a new checkbox is added “Clean up PDF Before applying redaction.
- Click Save from the bottom of the grid.
Actions
This pane shows the tasks that are enabled for the users in a particular room. Refer to the screenshot below:
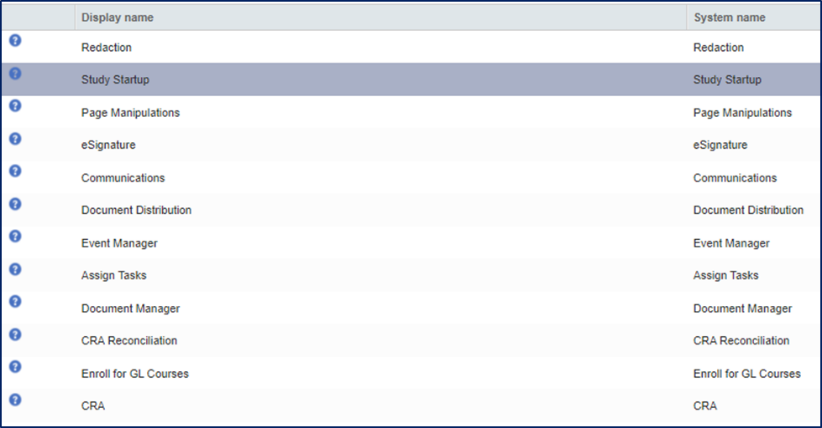 Figure 107: Actions
- Double-click the Display name of the listed action and edit the display.
- Click Save from the bottom of the grid to implement the changes.
PDF Watermark Options Settings
Watermarks can be added to documents downloaded or printed from a study room’s file index.
- Watermarks are only displayed when a document is not in the final workflow status.
- Therefore, once the document becomes final, the watermark will no longer be available on the document; this is an automatic process.
- In this panel, Administrators can select which metadata fields will comprise the watermark, and they can select the appearance and position of the watermark. Refer to the screenshot below:
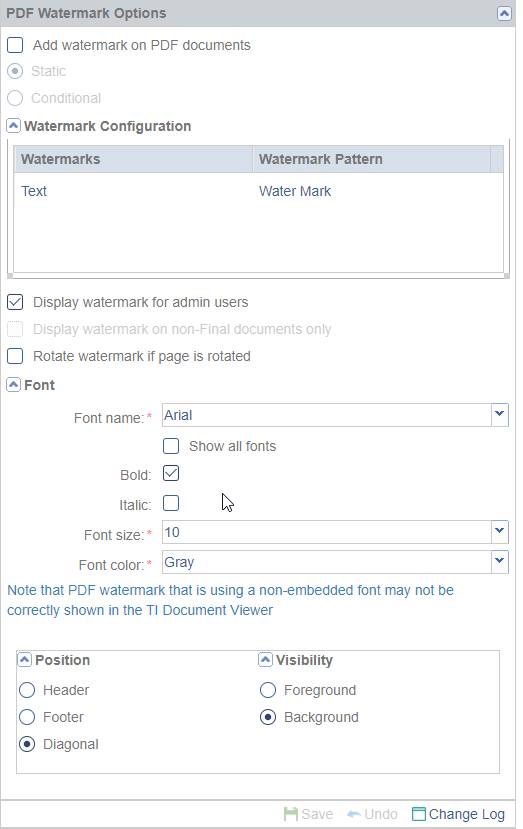 Figure 108: PDF Watermark Options
- Activate or inactivate the Add Watermark on documents option by
clicking the checkbox.
-
- Activation of this option also activates the option of allowing non-PDF documents to be printed or downloaded without watermarks.
-
- Tick the checkbox to Display the watermark for Administrator users.
- Double-click on the Watermark Pattern to enable editing.
- Click on the wrench icon to open the Watermark Pattern window.
- Select from the available insertions in the “Available
Templates” portion of the window.
-
- To use one of these insertions, select the point in the Rule Editor where the text should appear and then double-click on the desired insertion.
-
- Users can also free-type text into the Rule Editor
- When you are satisfied with the pattern, press OK.
- Tick the checkbox to Rotate watermark if page is rotated.
- Select the Font name from the dropdown.
-
- The dropdown list can be extended to include all fonts by clicking the Show all fonts checkbox.
-
- Select whether the watermark text will be rendered as Bold and/or Italic text.
- Select or confirm the Font Size from the dropdown menu.
- Select the Font color from the dropdown menu.
- Select whether or not to Embed the font to the PDF.
- Select the Position of the watermark.
- Select whether the watermark will appear in the Foreground or the Background of the document text.
- Click Save.
Document Viewers
Administrators can select which document viewers are available to room users and which of the viewers is marked as the room’s default viewer. Refer to the screenshot below:
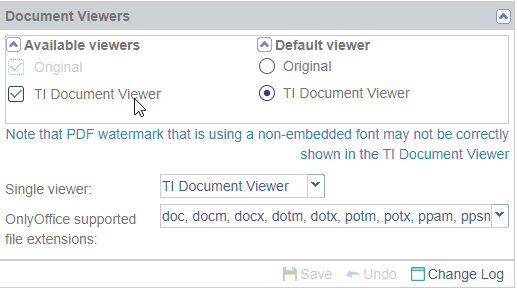 Figure 109: Document Viewers
- Select the viewers that will be available to users in the data room.
- Select whether the Default viewer for users in the room will be
the Original viewer or the TI Document Viewer.
-
- It is our recommendation that the TI Document Viewer be the default viewer. Some document functionality depends upon the use of this viewer.
-
- Select a Single viewer from the dropdown list if you want to restrict the availability for users.
- In this version, a new drop-down menu is added as OnlyOffice supported file extension.
- Click Save.
Document Encryption Options
The system provides Digital Rights Management (DRM) functionality. This feature provides additional security options to the users. Refer to the screenshot below:
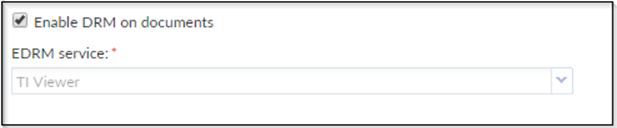 Figure 110: Document Encryption Options
- Use the checkbox to enable or disable DRM on documents.
- Click Save.
Confidentiality Agreement Settings
Another layer of security that an Administrator can add to a room is a Confidentiality Agreement.
- Once enabled, you can choose whether to have the agreement appear only on a user’s initial visit to the room, or have the agreement appear each time users log in.
- You also have the option of designating individual users or groups of users whose email addresses share a domain name who would be exempt from clicking the agreement.
Follow these steps to enable the Confidentiality Agreement:
- Tick the checkbox to enable/disable the Confidentiality
Agreement on this room. Refer to the screenshot below:
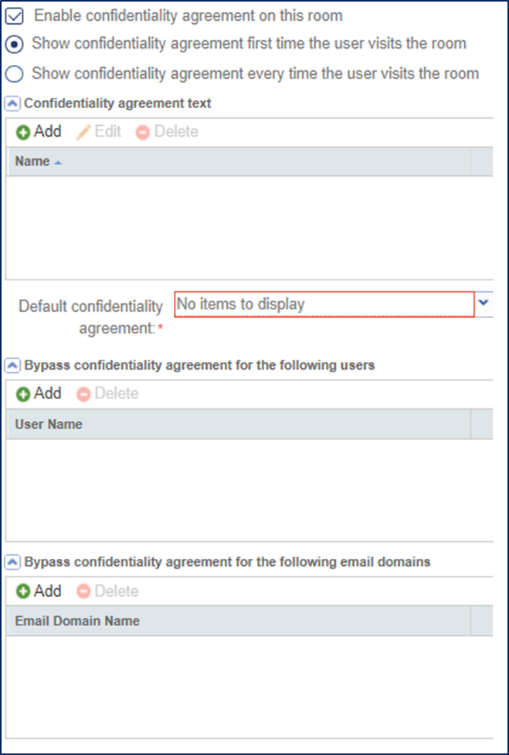 Figure 111: Confidentiality Agreement
- If enabled, select whether to have the agreement show only on the first time a user visits the room or every time a user visits the room.
- To type in the text of the Confidentiality Agreement, click
Add. A pop-up window appears. Refer to the screenshot below:
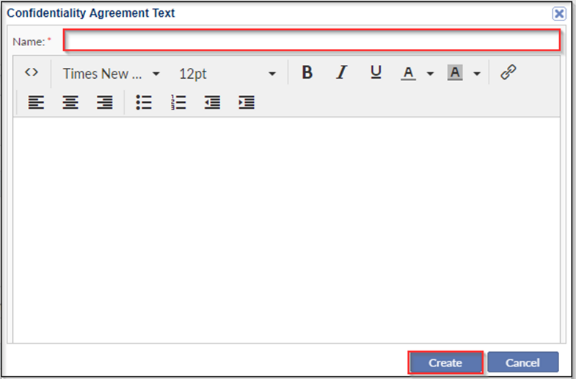 Figure 112: Confidentiality Agreement Text
- Type in the Name of the agreement.
- Click Create.