The Documents Grid Pane
The Grid Pane displays the details of the documents and provides various other functionalities through the Menu Bar on the top, the Document Data Panel, and the Selections at the bottom of the panel.
The Top Menu Bar
The Menu Bar above the Grid Pane holds buttons for various functionalities. Refer to the screenshot below:

Document Dropdown
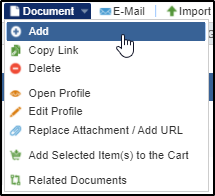
Add documents
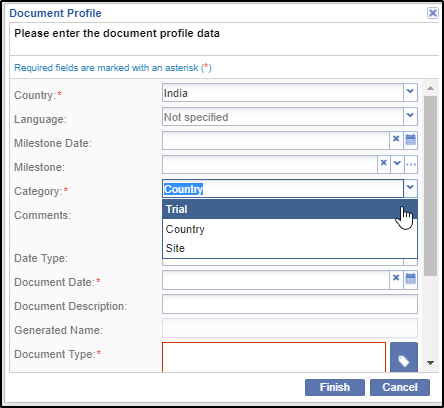
1. Select Add from the dropdown menu. The Document profile window opens.
2. Complete as many of the fields in the Document profile as you can. The fields marked with a red asterisk (*) are required – Title, Category, Index Position, Document Type, Document Date, and Name.
3. The Category could be General, Country, or Investigative Site.
If you select Investigative Site as Category, the document added will be available from the Site to which it has been added. Such a document can be viewed from the By Site Current View in the Document Tab or from the Sites Tab.
4. Click Finish.
Copy Link
Using this option you can copy the link of a document, or copy the link of the document with its metadata.
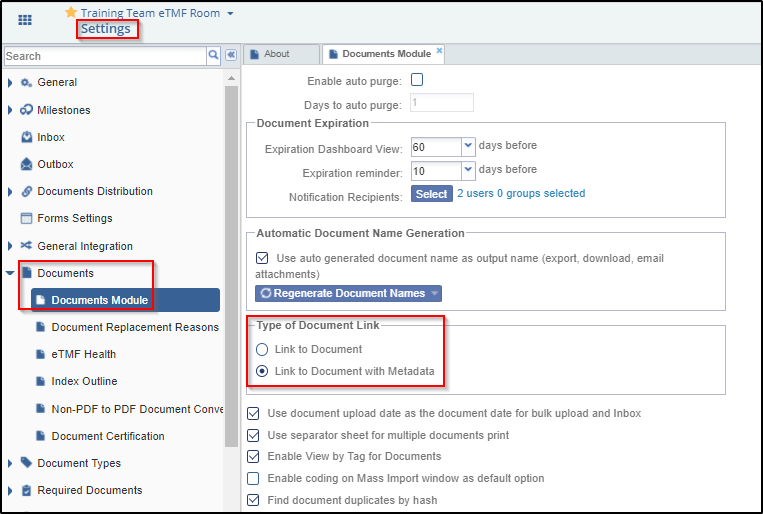
The administrator needs to configure the option that the users would like to use:
1. Navigate to Settings
2. Click Documents from the left pane.
3. Click Documents Module from the dropdown.
4. Go to the tab ‘Type of document link’.
5. Observe that there a two options:
a. Link to document
b. Link to document with metadata
2. Select the option as required.
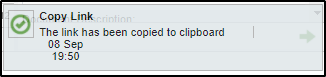
To copy the link of a document:
1. Select a document from the grid of the Documents section, or from the All Documents tab in Sites section.
2. Right click the document or activate the Document dropdown.
3. Select option Copy Link.
4. The document URL gets copied to the clipboard.
6. Paste the copied URL in a browser tab.
7. The document opens in the browser for you to read.
Edit Profile
1. Select a document from the grid.
2. Activate the Document dropdown menu and click Edit Profile. The Edit Document Profile window opens.
3. Make the necessary changes to the profile data fields as required.
4. Click Finish.
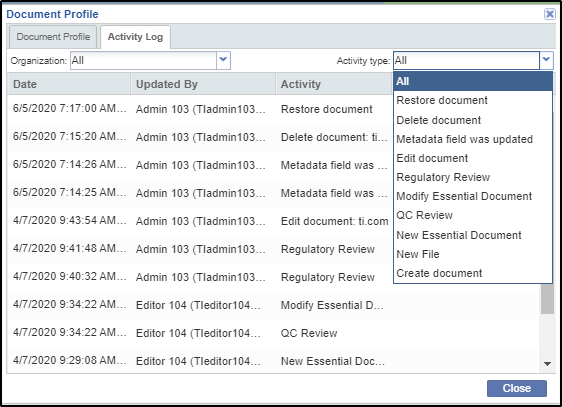
Open Profiile
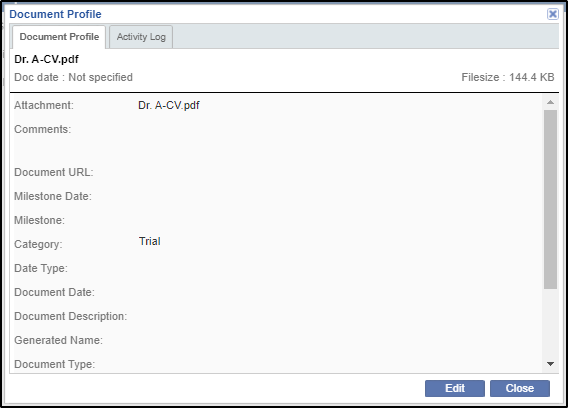
This window consists of two tabs: Document Profile, and Activity Log.
The Document Profile tab shows the profile of the document. Refer to the screenshot above.
Clicking the Edit button leads you to the Edit Document Profile window.
Replace Attachment / Add URL
You can replace the attachment to a document type if it is not approved by using this feature.
1. Select the document from the grid.
2. Activate the Document dropdown.
3. Click the option Replace Attachment / Add URL.
4. The Replace Attachment / Add URL window opens.
5. Change the attachment as required and provide the reason for the same.
6. Click Save.
Add Selected to the Cart
You can add a document selected from the grid to the cart to compare documents, link them, add them to the submission package, or download documents.
Related Documents
1. Select a single document in the Document Grid.
2. Click the Document dropdown menu.
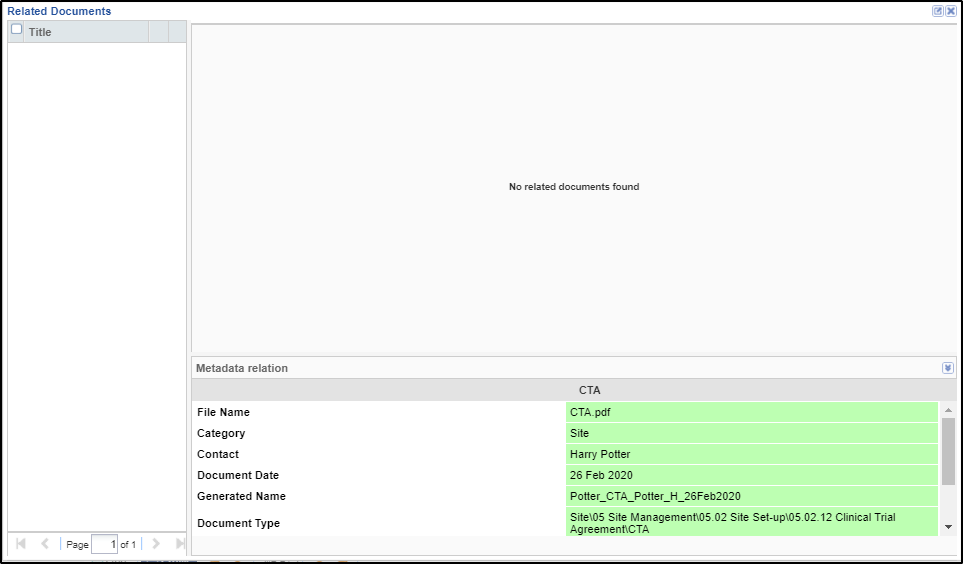
The top part of this window shows the documents located in the search through the room’s default viewer. The left panel lists the related documents by title. The right portion of the window carries the Metadata Fields of the related documents. The metadata fields that have common content are highlighted in green.
The procedure to send out emails is the same as described under Essential Documents.
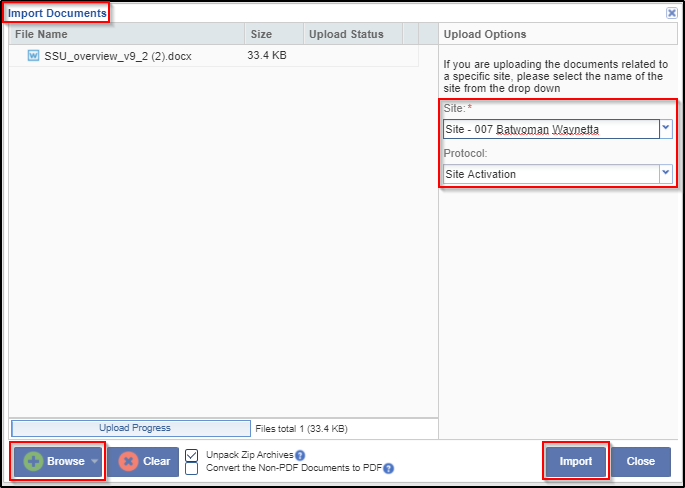
Import
from the menu ribbon. An Import Documents window opens.
2. The Upload Options depend upon the view selected – By Site, By Country, or By IRB/EC.
3. Select your choice from the dropdown menu in the field in the ‘Upload Options’ panel.
4. You can add documents to the window by using Browse and selecting the appropriate files for upload, or the user can drag-and-drop appropriate files, en masse, directly from a document library. You can tick the ‘Unpack Zip-archives’ if you have uploaded a zip file and want to import the documents in the zip as separate documents.
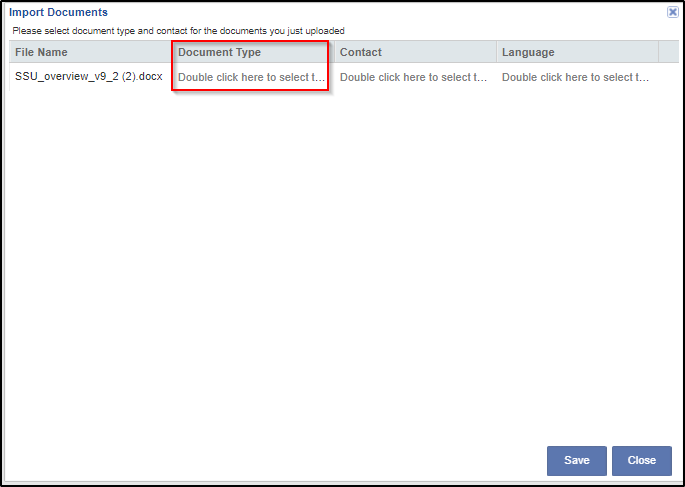
7. Following the on-screen instructions, double-click the Document Type field
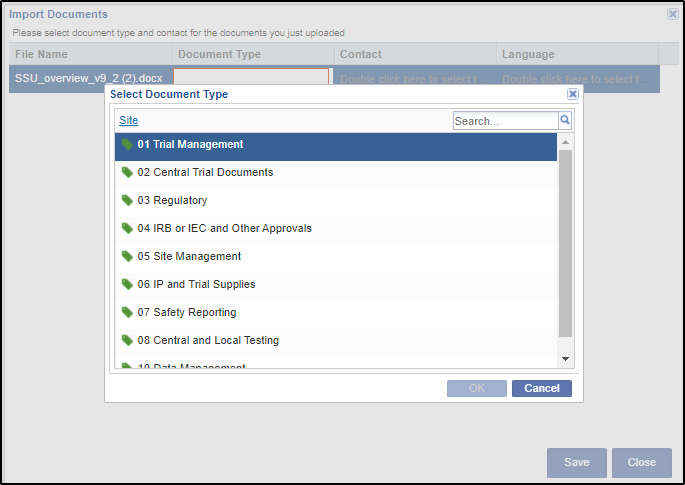
8. Select the document type that matches the actual document for each uploaded document.
9. Click Save. You return to the Documents view.
Move to eTMF
You can move a document selected from the grid in the eTMF by clicking the Move to eTMF button on the menu bar. This opens the Select index position to place the document window. Refer to the screenshot below.
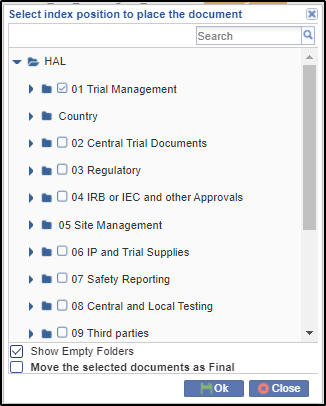
Select the appropriate folder to move the document to and click Ok.
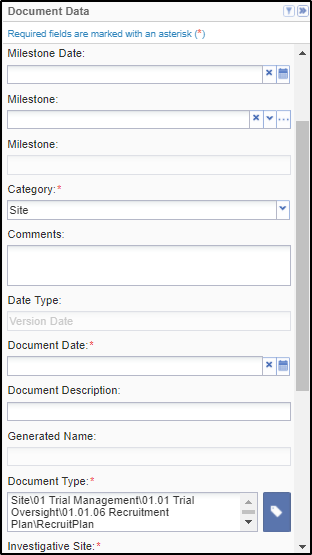
Document Data Panel