My Profile Main Section
| Sub-sections with the My Profile Main Section | Purpose |
|---|---|
| General Information |
From this section, you can set your time zone, language for your user interface, and the date format preferred by you. |
| Change Password |
From this section, you can change your existing password to set a new one. |
| Password Recovery - Secret Questions |
You are required to set the answers to two secret questions to help recover your password if you happen to forget it. |
| User Avatar | From this section, upload a new avatar image for your user profile. |
| Sites Filtering Options | From this section, you can choose to view only those sites where you are CRA. |
| Change Email Address | From this section, set your contact email address. |
| Default Context Configuration | From this section, you can set the default landing page when you enter a room. |
Each of these is discussed in detail in the sections below:
General Information - Time Zone
To set the time zone applicable to you:
- Click the Time zone dropdown to reveal the popup with the time zones.
- Scroll up or down to locate your time zone and click the applicable time zone to select it.
- The selected time zone displays in the box.
- A popup confirming the same appears. Click the ‘x’ on the popup to dismiss it.
- Click Save.
General Information - Language
To set your preferred language:
- Click the Language dropdown.
- Scroll down to locate your preferred language.
- Click the language to select it.
- The selected language displays in the box.
- A popup confirming the same appears. Click 'x' on the popup to dismiss it.
- Click Save.
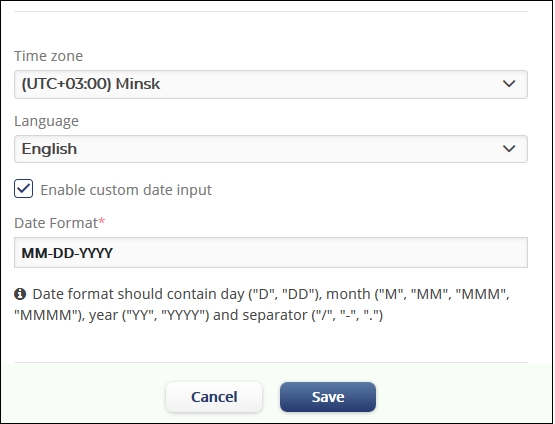
General Information - Enable Custom Date Input
With the Trial Interactive 10.0 release, while coding a document, in addition to selecting the date from the Calendar Date Picker, you can directly type in dates in the format preferred by you. The system interprets the date entered by you manually and saves it based on your geolocation that it is capable of detecting.
To be able to manually type-in dates, you will need to enable the manual entry of custom dates from this section of your My Profile. Refer to the screenshot below:
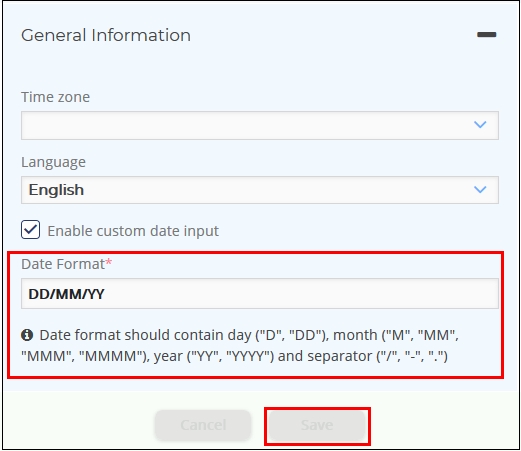
- Tick the checkbox Enable custom date input.
- The Date format textbox gets active. Enter the date format as preferred by you. Some of the most common date formats are MM/DD/YY, DD/MM/YY, MM/DD/YYYY, DD-MMM-YY.
- You also have the information text below to help you enter the date format correctly.
- Once done, Save the changes. You will now be able to enter dates manually if you so choose.
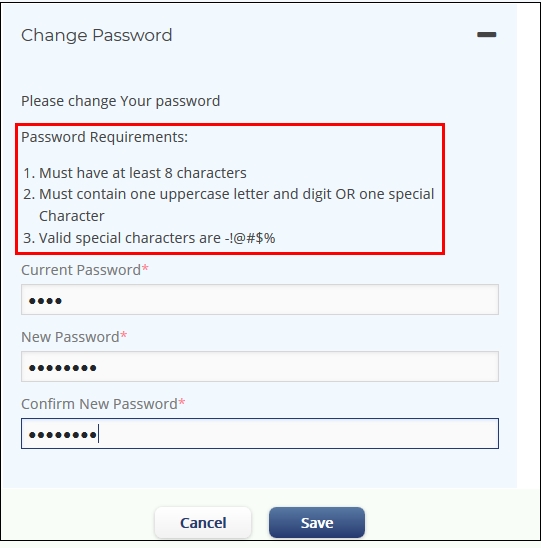
Change Password
From this section, you can change your existing password to set a new one.
To set the password:
- Enter the new password in the New Password text field.
- Re-enter the password in the Confirm New Password field.
- Click Save for the new password to be applicable. Refer to the
screenshot below:
Password Recovery - Secret Questions
You are required to set the answers to two secret questions to help recover your password if you happen to forget it.
To set the secret questions and their answers:
- Click the down arrow in the Question 1 field.
- Scroll the popup through the list of questions and click on a question of your choice to select it.
- Enter the answer in the Answer field.
- Repeat steps 2 and 3 to set Question 2 and its answer.
- Click Save.
User Avatar
Click Browse in the panel to upload a new picture for your login and click Save.
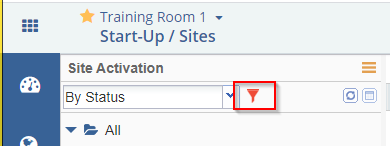
Sites Filtering Options
You can choose to view only those sites where you are the CRA or only SAS Sites from the Sites sub-module or in the SSU application in Trial Interactive by ticking this checkbox and Saving the changes. Refer to the screenshot below:
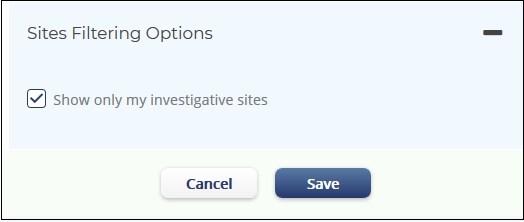
On selecting this option, the toggle in the Sites sub-module appears in red color. Refer to the screenshot below:
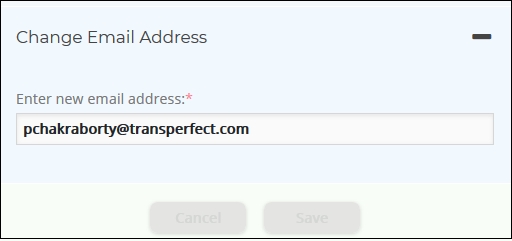
Change Email Address
This will change the email address of the user. Enter your new email address and click Save.
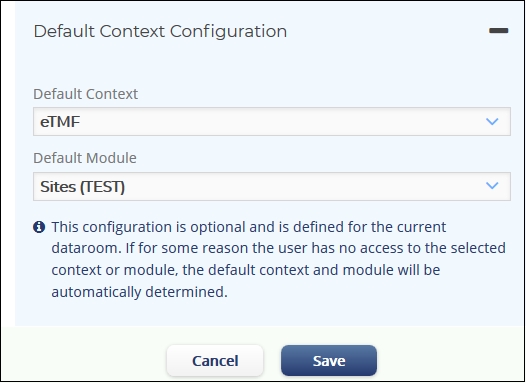
Default Context Configuration
You can choose your preferred landing page once you enter your room by selecting your Default Context as shown in the screenshot below:
- Select the Default Context from the Default Context dropdown.
- Select the preferred view from the Default module dropdown.
- Click Save.