Sending a Rejection Notification
The notification should include the reason for rejection, any necessary corrective actions, and instructions for resubmission if applicable. The format and method of notification (email, system alert, or both) should align with the organization's SOP requirements.
To send a rejection notification, follow these steps:
- Navigate to the My Review section available in the vertical menu at the left side of the screen.
- Click the 2-Step Workflow dropdown menu above the index pane. This will display the folder with status.
- Locate the document in Claimed folder. If the document has not been claimed, please see the section on Claiming a Document.
- Check the checkbox and open the document and review it according to any established guidelines for the document type.
- If the document is in good order and can be accepted, review the metadata associated with the document and make any corrections or fill in any required fields.
- At the right side of the screen, in the metadata panel, there is a workflow status area. This section is named for the workflow QC1.
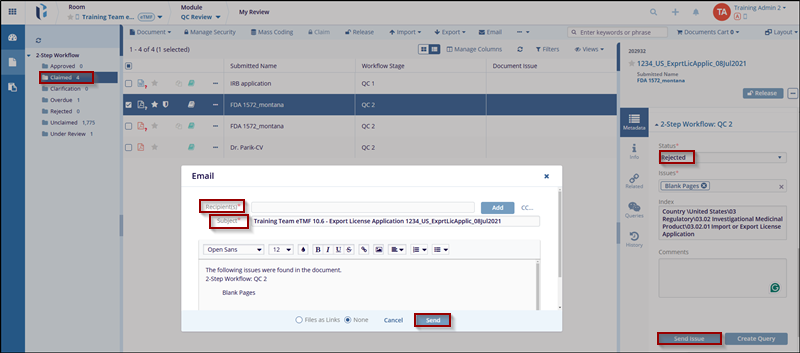
- Select the status: Rejected.
- Below the workflow comments box are two buttons Send Issue and Create Query. Once the status has been assigned and the issues have been noted in the comments, press the Send Issue button, this will open an email window.
- The submitter of the document is populated by default in the Recipients area. Add any additional recipients as appropriate.
- The text that populates comes from both a standard email template and from any comments/issues indicated, make any necessary additions or changes to the displayed text.
- Indicate, using the radio buttons at the lower left whether or not the document should be supplied to the recipient and, if so, in what manner.
-
Click the Save button to save these changes.