
Importing Metadata and Document
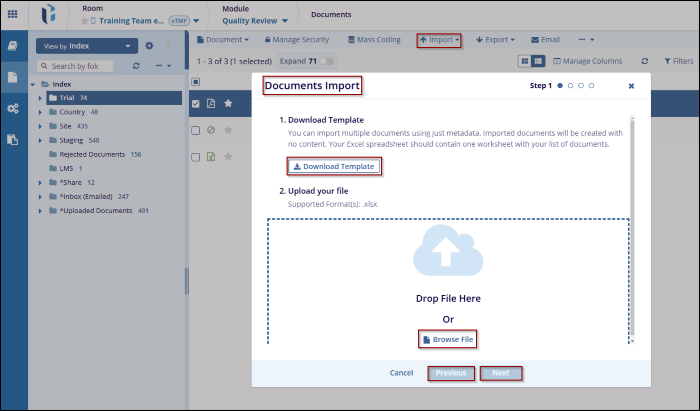
- Click on the Metadata dropdown arrow, and select Metadata, a new window titled Document Imports will appear.
- In the Document Imports window, click on Download Template to get a pre-formatted file that contains the required metadata fields.
- Open the downloaded template and fill in the necessary details as per the system guidelines.
- Under the Upload Your File section, locate the Browse button. Click Browse to open the file explorer.
- Select the appropriate file or folder containing the metadata information.
- Once selected, the system will display the chosen file. Click Next to proceed.
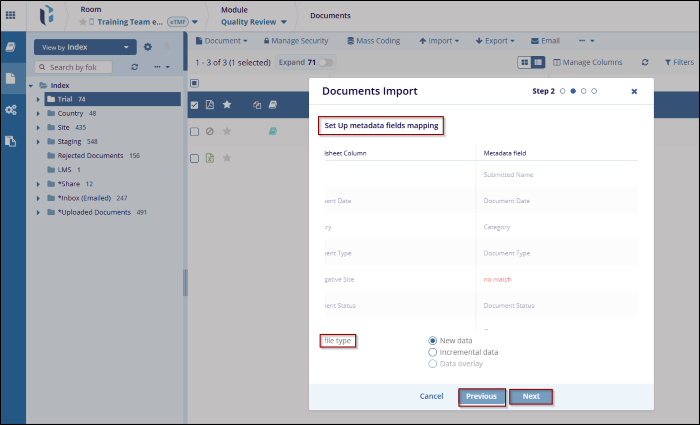
- The system will present a metadata field mapping screen, ensuring that each column from the uploaded file is correctly mapped to the system's metadata fields.
- Once the mapping is correctly set, click Next to proceed. If any errors are detected, click on the Previous button and go back to correct them.
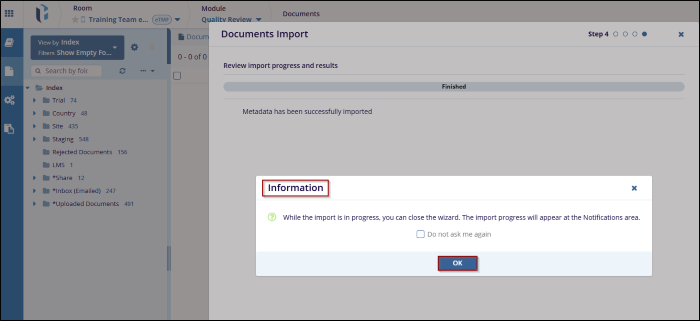
- Once confirmed, proceed by clicking Next to Import the data.
- Click OK to View the results.
Document
The Document Import enables users to import actual document files into the system. Users can upload documents in various formats (e.g., PDFs, Word documents, images) and associate them with the appropriate metadata, ensuring they are stored and accessible within the system.
To Import Documents, follow these steps:
- Click on the Metadata dropdown arrow, and select Document a new window titled Document Imports will appear.
- Drag and Drop files and folders or click on the Browse button to select files/folders from your system.
- On the right side of the Import Document window, fill in the required metadata fields.
- Available metadata fields include: Index Positions, Events, Country, Document Type,
Placeholders, etc.
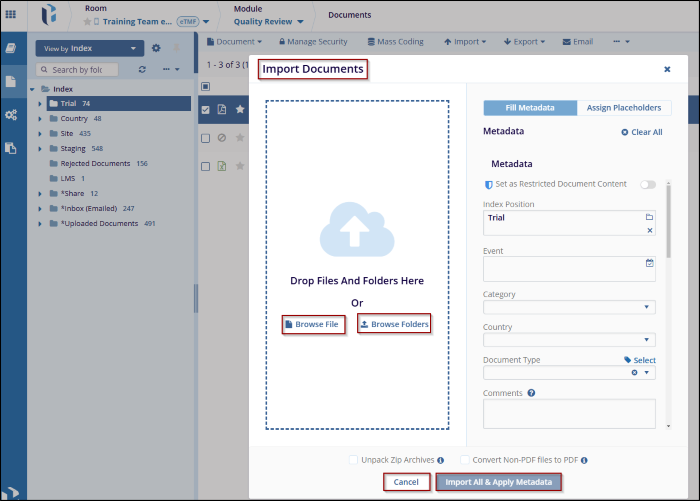
- Once all required metadata fields are filled, review the information for accuracy.
- Click on Import All & Apply Metadata to process the import and confirm the successful metadata applied.