Creating a Contact
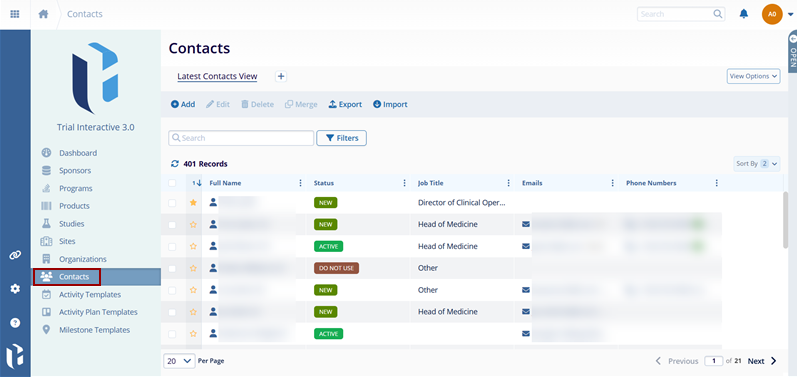
To navigate to the contacts list and view all the contacts, follow these steps:
- From the left-hand navigation links, select Contacts.The Contacts screen
opens where contacts are displayed at a global level.

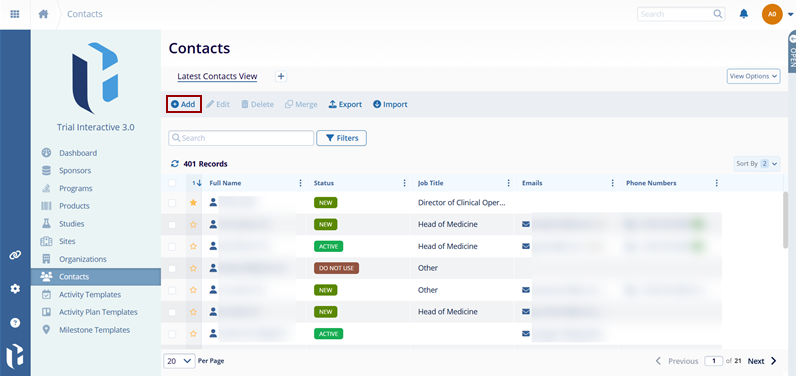
- Click on the +Add button on the top menu bar from the Contacts screen.

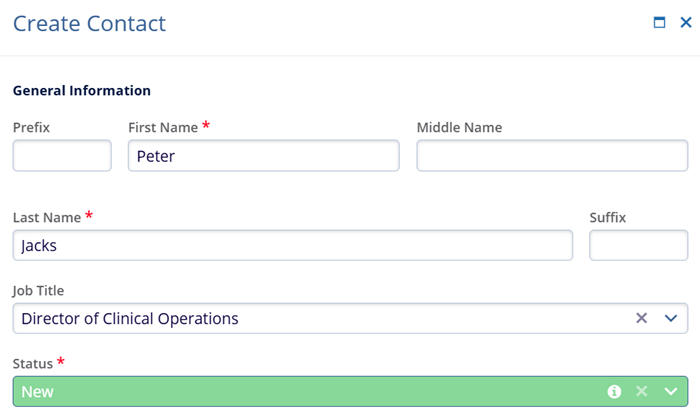
- On the Create Contact window, fill up the following mandatory information into the
respective fields to create a contact. Certain fields are optional but are recommended to be
filled.
- Prefix: Enter the prefix (e.g., Mr., Mrs., Dr.) if applicable.
- First Name*: Enter the first name of the contact. E.g., Miguel
- Middle Name: Enter the middle name if applicable.
- Last Name *: Enter the last name of the contact. E.g., Lopez
- Suffix: Enter the suffix (e.g., Jr., Sr., III) if applicable.
- Job Title: Enter the job title of the contact if applicable.
- Email Address: Enter the email address of the contact. Entry of an email address is recommended for better communication.
-
Status*: Select the status of the contact from the dropdown menu. A tooltip
showing the status meaning is visible for each status.
- New
- Active
- Approved
- Do not use
- Inactive
- No longer needed
- Pending Approval

-
Phone Numbers: Click on the +Add button to include phone numbers for the
contact. Set a contact type by accessing the dropdown options. Click on the checkbox to
set the number as a primary contact.

-
Emails: Click on the +Add button to add a new email address. Click on the
checkbox to set the email address as a primary email address.

-
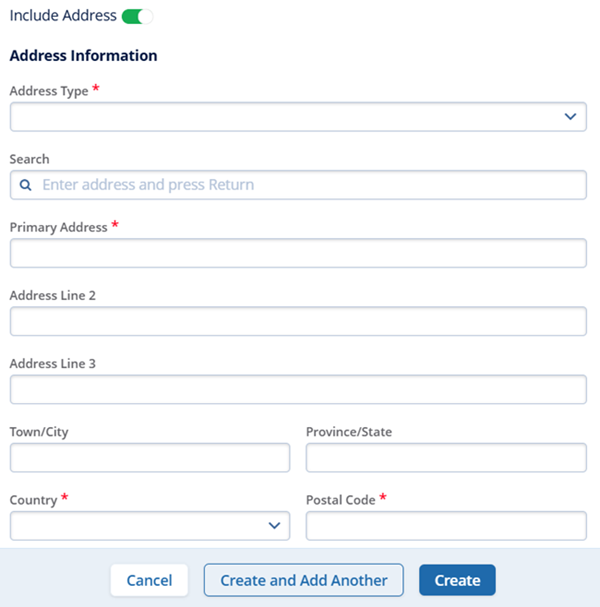
Include Address: Toggle the switch to include the address of the contact.
Enter the address details if the switch is turned on.

- Once all the required details are entered and verified, the user can perform the following
actions.
- Clicking on the Create button saves the contact details.
- Clicking on the Create and Add Another button saves the contact but enables the user to add another contact there itself since the Create Contact screen will remain intact.
- Clicking on the Cancel button will cease the contact creation process.
- Once the contact is successfully created, it appears on the Contacts screen.

Note: Fields highlighted with a red asterisk (*) mark require a mandatory update.
