
Resolving a Workflow Query
When a query is first created, it appears in ‘Pending’ status to indicate that the system has not received a response from the recipient. When the query changes to ‘In Progress’ status, the system has received a response. This will happen whether the system receives an actual response or if it receives an out of office message. If that happens, the user may want to use the ‘Return to Pending’ option in the Info area of the Queries module metadata panel.
‘Working’ a query can happen from multiple locations in the system. The user who opened the query can review the query process from the following areas:
- The Documents Module
- The Reviews view
- Query by Sender view
- Query by Recipient view
- Any other view where the document can be chosen and the metadata panel can be accessed
- The Queries Module
- The My Queries Dashlet
- The QC Workflow module
These instructions will direct the user based on the assumption that the query is being tracked and worked from the Queries module of the study room but the steps below are appropriate to any of the areas mentioned above.
To resolve a query, follow these steps:
- Locate the ‘In Progress’ query
- Pending queries can be resolved too but the status indicates that no response has been received.
- Click on the query in the grid.
- The metadata panel will load
- For users who opt to perform these steps from other locations in the system,
you may have to select the Query tab of the metadata panel.

- The query response will appear lower down in the panel and is usually colored green or blue depending upon your system settings.
- Read the response and, if it answers your question, press ‘Resolve Query’
- The ‘Resolve Query’ window will open.
- Add a comment indicating why the query is being resolved.
- Choose your Resolution type using the dropdown menu.
- Resolve – This option would be used if no replacement document was received during the query process.
- Resolve and Replace using selected attachment – This option would be used if the user wants to replace the attached file.
- Resolve and create new document – This is primarily used when the document received in the query response should be used but is significantly different from the one received.
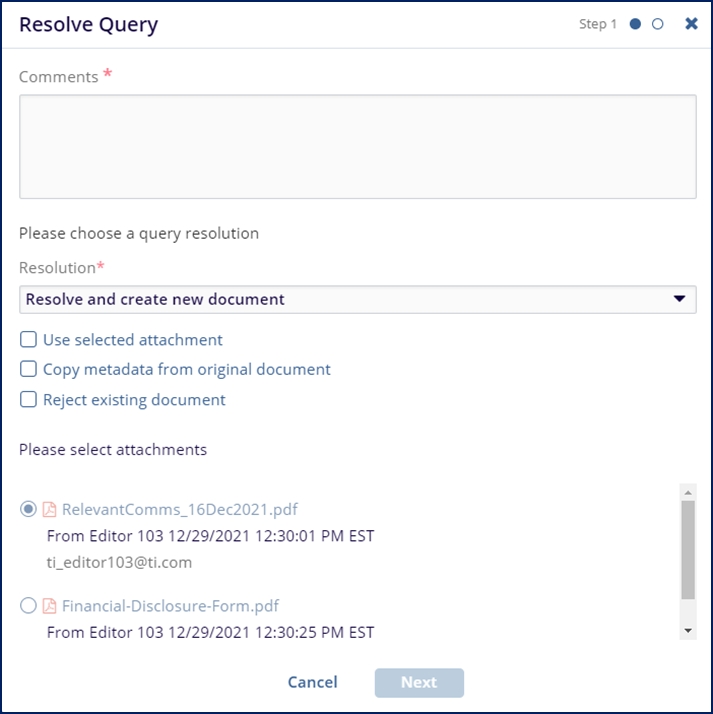
- Please note that the checkboxes become active asking the user to clarify what action is to be taken next:
- Use selected attachment
- Copy metadata from original document
- Reject existing document
- If appropriate, choose the file to move forward with.
- Press ‘Next’ or ‘Resolve’
- If you have chosen either the ‘Resolve’ or ‘Resolve and replace using selected attachment’ option then this is the last step.
- If you have chosen to reject the existing document and use a replacement attachment, press ‘Next’
- Apply the correct metadata to the new document.
- Press ‘Resolve’