
Incident Approval
Once the Investigation is completed and sent for approval, a QA will receive an email notification.
Please note that the Approval process is explained in this section. All modifications, such as Clarification, Cancellation, and other related actions, must be configured through the workflow settings.
To create and learn more about CAPA, click here.
To create and learn more about an Action item, click here.
- From the Home Page, navigate to the room to perform this activity.
- Click the Waffle Menu located at the top-left corner of the screen, then select
Quality Module. The user will be redirected to the Quality Module’s Dashboard
screen.
.png)
- In the left navigation panel, click the Incidents icon, which will open the Incident screen.
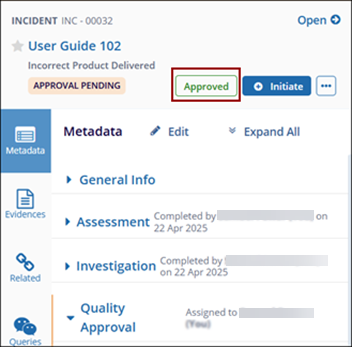
- From the grid, select the incident to view its metadata panel. The incident is in the Approval Pending Stage.
- To proceed further with the approval process. Click on the
Approve button. Refer to the screenshot below.
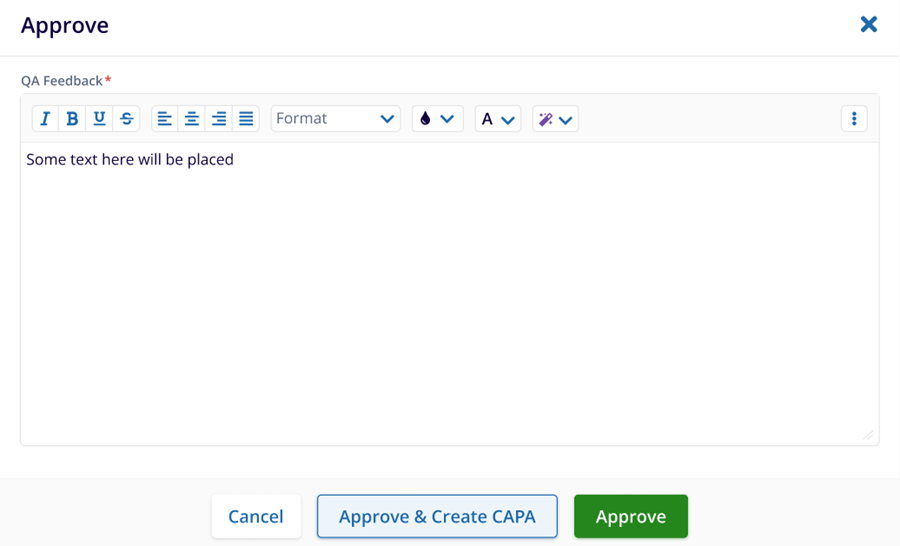
- The Approve window will appear with a feedback box. Provide feedback as per the requirement.
- Click on the Approve button to approve the Incident.
- The status of the incident will change to Resolved.