Cancel Incident
Incidents can be canceled at any stage, depending on the configuration of the workflow. Once an authority cancels a CAPA, the record is removed from the workflow.
Follow the steps below to cancel an Incident:
-
Navigate to the My Assignments view and select the Incident to cancel.
Once selected, the Incident metadata panel will appear on the right side of the screen.
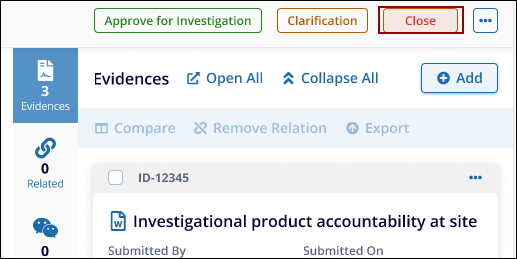
- On the metadata panel, at the top-right side, click the Close button.
(Refer to Screenshot - The Close button appears along with other action options like Approve for Investigation and Clarification.)
- A Close Incident pop-up window will appear.
- In the pop-up window. Enter the Reason for closing the Incident
in the provided text area.
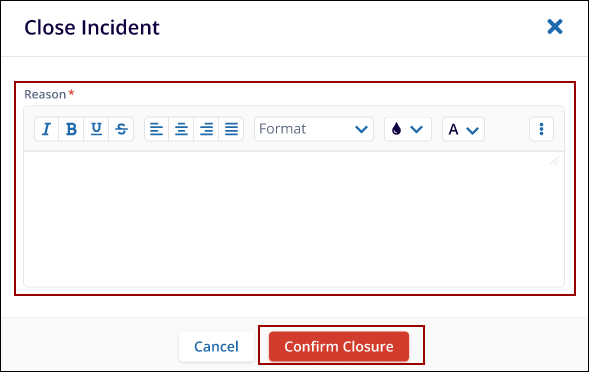
- Provide the reason for closing the incident and click on the confirm closure button to complete the cancellation.
- Once confirmed, the Incident will be closed, and a success message will appear at the top-right of the screen.
Start Investigation
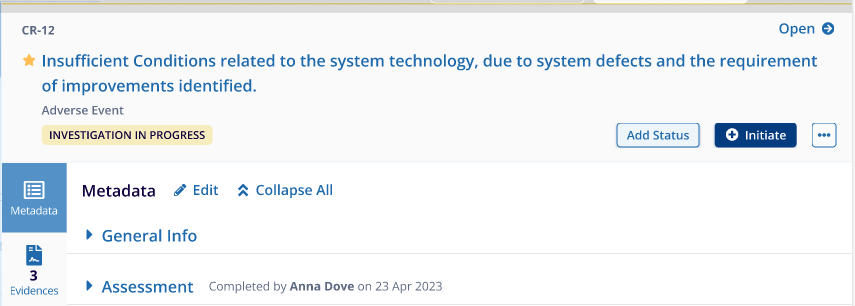
After an Incident is claimed and completed by the assigned Process Owner during the Assessment Stage, it transitions to the Investigation Stage.
At this point, the assigned Main Investigator receives an email notification informing them of the new assignment.
Note: Actions like Clarification, Cancellation, and other modifications are configured within the system's workflow settings.
Follow the steps below to start the Investigation
- From the Home Page, navigate to the room where to perform this activity.
- Click the Waffle Menu at the top-left corner of the screen and select Quality
Module. The user will be redirected to the Quality Dashboard.
.png)
- Click the Incidents icon in the left navigation panel to open the Incident screen.
- From the View by options, select the My Assignment option. All
incidents will be displayed as shown in the screenshot below.
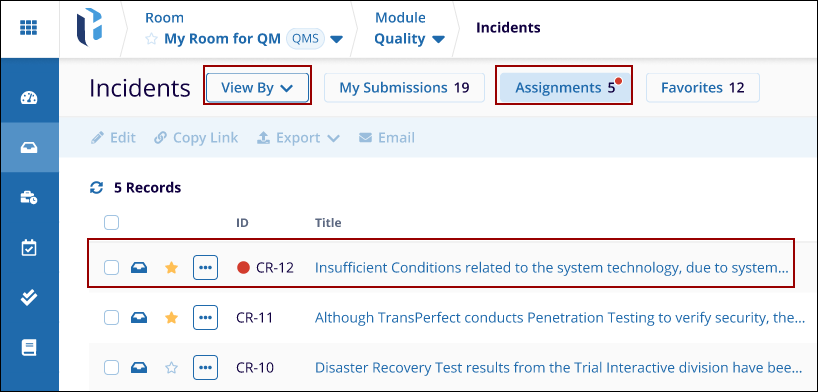
- Select the Incident received in the email notification.
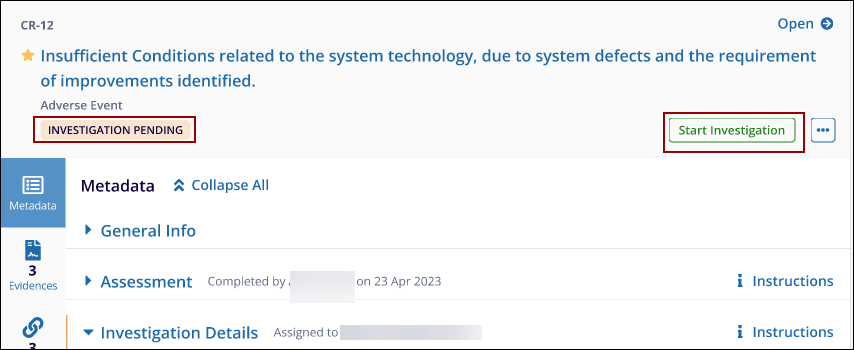
- Check that the Incident status is displayed as Investigation Pending.
- Click the Start Investigation button located at the top-right corner of the
Incident metadata panel.
- After clicking Start Investigation, the Start Investigation
pop-up window will appear.
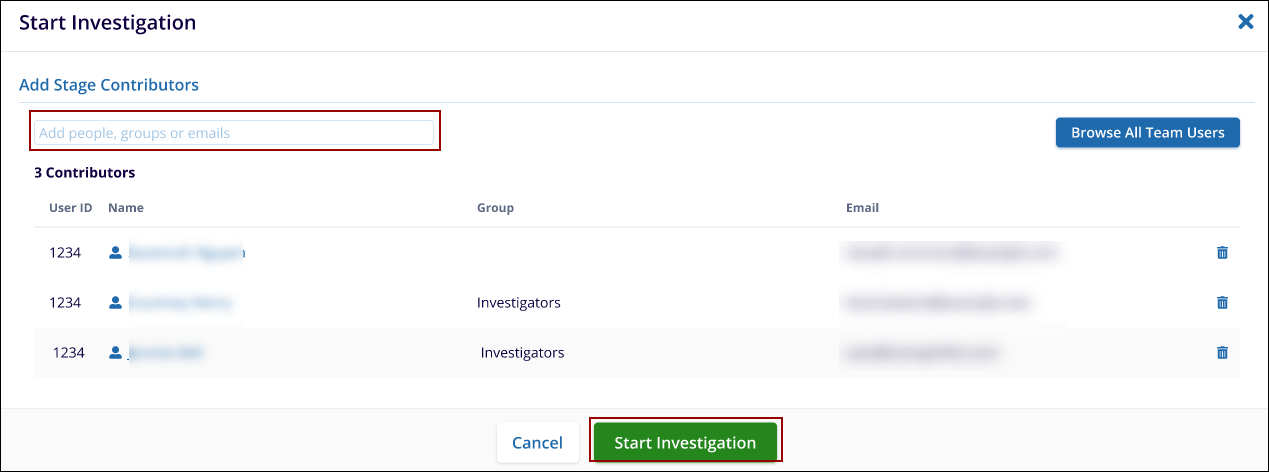
- In the Add Stage Contributors field, enter the name, group, or email address of the Sub-Investigator to add to the Investigation.
- Select the Sub-Investigator from the dropdown list.
- Click the Start Investigation button at the bottom of the pop-up window to initiate the Investigation.
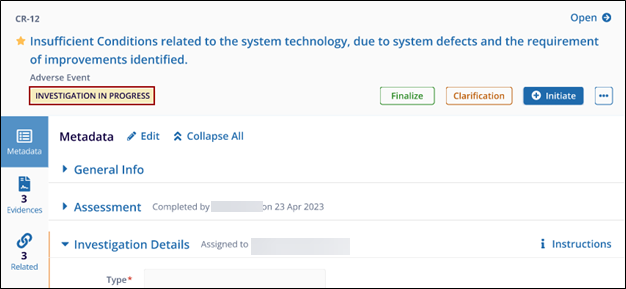
- Once the Investigation is started, the Incident status will
change to Investigation in Progress.
- After the Investigation is initiated, Sub-Investigators will receive an email
notification informing them of their assignment to the Incident and the Main Investigator
who assigned it.
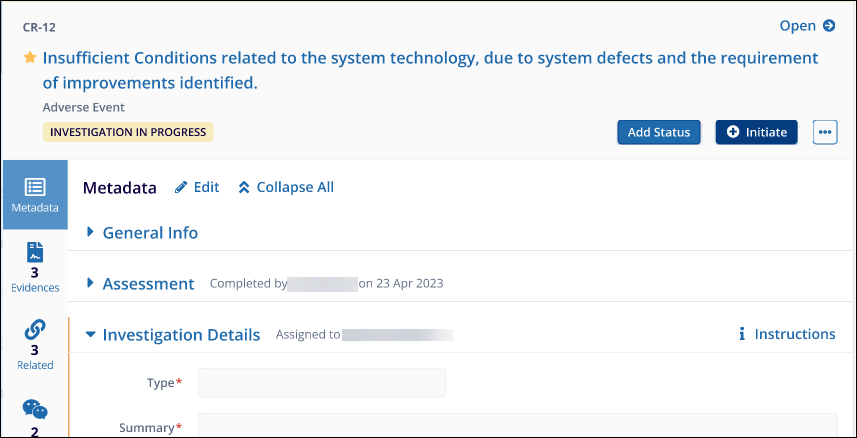
Investigation in Progress
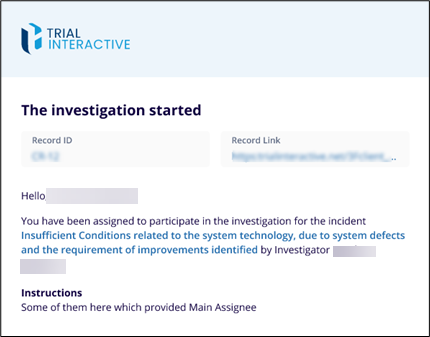
Once the email notification is received that the investigation has started with the Record ID, Record Link, Assignee Name, and the Incident Name, as shown in the screenshot below.
.png)
Follow the steps to start working on the investigation:
- In this stage, the investigation is in Progress. The sub-investigator can review and check the investigation in MY assignment.
- When an investigator investigates the incident, he will include all additional information to cover all bases.
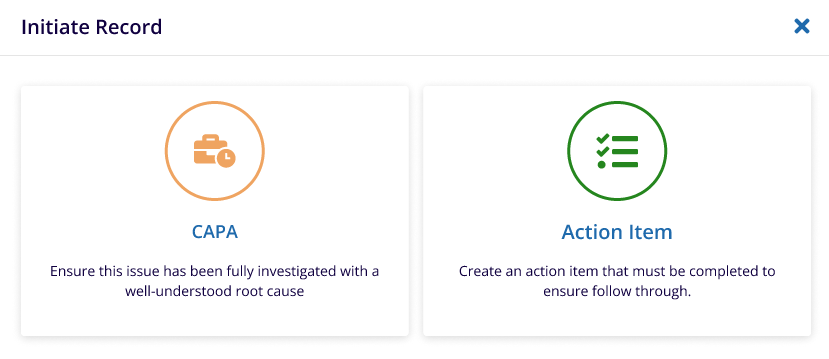
- The sub-investigator should click on the + Initiate button to create and CAPA
and an Action Item.
- After clicking on the button, it will open the window to create CAPA and Action Item.
- Please refer to the CAPA and Action Item sections to learn how
to create the CAPA and Action Item.
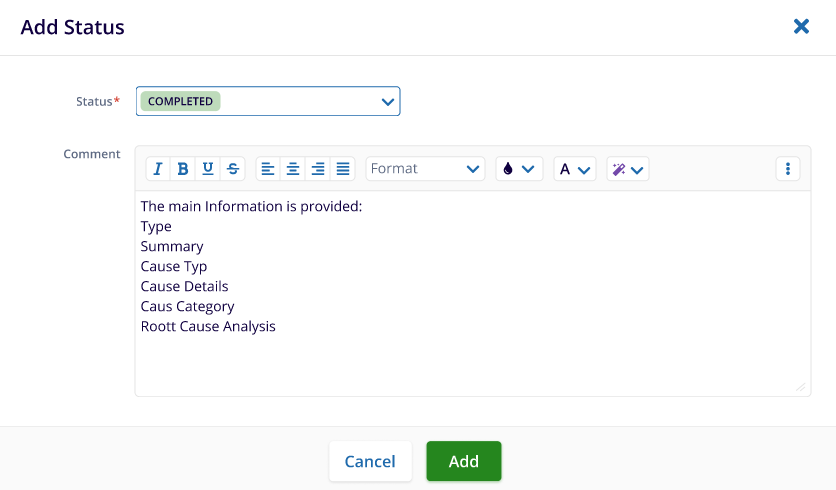
- Once the investigation is completed, the sub-investor will click on add status.
- Keep the status as completed and provide the comments.
- The Main Investigator will check the details and finalize the Incident.
Follow the steps to finalize the incident.
- Once the Incident is completed, investigate. The main investigator can finalize the incident.
- To finalize the incident, the user has to select the incident that needs to be finalized.
- Once the Incident is selected, the metadata panel will appear.
- Click on the Finalize button at the top of the metadata screen.
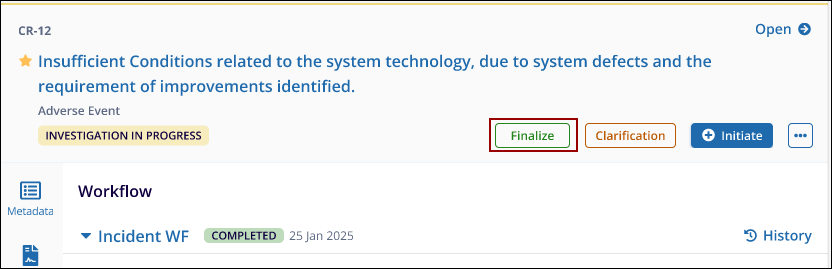
- The Finalize investigation Page will appear. Fill out the missing information and click on the finalize button.
- Once it is finalized, the stage will change to Investigation In progress – Investigation Finalized – ‘Approval Pending’.
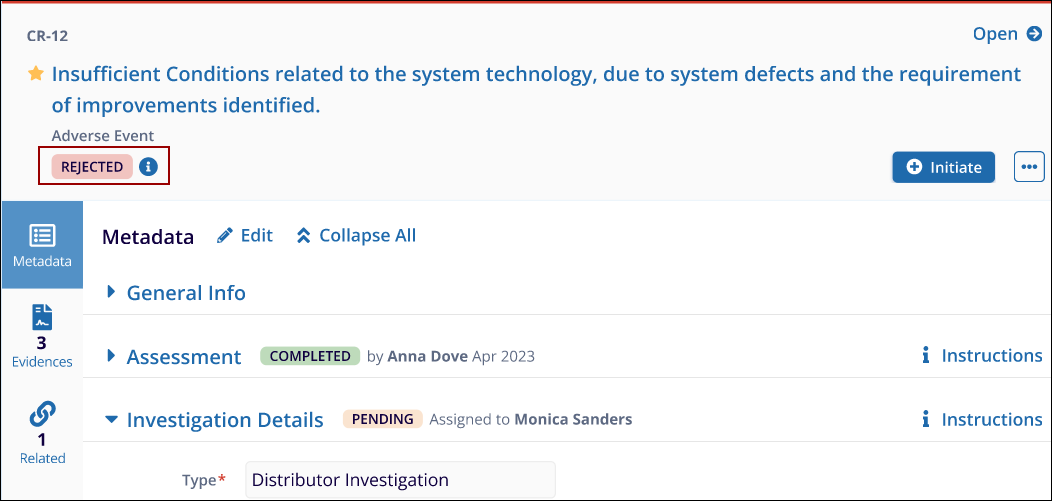
Reject Investigation
Once the incident is finalized and sent to QA for approval. The QA will receive an email notification
Follow the steps to reject the Incident:
- Select the Incident that the user wants to reject from the My Assignment grid view.
- After selecting the incident, the metadata panel will appear.
- Click on the Reject Investigation. It will display a pop-up window for rejecting the incident.
- Provide the reason for the rejection and click on the reject button to proceed further.
- The Incident status will change to Reject. Refer to the screenshot below.