
Responding to a General Query
The recipient of a query will receive an email as shown in the steps for sending a general query. If the sender was a Reader or Editor, they will not have been able to designate a specific responder. In cases like these, the members of the General Query Responders group would be able to respond to the query from within the system.
Responding to a query can happen from multiple locations in the system:
- The Documents Module
- Query by Sender view
- Query by Recipient view
- Any other view where the document can be chosen and the metadata panel can be accessed
- The Queries Module
- The My Queries Dashlet
These instructions will direct the user based on the assumption that the query is being tracked and worked from the Queries module of the study room but the steps below are appropriate to any of the areas mentioned above.
To respond to a query from inside the system:
- Navigate to the Queries Module via the Navigation Grid at the top-left corner of the
screen.
- This will open a view that defaults to ‘My Queries’ which are queries in which you are listed as either the sender or the recipient.
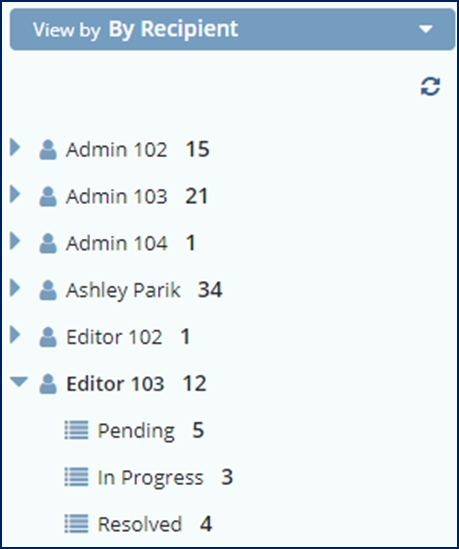
- Choose the ‘By Recipient’ view from the dropdown menu at the top-left.
- Users who have access to view queries for multiple users will need to expand
their own list by clicking on the arrow next to their username.
- Users who have access to view queries for multiple users will need to expand
their own list by clicking on the arrow next to their username.
- Select your Pending queries.
- This will cause the documents grid to populate.
- Select the document whose query you wish to review and respond to.
- The metadata panel will populate with the query information.
- For other areas of the system, choosing the document will also cause the metadata panel to load but the user may be required to select the Queries tab of the metadata panel to continue.
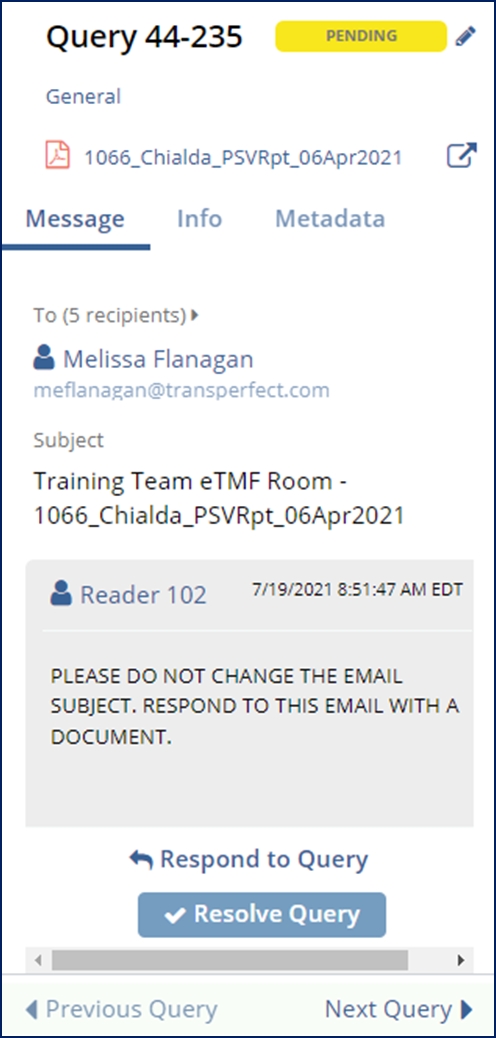
- Read the query email, review the document.
- There is a link to the document at the top of the metadata panel. See the
screenshot below.
- There is a link to the document at the top of the metadata panel. See the
screenshot below.
- When you are ready to respond to the query, press the ‘Respond to Query’ button.
- This will cause a response area to appear.
- Type in your response and, if necessary, attach any required documents.
- Press ‘Save’