
Adding a Site
- Click the Add button from the top ribbon bar. The New Investigative Site window
opens. Refer to the screenshot below:
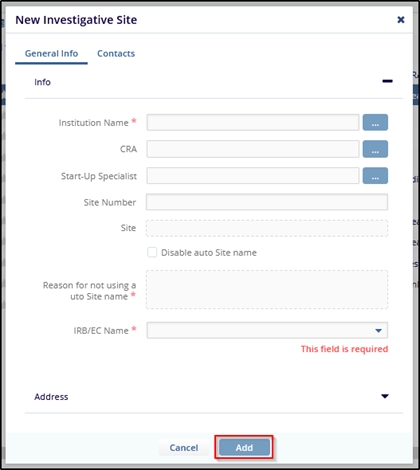
- Either type the Institution Name in the available field or click the search icon to
view the list of Available Investigative Sites. Investigative site information is
stored in Trial Interactive’s database.
- If you have used an investigative site in a previous study, the site’s information will be stored and easily accessed through this option.
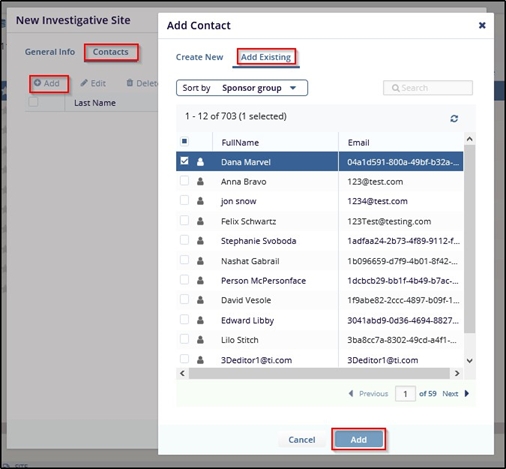
- Create or Add existing contacts from the Contacts panel in the window. This
information will be supplied by the client and can be created under Contact Types in
Investigative Site Settings.
- You can also add the Contact Type by clicking the contact type field which
will then reveal the dropdown list to select your choice. Refer to the
screenshot below:
- You can also add the Contact Type by clicking the contact type field which
will then reveal the dropdown list to select your choice. Refer to the
screenshot below:
- Select an added contact and click Edit in the Contacts panel to edit the contact information entered above or Delete to delete a contact information. You can also edit a contact by double- clicking the contact in the Contacts panel.
- Click Activate or Deactivate to activate or deactivate a contact. This will either
check or uncheck the Active Contact checkbox in the Edit contact window. Refer to
the screenshot below.
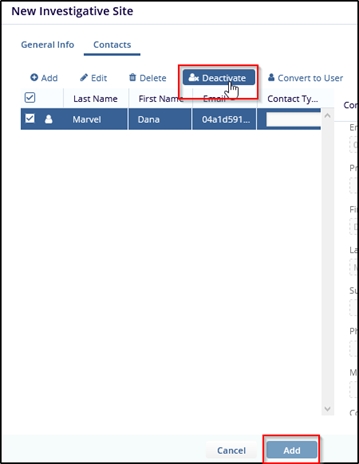
- You can assign a site contact the role of editor or reader and assign actions as appropriate from the Contacts panel.
- Click ‘Address’ to reveal the fields to enter the site location details.
- Click ‘More’ to open another array of data fields. Enter the investigative site information.
- Click ‘Create’ at the bottom of the window.